Deep linking
In this guide, we will configure our app to handle deep links on various platforms. To handle incoming links, we need to handle 2 scenarios:
- If the app wasn't previously open, we need to set the initial state based on the link
- If the app was already open, we need to update the state to reflect the incoming link
React Native provides a Linking to get notified of incoming links. React Navigation can integrate with the Linking module to automatically handle deep links. See configuring links to see more details on how to configure links in React Navigation.
Below, we'll go through required configurations for each platform so that the deep link integration works.
Set up with Expo projects
First, you will want to specify a URL scheme for your app. This corresponds to the string before :// in a URL, so if your scheme is example then a link to your app would be example://. The scheme only applies to standalone apps and you need to re-build the standalone app for the change to take effect. In the Expo client app you can deep link using exp://ADDRESS:PORT where ADDRESS is often 127.0.0.1 and PORT is often 19000 - the URL is printed when you run expo start. If you want to test with your custom scheme you will need to run expo build:ios -t simulator or expo build:android and install the resulting binaries in your emulators. You can register for a scheme in your app.json by adding a string under the scheme key:
{
  "expo": {
    "scheme": "example"
  }
}
URI Prefix
Next, let's configure our navigation container to extract the path from the app's incoming URI.
// Install this package with `npx expo install expo-linking`
import * as Linking from 'expo-linking';

// Linking.createURL is available as of [email protected] and [email protected]. If
// you are using older versions, you can upgrade or use Linking.makeUrl instead,
// but note that your deep links in standalone apps will be in the format
// scheme:/// rather than scheme:// if you use makeUrl.
const prefix = Linking.createURL('/');

function App() {
  const linking = {
    prefixes: [prefix],
  };

  return (
    <NavigationContainer linking={linking} fallback={<Text>Loading...</Text>}>
      {/* content */}
    </NavigationContainer>
  );
}
The reason that is necessary to use Linking.createURL is that the scheme will differ depending on whether you're in the client app or in a standalone app.
Universal Links
If you are using universal links, you need to add your domain to the prefixes.
function App() {
  const linking = {
    prefixes: ['https://app.example.com'],
  };

  return (
    <NavigationContainer linking={linking} fallback={<Text>Loading...</Text>}>
      {/* content */}
    </NavigationContainer>
  );
}
Note: If you are using Expo SDK version 37 or lower, you need to add your domain with both the https and exps scheme, to work around this bug in Expo.
   const linking = {
-    prefixes: ['https://app.example.com'],
+    prefixes: ['https://app.example.com', 'exps://app.example.com'],
   };
Multiple subdomains
To match all subdomains of an associated domain, you can specify a wildcard by prefixing *. before the beginning of a specific domain. Note that an entry for *.example.com does not match example.com because of the period after the asterisk. To enable matching for both *.example.com and example.com, you need to provide a separate prefix entry for each.
const linking = {
  prefixes: ['https://*.example.com', 'https://example.com'],
};
Test deep linking on iOS
To test the URI on the simulator in the Expo client app, run the following:
npx uri-scheme open [ put your uri prefix in here] --ios

# for example

npx uri-scheme open exp://127.0.0.1:19000/--/chat/jan --ios
or use xcrun directly:
xcrun simctl openurl booted [ put your URI prefix in here ]

# for example

xcrun simctl openurl booted exp://127.0.0.1:19000/--/chat/jane
Test deep linking on Android
To test the intent handling in the Expo client app on Android, run the following:
npx uri-scheme open "[ put your URI prefix in here ]" --/chat/jan --android

# for example

npx uri-scheme open exp://127.0.0.1:19000/--/chat/jan --android
or use adb directly:
adb shell am start -W -a android.intent.action.VIEW -d "[ put your URI prefix in here ]" host.exp.exponent

# for example

adb shell am start -W -a android.intent.action.VIEW -d "exp://127.0.0.1:19000/--/chat/jane" host.exp.exponent
Change host.exp.exponent to your app package name if you are testing on a standalone app.
Read the Expo linking guide for more information about how to configure linking in projects built with Expo.
Set up with bare React Native projects
iOS
Let's configure the native iOS app to open based on the example:// URI scheme.
You'll need to link RCTLinking to your project by following the steps described here. To be able to listen to incoming app links, you'll need to add the following lines to SimpleApp/ios/SimpleApp/AppDelegate.m.
If you're targeting iOS 9.x or newer:
// Add the header at the top of the file:
#import <React/RCTLinkingManager.h>

// Add this inside `@implementation AppDelegate` above `@end`:
- (BOOL)application:(UIApplication *)application
   openURL:(NSURL *)url
   options:(NSDictionary<UIApplicationOpenURLOptionsKey,id> *)options
{
  return [RCTLinkingManager application:application openURL:url options:options];
}
If you're targeting iOS 8.x or older, you can use the following code instead:
// Add the header at the top of the file:
#import <React/RCTLinkingManager.h>

// Add this inside `@implementation AppDelegate` above `@end`:
- (BOOL)application:(UIApplication *)application openURL:(NSURL *)url
  sourceApplication:(NSString *)sourceApplication annotation:(id)annotation
{
  return [RCTLinkingManager application:application openURL:url
                      sourceApplication:sourceApplication annotation:annotation];
}
If your app is using Universal Links, you'll need to add the following code as well:
// Add this inside `@implementation AppDelegate` above `@end`:
- (BOOL)application:(UIApplication *)application continueUserActivity:(nonnull NSUserActivity *)userActivity
 restorationHandler:(nonnull void (^)(NSArray<id<UIUserActivityRestoring>> * _Nullable))restorationHandler
{
 return [RCTLinkingManager application:application
                  continueUserActivity:userActivity
                    restorationHandler:restorationHandler];
}
Now you need to add the scheme to your project configuration.
The easiest way to do this is with the uri-scheme package: npx uri-scheme add example --ios.
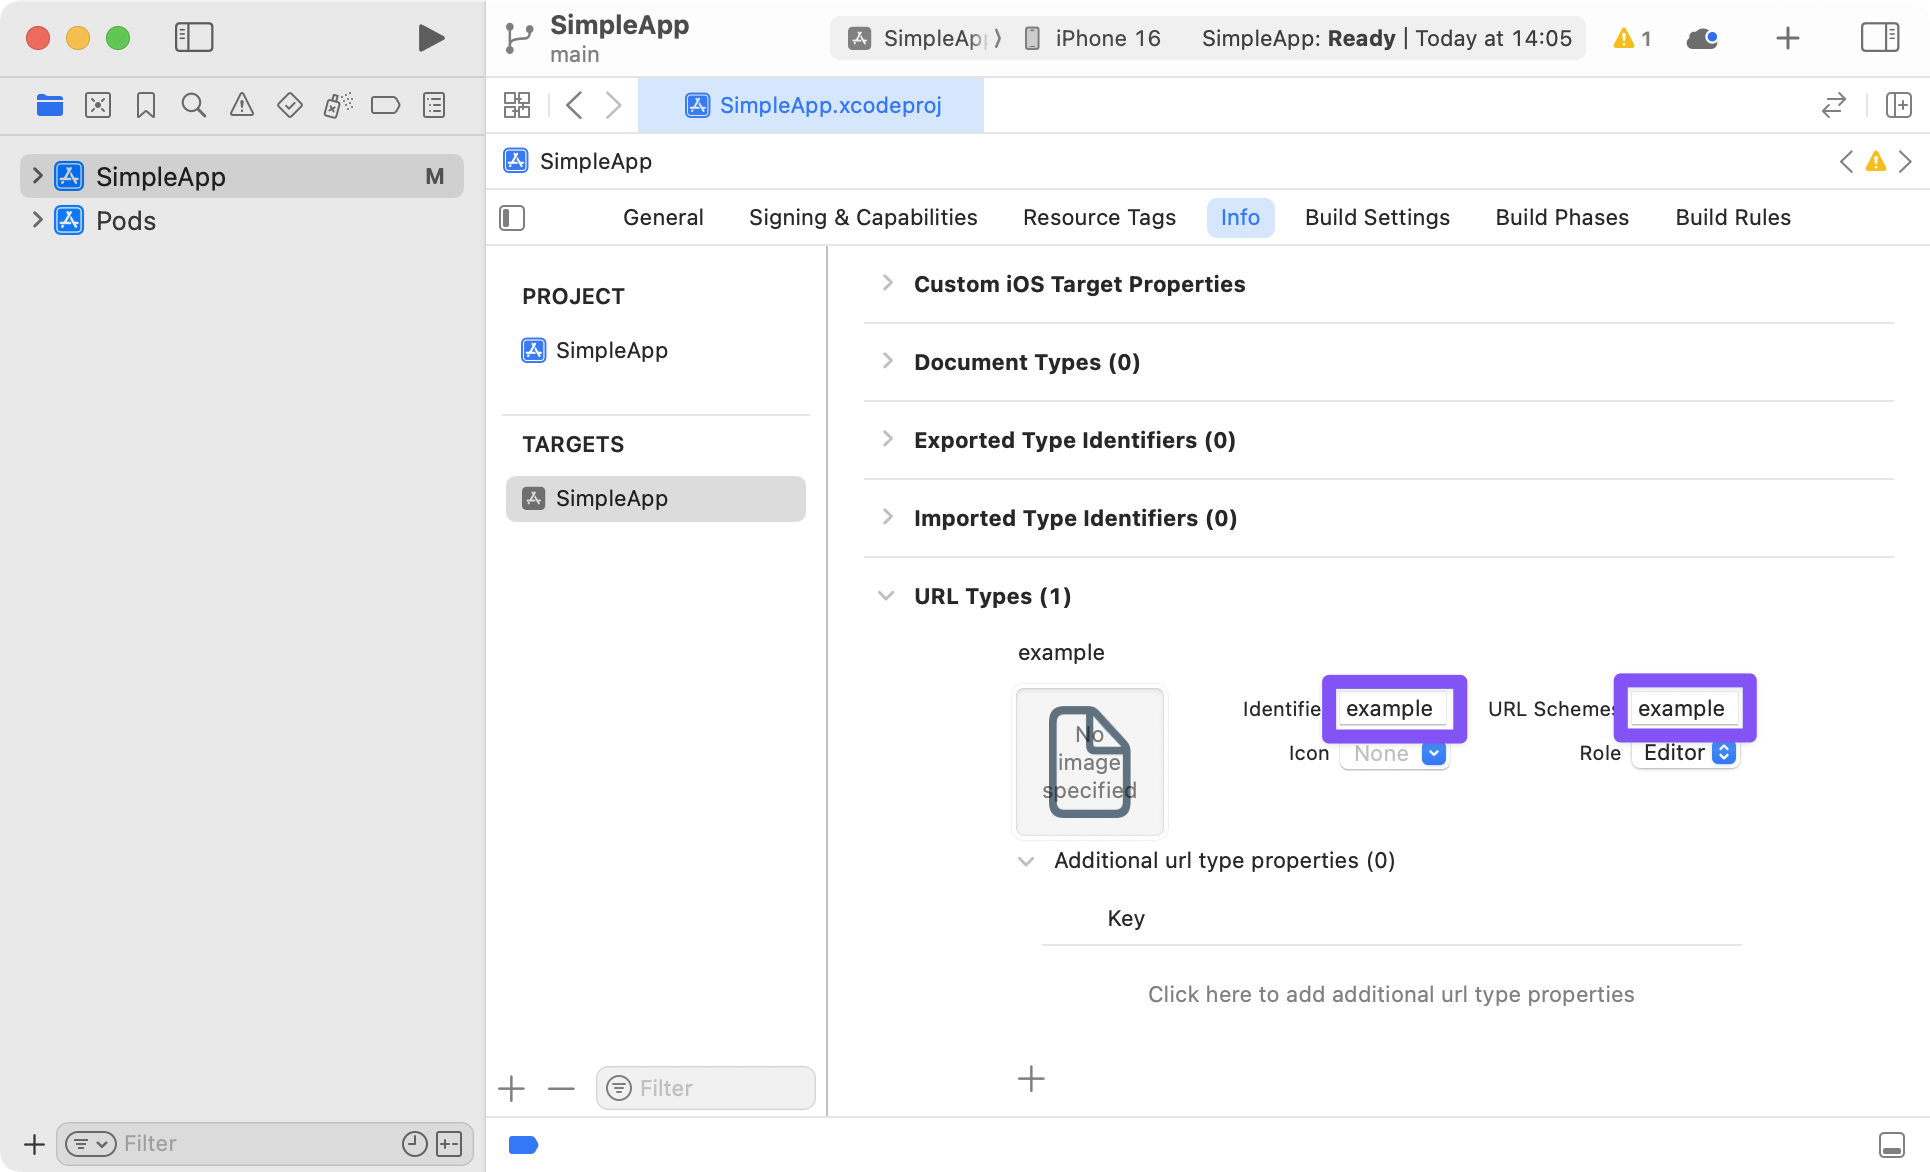
If you want to do it manually, open the project at SimpleApp/ios/SimpleApp.xcodeproj in Xcode. Select the project in sidebar and navigate to the info tab. Scroll down to "URL Types" and add one. In the new URL type, set the identifier and the URL scheme to your desired URL scheme.
Now you can press play in Xcode, or re-build on the command line:
npx react-native run-ios
To test the URI on the simulator, run the following:
npx uri-scheme open example://chat/jane --ios
or use xcrun directly:
xcrun simctl openurl booted example://chat/jane
To test the URI on a real device, open Safari and type example://chat/jane.
Android
To configure the external linking in Android, you can create a new intent in the manifest.
The easiest way to do this is with the uri-scheme package: npx uri-scheme add example --android.
If you want to add it manually, open up SimpleApp/android/app/src/main/AndroidManifest.xml, and make the following adjustments:
- Set
launchModeofMainActivitytosingleTaskin order to receive intent on existingMainActivity(this is the default on all new projects, so you may not need to actually change anything!). It is useful if you want to perform navigation using deep link you have been registered - details - Add the new
intent-filterinside theMainActivityentry with aVIEWtype action:
<activity
    android:name=".MainActivity"
    android:launchMode="singleTask">
    <intent-filter>
        <action android:name="android.intent.action.MAIN" />
        <category android:name="android.intent.category.LAUNCHER" />
    </intent-filter>
    <intent-filter>
        <action android:name="android.intent.action.VIEW" />
        <category android:name="android.intent.category.DEFAULT" />
        <category android:name="android.intent.category.BROWSABLE" />
        <data android:scheme="example" />
    </intent-filter>
</activity>
Now, re-install the app:
react-native run-android
To test the intent handling in Android, run the following:
npx uri-scheme open example://chat/jane --android
or use adb directly:
adb shell am start -W -a android.intent.action.VIEW -d "example://chat/jane" com.simpleapp
Hybrid React Native and native iOS Applications (skip for React-Native-only projects)
If you're using React Navigation within a hybrid app - an iOS app that has both Swift/ObjC and React Native parts - you may be missing the RCTLinkingIOS subspec in your Podfile, which is installed by default in new RN projects. To add this, ensure your Podfile looks like the following:
 pod 'React', :path => '../node_modules/react-native', :subspecs => [
    . . . // other subspecs
    'RCTLinkingIOS',
    . . .
  ]
Third-party integrations
React Native's Linking isn't the only way to handle deep linking. You might also want to integrate other services such as Branch which provide their own API for getting notified of incoming links, or you also might want to handle links from push notifications using Firebase etc.
To achieve this, you'd need to override how React Navigation subscribes to incoming links. To do so, you can provide your own getInitialURL and subscribe functions:
const linking = {
  prefixes: ['myapp://', 'https://myapp.com'],

  // Custom function to get the URL which was used to open the app
  async getInitialURL() {
    // First, you may want to do the default deep link handling
    // Check if app was opened from a deep link
    const url = await Linking.getInitialURL();

    if (url != null) {
      return url;
    }

    // Next, you would need to get the initial URL from your third-party integration
    // It depends on the third-party SDK you use
    // For example, to get the initial URL for branch.io:
    const params = branch.getFirstReferringParams();

    return params?.$canonical_url;
  },

  // Custom function to subscribe to incoming links
  subscribe(listener) {
    // First, you may want to do the default deep link handling
    const onReceiveURL = ({ url }: { url: string }) => listener(url);

    // Listen to incoming links from deep linking
    Linking.addEventListener('url', onReceiveURL);

    // Next, you would need to subscribe to incoming links from your third-party integration
    // For example, to get to subscribe to incoming links from branch.io:
    branch.subscribe(({ error, params, uri }) => {
      if (error) {
        console.error('Error from Branch: ' + error);
        return;
      }

      if (params['+non_branch_link']) {
        const nonBranchUrl = params['+non_branch_link'];
        // Route non-Branch URL if appropriate.
        return;
      }

      if (!params['+clicked_branch_link']) {
        // Indicates initialization success and some other conditions.
        // No link was opened.
        return;
      }

      // A Branch link was opened
      const url = params.$canonical_url;

      listener(url);
    });
    );

    return () => {
      // Clean up the event listeners
      Linking.removeEventListener('url', onReceiveURL);
      branch.unsubscribe();
    };
  },

  config: {
    // Deep link configuration
  }
};
Similar to the above example, you can integrate any API that provides a way to get the initial URL and to subscribe to new incoming URLs using the getInitialURL and subscribe options.