# React Navigation 7.x Documentation
## Getting started
Source: https://reactnavigation.org/docs/getting-started
import Tabs from '@theme/Tabs';
import TabItem from '@theme/TabItem';
The _Fundamentals_ section covers the most important aspects of React Navigation. It should be enough to build a typical mobile application and give you the background to dive deeper into the more advanced topics.
Prior knowledge
If you're already familiar with JavaScript, React and React Native, you'll be able to get moving with React Navigation quickly! If not, we recommend gaining some basic knowledge first, then coming back here when you're done.
1. [React Documentation](https://react.dev/learn)
2. [React Native Documentation](https://reactnative.dev/docs/getting-started)
Minimum requirements
- `react-native` >= 0.72.0
- `expo` >= 52 (if you use [Expo Go](https://expo.dev/go))
- `typescript` >= 5.0.0 (if you use TypeScript)
## Starter template
You can use the [React Navigation template](https://github.com/react-navigation/template) to quickly set up a new project:
```bash
npx create-expo-app@latest --template react-navigation/template
```
See the project's `README.md` for more information on how to get started.
If you created a new project using the template, you can skip the installation steps below and move on to ["Hello React Navigation"](hello-react-navigation.md?config=static).
Otherwise, you can follow the instructions below to install React Navigation into your existing project.
## Installation
The `@react-navigation/native` package contains the core functionality of React Navigation.
In your project directory, run:
```bash npm2yarn
npm install @react-navigation/native
```
### Installing dependencies
Next, install the dependencies used by most navigators: [`react-native-screens`](https://github.com/software-mansion/react-native-screens) and [`react-native-safe-area-context`](https://github.com/th3rdwave/react-native-safe-area-context).
In your project directory, run:
```bash
npx expo install react-native-screens react-native-safe-area-context
```
This will install versions of these libraries that are compatible with your Expo SDK version.
In your project directory, run:
```bash npm2yarn
npm install react-native-screens react-native-safe-area-context
```
If you're on a Mac and developing for iOS, install the pods via [Cocoapods](https://cocoapods.org/) to complete the linking:
```bash
npx pod-install ios
```
#### Configuring `react-native-screens` on Android
[`react-native-screens`](https://github.com/software-mansion/react-native-screens) requires one additional configuration to properly work on Android.
Edit `MainActivity.kt` or `MainActivity.java` under `android/app/src/main/java//` and add the highlighted code:
```kotlin
// highlight-start
import android.os.Bundle
import com.swmansion.rnscreens.fragment.restoration.RNScreensFragmentFactory
// highlight-end
// ...
class MainActivity: ReactActivity() {
// ...
// highlight-start
override fun onCreate(savedInstanceState: Bundle?) {
supportFragmentManager.fragmentFactory = RNScreensFragmentFactory()
super.onCreate(savedInstanceState)
}
// highlight-end
// ...
}
```
```java
// highlight-start
import android.os.Bundle;
import com.swmansion.rnscreens.fragment.restoration.RNScreensFragmentFactory;
// highlight-end
// ...
public class MainActivity extends ReactActivity {
// ...
// highlight-start
@Override
protected void onCreate(Bundle savedInstanceState) {
getSupportFragmentManager().setFragmentFactory(new RNScreensFragmentFactory());
super.onCreate(savedInstanceState);
}
// highlight-end
// ...
}
```
This avoids crashes related to View state not being persisted across Activity restarts.
#### Opting-out of predictive back on Android
React Navigation doesn't yet support Android's predictive back gesture, so you need to disable it for the system back gesture to work properly.
In `AndroidManifest.xml`, set `android:enableOnBackInvokedCallback` to `false` in the `` tag (or `` tag to opt-out at activity level):
```xml
```
## Setting up React Navigation
When using React Navigation, you configure [**navigators**](glossary-of-terms.md#navigator) in your app. Navigators handle transitions between screens and provide UI such as headers, tab bars, etc.
:::info
When you use a navigator (such as stack navigator), you'll need to follow that navigator's installation instructions for any additional dependencies.
:::
There are 2 ways to configure navigators:
### Static configuration
The static configuration API lets you write your navigation configuration in an object. This reduces boilerplate and simplifies TypeScript types and deep linking. Some aspects can still be changed dynamically.
This is the **recommended way** to set up your app. If you need more flexibility later, you can mix and match with the dynamic configuration.
Continue to ["Hello React Navigation"](hello-react-navigation.md?config=static) to start writing some code with the static API.
### Dynamic configuration
The dynamic configuration API lets you write your navigation configuration using React components that can change at runtime based on state or props. This offers more flexibility but requires significantly more boilerplate for TypeScript types, deep linking, etc.
Continue to ["Hello React Navigation"](hello-react-navigation.md?config=dynamic) to start writing some code with the dynamic API.
---
## Hello React Navigation
Source: https://reactnavigation.org/docs/hello-react-navigation
import Tabs from '@theme/Tabs';
import TabItem from '@theme/TabItem';
In a web browser, clicking a link pushes a page onto the browser's history stack, and pressing the back button pops the page from the stack, making the previous page active again. React Native doesn't have a built-in history like a web browser - this is where React Navigation comes in.
The native stack navigator keeps track of visited screens in a history stack. It also provides UI elements such as headers, native gestures, and animations to transition between screens etc. that you'd expect in a mobile app.
## Installing the native stack navigator library
Each navigator in React Navigation lives in its own library.
To use the native stack navigator, we need to install [`@react-navigation/native-stack`](https://github.com/react-navigation/react-navigation/tree/main/packages/native-stack):
```bash npm2yarn
npm install @react-navigation/native-stack
```
:::info
`@react-navigation/native-stack` depends on `react-native-screens` and the other libraries that we installed in [Getting started](getting-started.md). If you haven't installed those yet, head over to that page and follow the installation instructions.
:::
## Installing the elements library
The [`@react-navigation/elements`](elements.md) library provides components designed to work with React Navigation. In this guide, we'll use components like [`Button`](elements.md#button) from the elements library:
```bash npm2yarn
npm install @react-navigation/elements
```
## Creating a native stack navigator
We can create a native stack navigator by using the `createNativeStackNavigator` function:
```js name="Native Stack Example" snack
import * as React from 'react';
import { View, Text } from 'react-native';
import { createStaticNavigation } from '@react-navigation/native';
import { createNativeStackNavigator } from '@react-navigation/native-stack';
function HomeScreen() {
return (
Home Screen
);
}
const RootStack = createNativeStackNavigator({
screens: {
Home: HomeScreen,
},
});
const Navigation = createStaticNavigation(RootStack);
export default function App() {
return ;
}
```
`createNativeStackNavigator` takes a configuration object containing the screens to include, as well as various other options.
`createStaticNavigation` takes the navigator and returns a component to render in the app. It should only be called once, typically at the root of your app (e.g., in `App.tsx`):
:::warning
In a typical React Native app, the `createStaticNavigation` function should be only used once in your app at the root.
:::
```js name="Native Stack Example" snack
import * as React from 'react';
import { View, Text } from 'react-native';
import { NavigationContainer } from '@react-navigation/native';
import { createNativeStackNavigator } from '@react-navigation/native-stack';
function HomeScreen() {
return (
Home Screen
);
}
const Stack = createNativeStackNavigator();
function RootStack() {
return (
);
}
export default function App() {
return (
);
}
```
`createNativeStackNavigator` returns an object with `Screen` and `Navigator` components. The `Navigator` should render `Screen` elements as children to define routes.
`NavigationContainer` manages the navigation tree and holds the [navigation state](navigation-state.md). It must wrap all navigators and should be rendered at the root of your app (e.g., in `App.tsx`):
:::warning
In a typical React Native app, the `NavigationContainer` should be only used once in your app at the root. You shouldn't nest multiple `NavigationContainer`s unless you have a specific use case for them.
:::

If you run this code, you will see a screen with an empty navigation bar and a grey content area containing your `HomeScreen` component (shown above). These are the default styles for a stack navigator - we'll learn how to customize them later.
:::tip
The casing of the route name doesn't matter -- you can use lowercase `home` or capitalized `Home`, it's up to you. We prefer capitalizing our route names.
:::
## Configuring the navigator
We haven't passed any configuration to the navigator yet, so it just uses the default configuration.
Let's add a second screen and configure `Home` as the initial route:
```js name="Native Stack Example" snack
import * as React from 'react';
import { View, Text } from 'react-native';
import { createStaticNavigation } from '@react-navigation/native';
import { createNativeStackNavigator } from '@react-navigation/native-stack';
function HomeScreen() {
return (
Home Screen
);
}
function DetailsScreen() {
return (
Details Screen
);
}
// codeblock-focus-start
const RootStack = createNativeStackNavigator({
// highlight-next-line
initialRouteName: 'Home',
screens: {
Home: HomeScreen,
Details: DetailsScreen,
},
});
// codeblock-focus-end
const Navigation = createStaticNavigation(RootStack);
export default function App() {
return ;
}
```
Now our stack has two _routes_: `Home` and `Details`. Routes are defined under the `screens` property - the property name is the route name, and the value is the component to render.
```js name="Native Stack Example" snack
import * as React from 'react';
import { View, Text } from 'react-native';
import { NavigationContainer } from '@react-navigation/native';
import { createNativeStackNavigator } from '@react-navigation/native-stack';
function HomeScreen() {
return (
Home Screen
);
}
function DetailsScreen() {
return (
Details Screen
);
}
const Stack = createNativeStackNavigator();
// codeblock-focus-start
function RootStack() {
return (
// highlight-next-line
);
}
// codeblock-focus-end
export default function App() {
return (
);
}
```
Now our stack has two _routes_, a `Home` route and a `Details` route. A route can be specified by using the `Screen` component. The `Screen` component accepts a `name` prop which corresponds to the name of the route we will use to navigate, and a `component` prop which corresponds to the component it'll render.
:::warning
When using the dynamic API, the `component` prop accepts a component, not a render function. Don't pass an inline function (e.g. `component={() => }`), or your component will unmount and remount losing all state when the parent component re-renders. See [Passing additional props](#passing-additional-props) for alternatives.
:::
Here, the initial route is set to `Home`. Try changing `initialRouteName` to `Details` and reload the app (Fast Refresh won't pick up this change) to see the Details screen first.
## Specifying options
Each screen can specify options such as the header title.
We can specify the `options` property in the screen configuration to set screen-specific options:
To specify the options, we'll change how we have specified the screen component. Instead of specifying the screen component as the value, we can also specify an object with a `screen` property:
```js
const RootStack = createNativeStackNavigator({
initialRouteName: 'Home',
screens: {
Home: {
// highlight-next-line
screen: HomeScreen,
},
Details: DetailsScreen,
},
});
```
This will let us specify additional options for the screen.
Now, we can add an `options` property:
```js name="Options for Screen" snack
import * as React from 'react';
import { View, Text } from 'react-native';
import { createStaticNavigation } from '@react-navigation/native';
import { createNativeStackNavigator } from '@react-navigation/native-stack';
function HomeScreen() {
return (
Home Screen
);
}
function DetailsScreen() {
return (
Details Screen
);
}
// codeblock-focus-start
const RootStack = createNativeStackNavigator({
initialRouteName: 'Home',
screens: {
Home: {
screen: HomeScreen,
// highlight-start
options: {
title: 'Overview',
},
// highlight-end
},
Details: DetailsScreen,
},
});
// codeblock-focus-end
const Navigation = createStaticNavigation(RootStack);
export default function App() {
return ;
}
```
To apply the same options to all screens, we can use `screenOptions` on the navigator:
```js name="Common options for Screens" snack
import * as React from 'react';
import { View, Text } from 'react-native';
import { createStaticNavigation } from '@react-navigation/native';
import { createNativeStackNavigator } from '@react-navigation/native-stack';
function HomeScreen() {
return (
Home Screen
);
}
function DetailsScreen() {
return (
Details Screen
);
}
// codeblock-focus-start
const RootStack = createNativeStackNavigator({
initialRouteName: 'Home',
// highlight-start
screenOptions: {
headerStyle: { backgroundColor: 'tomato' },
},
// highlight-end
screens: {
Home: {
screen: HomeScreen,
options: {
title: 'Overview',
},
},
Details: DetailsScreen,
},
});
// codeblock-focus-end
const Navigation = createStaticNavigation(RootStack);
export default function App() {
return ;
}
```
Any customization options can be passed in the `options` prop for each screen component:
```js name="Options for Screen" snack
import * as React from 'react';
import { View, Text } from 'react-native';
import { NavigationContainer } from '@react-navigation/native';
import { createNativeStackNavigator } from '@react-navigation/native-stack';
function HomeScreen() {
return (
Home Screen
);
}
function DetailsScreen() {
return (
Details Screen
);
}
const Stack = createNativeStackNavigator();
function RootStack() {
return (
// codeblock-focus-start
// codeblock-focus-end
);
}
export default function App() {
return (
);
}
```
To apply the same options to all screens, we can use `screenOptions` on the navigator:
```js name="Common options for Screens" snack
import * as React from 'react';
import { View, Text } from 'react-native';
import { NavigationContainer } from '@react-navigation/native';
import { createNativeStackNavigator } from '@react-navigation/native-stack';
function HomeScreen() {
return (
Home Screen
);
}
function DetailsScreen() {
return (
Details Screen
);
}
const Stack = createNativeStackNavigator();
function RootStack() {
return (
// codeblock-focus-start
// codeblock-focus-end
);
}
export default function App() {
return (
);
}
```
## Passing additional props
Passing additional props to a screen is not supported in the static API.
We can pass additional props to a screen with 2 approaches:
1. [React context](https://react.dev/reference/react/useContext) and wrap the navigator with a context provider to pass data to the screens (recommended).
2. Render callback for the screen instead of specifying a `component` prop:
```js
// highlight-next-line
{(props) => }
```
:::warning
React Navigation applies optimizations to screen components to prevent unnecessary renders. Using a render callback removes those optimizations, so you'll need to use [`React.memo`](https://react.dev/reference/react/memo) or [`React.PureComponent`](https://react.dev/reference/react/PureComponent) for your screen components to avoid performance issues.
:::
## What's next?
Now that we have two screens, "How do we navigate from `Home` to `Details`?". That's covered in the [next section](navigating.md).
Using with TypeScript
If you are using TypeScript, you will need to specify the types accordingly. You can check [Type checking with TypeScript](typescript.md) after going through the fundamentals for more details. For now, we won't be covering TypeScript in the examples.
## Summary
- React Native doesn't have a built-in API for navigation like a web browser does. React Navigation provides this for you, along with the iOS and Android gestures and animations to transition between screens.
- [`createNativeStackNavigator`](native-stack-navigator.md) is a function that takes the screens configuration and renders our content.
- Each property under screens refers to the name of the route, and the value is the component to render for the route.
- To specify what the initial route in a stack is, provide an [`initialRouteName`](navigator.md#initial-route-name) option for the navigator.
- To specify screen-specific options, we can specify an [`options`](screen-options.md#options-prop-on-screen) property, and for common options, we can specify [`screenOptions`](screen-options.md#screenoptions-prop-on-the-navigator).
- React Native doesn't have a built-in API for navigation like a web browser does. React Navigation provides this for you, along with the iOS and Android gestures and animations to transition between screens.
- [`Stack.Navigator`](native-stack-navigator.md) is a component that takes route configuration as its children with additional props for configuration and renders our content.
- Each [`Stack.Screen`](screen.md) component takes a [`name`](screen.md#name) prop which refers to the name of the route and [`component`](screen.md#component) prop which specifies the component to render for the route. These are the 2 required props.
- To specify what the initial route in a stack is, provide an [`initialRouteName`](navigator.md#initial-route-name) as the prop for the navigator.
- To specify screen-specific options, we can pass an [`options`](screen-options.md#options-prop-on-screen) prop to `Stack.Screen`, and for common options, we can pass [`screenOptions`](screen-options.md#screenoptions-prop-on-the-navigator) to `Stack.Navigator`.
---
## Moving between screens
Source: https://reactnavigation.org/docs/navigating
import Tabs from '@theme/Tabs';
import TabItem from '@theme/TabItem';
In the previous section, we defined a stack navigator with two routes (`Home` and `Details`), but we didn't learn how to let a user navigate from `Home` to `Details`.
If this was a web browser, we'd be able to write something like this:
```js
Go to Details
```
Or programmatically in JavaScript:
```js
window.location.href = 'details.html';
```
So how do we do this in React Navigation? There are two main ways to navigate between screens in React Navigation:
## Using `Link` or `Button` components
The simplest way to navigate is using the [`Link`](link.md) component from `@react-navigation/native` or the [`Button`](elements.md#button) component from `@react-navigation/elements`:
```js name="Navigation with Link and Button" snack static2dynamic
// codeblock-focus-start
import * as React from 'react';
import { View, Text } from 'react-native';
import { createStaticNavigation } from '@react-navigation/native';
import { createNativeStackNavigator } from '@react-navigation/native-stack';
// highlight-start
import { Link } from '@react-navigation/native';
import { Button } from '@react-navigation/elements';
// highlight-end
function HomeScreen() {
return (
Home Screen
// highlight-start
Go to Details
// highlight-end
);
}
// ... other code from the previous section
// codeblock-focus-end
function DetailsScreen() {
return (
Details Screen
);
}
const RootStack = createNativeStackNavigator({
initialRouteName: 'Home',
screens: {
Home: HomeScreen,
Details: DetailsScreen,
},
});
const Navigation = createStaticNavigation(RootStack);
export default function App() {
return ;
}
```
The `Link` and `Button` components accept a `screen` prop specifying where to navigate when pressed. [On the web](web-support.md), they render as anchor tags (``) with proper `href` attributes.
:::note
The built-in `Link` and `Button` components have their own styling. To create custom link or button components matching your app's design, see the [`useLinkProps`](use-link-props.md) hook.
:::
## Using the `navigation` object
Another way to navigate is by using the `navigation` object. This method gives you more control over when and how navigation happens.
The `navigation` object is available in your screen components through the [`useNavigation`](use-navigation.md) hook:
```js name="Navigating to a new screen" snack static2dynamic
// codeblock-focus-start
import * as React from 'react';
import { View, Text } from 'react-native';
import {
createStaticNavigation,
// highlight-next-line
useNavigation,
} from '@react-navigation/native';
import { createNativeStackNavigator } from '@react-navigation/native-stack';
import { Button } from '@react-navigation/elements';
function HomeScreen() {
// highlight-next-line
const navigation = useNavigation();
return (
Home Screen
// highlight-start
// highlight-end
);
}
// ... other code from the previous section
// codeblock-focus-end
function DetailsScreen() {
return (
Details Screen
);
}
const RootStack = createNativeStackNavigator({
initialRouteName: 'Home',
screens: {
Home: HomeScreen,
Details: DetailsScreen,
},
});
const Navigation = createStaticNavigation(RootStack);
export default function App() {
return ;
}
```
The [`useNavigation`](use-navigation.md) hook returns the navigation object. We can call `navigate` with the route name we want to go to.
:::note
Calling `navigation.navigate` with an incorrect route name shows an error in development and does nothing in production.
:::
## Navigate to a screen multiple times
What happens if we navigate to `Details` again while already on the `Details` screen?
```js name="Navigate to a screen multiple times" snack static2dynamic
import * as React from 'react';
import { View, Text } from 'react-native';
import {
createStaticNavigation,
useNavigation,
} from '@react-navigation/native';
import { createNativeStackNavigator } from '@react-navigation/native-stack';
import { Button } from '@react-navigation/elements';
function HomeScreen() {
const navigation = useNavigation();
return (
Home Screen
);
}
// codeblock-focus-start
function DetailsScreen() {
const navigation = useNavigation();
return (
Details Screen
// highlight-start
// highlight-end
);
}
// codeblock-focus-end
const RootStack = createNativeStackNavigator({
initialRouteName: 'Home',
screens: {
Home: HomeScreen,
Details: DetailsScreen,
},
});
const Navigation = createStaticNavigation(RootStack);
export default function App() {
return ;
}
```
Tapping "Go to Details... again" does nothing because we're already on that route. The `navigate` function means "go to this screen" - if you're already there, it does nothing.
Let's say we actually _want_ to add another Details screen. This is common when you pass unique data to each route (more on that when we talk about `params`!). To do this, use `push` instead of `navigate`. This adds another route regardless of the existing navigation history:
```js name="Navigate to a screen multiple times" snack static2dynamic
import * as React from 'react';
import { View, Text } from 'react-native';
import {
createStaticNavigation,
useNavigation,
} from '@react-navigation/native';
import { createNativeStackNavigator } from '@react-navigation/native-stack';
import { Button } from '@react-navigation/elements';
function HomeScreen() {
const navigation = useNavigation();
return (
Home Screen
);
}
function DetailsScreen() {
const navigation = useNavigation();
return (
Details Screen
// codeblock-focus-start
// codeblock-focus-end
);
}
const RootStack = createNativeStackNavigator({
initialRouteName: 'Home',
screens: {
Home: HomeScreen,
Details: DetailsScreen,
},
});
const Navigation = createStaticNavigation(RootStack);
export default function App() {
return ;
}
```
Each `push` call adds a new route to the stack, while `navigate` only pushes if you're not already on that route.
## Going back
The native stack navigator's header automatically shows a back button when there's a screen to go back to.
You can use `navigation.goBack()` to trigger going back programmatically from your own buttons:
```js name="Going back" snack static2dynamic
import * as React from 'react';
import { View, Text } from 'react-native';
import {
createStaticNavigation,
useNavigation,
} from '@react-navigation/native';
import { createNativeStackNavigator } from '@react-navigation/native-stack';
import { Button } from '@react-navigation/elements';
function HomeScreen() {
const navigation = useNavigation();
return (
Home Screen
);
}
// codeblock-focus-start
function DetailsScreen() {
const navigation = useNavigation();
return (
Details Screen
// highlight-start
// highlight-end
);
}
// codeblock-focus-end
const RootStack = createNativeStackNavigator({
initialRouteName: 'Home',
screens: {
Home: HomeScreen,
Details: DetailsScreen,
},
});
const Navigation = createStaticNavigation(RootStack);
export default function App() {
return ;
}
```
:::note
On Android, React Navigation calls `goBack()` automatically on hardware back button press or back gesture.
:::
Sometimes you need to go back multiple screens at once. For example, if you're several screens deep in a stack and want to go back to the first screen. You have two options:
- `navigation.popTo('Home')` - Go back to a specific screen (in this case, Home)
- `navigation.popToTop()` - Go back to the first screen in the stack
```js name="Going back to specific screen" snack static2dynamic
import * as React from 'react';
import { View, Text } from 'react-native';
import {
createStaticNavigation,
useNavigation,
} from '@react-navigation/native';
import { createNativeStackNavigator } from '@react-navigation/native-stack';
import { Button } from '@react-navigation/elements';
function HomeScreen() {
const navigation = useNavigation();
return (
Home Screen
);
}
// codeblock-focus-start
function DetailsScreen() {
const navigation = useNavigation();
return (
Details Screen
// highlight-start
// highlight-end
);
}
// codeblock-focus-end
const RootStack = createNativeStackNavigator({
initialRouteName: 'Home',
screens: {
Home: HomeScreen,
Details: DetailsScreen,
},
});
const Navigation = createStaticNavigation(RootStack);
export default function App() {
return ;
}
```
## Summary
- [`Link`](link.md) and [`Button`](elements.md#button) components can be used to navigate between screens declaratively.
- We can use [`useLinkProps`](use-link-props.md) to create our own link components.
- [`navigation.navigate('RouteName')`](navigation-object.md#navigate) pushes a new route to the native stack navigator if you're not already on that route.
- We can call [`navigation.push('RouteName')`](stack-actions.md#push) as many times as we like and it will continue pushing routes.
- The header bar will automatically show a back button, but you can programmatically go back by calling [`navigation.goBack()`](navigation-object.md#goback). On Android, the hardware back button just works as expected.
- You can go back to an existing screen in the stack with [`navigation.popTo('RouteName')`](stack-actions.md#popto), and you can go back to the first screen in the stack with [`navigation.popToTop()`](stack-actions.md#poptotop).
- The [`navigation`](navigation-object.md) object is available to all screen components with the [`useNavigation`](use-navigation.md) hook.
---
## Passing parameters to routes
Source: https://reactnavigation.org/docs/params
import Tabs from '@theme/Tabs';
import TabItem from '@theme/TabItem';
Now that we know how to create a stack navigator with some routes and [navigate between those routes](navigating.md), let's look at how we can pass data to routes when we navigate to them.
There are two pieces to this:
1. Pass params as the second argument to navigation methods: `navigation.navigate('RouteName', { /* params go here */ })`
2. Read params from `route.params` inside the screen component.
:::note
We recommend that the params you pass are JSON-serializable. That way, you'll be able to use [state persistence](state-persistence.md) and your screen components will have the right contract for implementing [deep linking](deep-linking.md).
:::
```js name="Passing params" snack static2dynamic
import * as React from 'react';
import { View, Text } from 'react-native';
import {
createStaticNavigation,
useNavigation,
} from '@react-navigation/native';
import { createNativeStackNavigator } from '@react-navigation/native-stack';
import { Button } from '@react-navigation/elements';
// codeblock-focus-start
function HomeScreen() {
const navigation = useNavigation();
return (
Home Screen
);
}
function DetailsScreen({ route }) {
const navigation = useNavigation();
/* 2. Get the param */
// highlight-next-line
const { itemId, otherParam } = route.params;
return (
Details Screen
itemId: {JSON.stringify(itemId)}
otherParam: {JSON.stringify(otherParam)}
);
}
// codeblock-focus-end
const RootStack = createNativeStackNavigator({
screens: {
Home: HomeScreen,
Details: DetailsScreen,
},
});
const Navigation = createStaticNavigation(RootStack);
export default function App() {
return ;
}
```
## Initial params
Initial params can be specified in `initialParams`. These are used when navigating to the screen without params, and are shallow merged with any params that you pass:
```js
{
Details: {
screen: DetailsScreen,
// highlight-next-line
initialParams: { itemId: 42 },
},
}
```
```js
```
## Updating params
Screens can update their params using [`navigation.setParams`](navigation-object.md#setparams):
```js name="Updating params" snack static2dynamic
import * as React from 'react';
import { Text, View } from 'react-native';
import {
createStaticNavigation,
useNavigation,
} from '@react-navigation/native';
import { createNativeStackNavigator } from '@react-navigation/native-stack';
import { Button } from '@react-navigation/elements';
function HomeScreen({ route }) {
const navigation = useNavigation();
const { itemId } = route.params;
return (
Home Screen
itemId: {JSON.stringify(itemId)}
);
}
const RootStack = createNativeStackNavigator({
screens: {
Home: {
screen: HomeScreen,
initialParams: { itemId: 42 },
},
},
});
const Navigation = createStaticNavigation(RootStack);
export default function App() {
return ;
}
```
`setParams` merges new params with existing ones. To replace params entirely, use [`replaceParams`](navigation-object.md#replaceparams).
:::note
Avoid using `setParams` or `replaceParams` to update screen options like `title`. Use [`setOptions`](navigation-object.md#setoptions) instead.
:::
## Passing params to a previous screen
Params can be passed to a previous screen as well, for example, when you have a "Create post" button that opens a new screen and you want to pass the post data back.
Use `popTo` to go back to the previous screen and pass params to it:
```js name="Passing params back" snack static2dynamic
import * as React from 'react';
import { Text, View, TextInput } from 'react-native';
import {
createStaticNavigation,
useNavigation,
} from '@react-navigation/native';
import { createNativeStackNavigator } from '@react-navigation/native-stack';
import { Button } from '@react-navigation/elements';
// codeblock-focus-start
function HomeScreen({ route }) {
const navigation = useNavigation();
// Use an effect to monitor the update to params
// highlight-start
React.useEffect(() => {
if (route.params?.post) {
// Post updated, do something with `route.params.post`
// For example, send the post to the server
alert('New post: ' + route.params?.post);
}
}, [route.params?.post]);
// highlight-end
return (
Post: {route.params?.post}
);
}
function CreatePostScreen({ route }) {
const navigation = useNavigation();
const [postText, setPostText] = React.useState('');
return (
<>
);
}
// codeblock-focus-end
const RootStack = createNativeStackNavigator({
screens: {
Home: HomeScreen,
CreatePost: CreatePostScreen,
},
});
const Navigation = createStaticNavigation(RootStack);
export default function App() {
return ;
}
```
After pressing "Done", the home screen's `route.params` will be updated with the post text.
## Passing params to a nested screen
If you have nested navigators, pass params using the same pattern as [navigating to a nested screen](nesting-navigators.md#navigating-to-a-screen-in-a-nested-navigator):
```js name="Passing params to nested screen" snack static2dynamic
import * as React from 'react';
import { Text, View, TextInput } from 'react-native';
import {
createStaticNavigation,
useNavigation,
} from '@react-navigation/native';
import { createNativeStackNavigator } from '@react-navigation/native-stack';
import { createBottomTabNavigator } from '@react-navigation/bottom-tabs';
import { Button } from '@react-navigation/elements';
function SettingsScreen({ route }) {
const navigation = useNavigation();
const { userId } = route.params;
return (
Settings Screen
User ID: {JSON.stringify(userId)}
);
}
function ProfileScreen() {
return (
Profile Screen
);
}
function HomeScreen() {
const navigation = useNavigation();
return (
Home Screen
);
}
const MoreStack = createNativeStackNavigator({
screens: {
Settings: SettingsScreen,
Profile: ProfileScreen,
},
});
const RootTabs = createBottomTabNavigator({
screens: {
Home: HomeScreen,
More: MoreStack,
},
});
const Navigation = createStaticNavigation(RootTabs);
export default function App() {
return ;
}
```
See [Nesting navigators](nesting-navigators.md) for more details on nesting.
## Reserved param names
Some param names are reserved by React Navigation for nested navigator APIs:
- `screen`
- `params`
- `initial`
- `state`
Avoid using these param names in your code. Trying to read these params in parent screens is not recommended and will cause unexpected behavior.
## What should be in params
Params should contain the minimal information required to show a screen:
- Data to identify what to display (e.g. user id, item id)
- Screen-specific state (e.g. sort order, filters, page numbers)
Think of params like URL query parameters - they should contain identifiers and state, not actual data objects. The actual data should come from a global store or cache.
For example, say you have a `Profile` screen. You might be tempted to pass the user object in params:
```js
// Don't do this
navigation.navigate('Profile', {
user: {
id: 'jane',
firstName: 'Jane',
lastName: 'Done',
age: 25,
},
});
```
This is an anti-pattern because:
- Data is duplicated, leading to stale data bugs
- Each screen navigating here needs to know how to fetch the user
- URLs/deep links would contain the full object, causing issues
Instead, pass only the ID:
```js
navigation.navigate('Profile', { userId: 'jane' });
```
Then fetch the user data using the ID from a global cache or API. Libraries like [React Query](https://tanstack.com/query/) can help with fetching and caching.
Good examples of params:
- IDs: `navigation.navigate('Profile', { userId: 'jane' })`
- Sorting/filtering: `navigation.navigate('Feeds', { sortBy: 'latest' })`
- Pagination: `navigation.navigate('Chat', { beforeTime: 1603897152675 })`
- Input data: `navigation.navigate('ComposeTweet', { title: 'Hello world!' })`
## Summary
- Params can be passed to screens as the second argument to navigation methods like [`navigate`](navigation-actions.md#navigate) and [`push`](stack-actions.md#push)
- Params can be read from the `params` property of the [`route`](route-object.md) object
- Params can be updated with [`navigation.setParams`](navigation-object.md#setparams) or [`navigation.replaceParams`](navigation-object.md#replaceparams)
- Initial params can be passed via the [`initialParams`](screen.md#initial-params) prop
- Params should contain the minimal data needed to identify a screen (e.g. IDs instead of full objects)
- Some [param names are reserved](#reserved-param-names) by React Navigation
---
## Configuring the header bar
Source: https://reactnavigation.org/docs/headers
import Tabs from '@theme/Tabs';
import TabItem from '@theme/TabItem';
We've seen how to configure the header title already, but let's go over that again before moving on to some other options.
## Setting the header title
Each screen has an `options` property (an object or function returning an object) for configuring the navigator. For the header title, we can use the `title` option:
```js name="Setting header title" snack static2dynamic
import * as React from 'react';
import { Text, View } from 'react-native';
import { createStaticNavigation } from '@react-navigation/native';
import { createNativeStackNavigator } from '@react-navigation/native-stack';
function HomeScreen() {
return (
Home Screen
);
}
// codeblock-focus-start
const MyStack = createNativeStackNavigator({
screens: {
Home: {
screen: HomeScreen,
// highlight-start
options: {
title: 'My home',
},
// highlight-end
},
},
});
// codeblock-focus-end
const Navigation = createStaticNavigation(MyStack);
export default function App() {
return ;
}
```

## Using params in the title
To use params in the title, make `options` a function that returns a configuration object. React Navigation calls this function with `{ navigation, route }` - so you can use `route.params` to access the params:
```js name="Using params in the title" snack static2dynamic
import * as React from 'react';
import { Text, View } from 'react-native';
import {
createStaticNavigation,
useNavigation,
} from '@react-navigation/native';
import { createNativeStackNavigator } from '@react-navigation/native-stack';
import { Button } from '@react-navigation/elements';
function HomeScreen() {
const navigation = useNavigation();
return (
);
}
function ProfileScreen() {
return (
Profile Screen
);
}
// codeblock-focus-start
const MyStack = createNativeStackNavigator({
screens: {
Home: {
screen: HomeScreen,
options: {
title: 'My home',
},
},
Profile: {
screen: ProfileScreen,
// highlight-start
options: ({ route }) => ({
title: route.params.name,
}),
// highlight-end
},
},
});
// codeblock-focus-end
const Navigation = createStaticNavigation(MyStack);
export default function App() {
return ;
}
```
The argument that is passed in to the `options` function is an object with the following properties:
- `navigation` - The [navigation object](navigation-object.md) for the screen.
- `route` - The [route object](route-object.md) for the screen
We only needed the `route` object in the above example but you may in some cases want to use `navigation` as well.
## Updating `options` with `setOptions`
We can update the header from within a screen using `navigation.setOptions`:
```js name="Updating options" snack static2dynamic
import * as React from 'react';
import { Text, View } from 'react-native';
import {
createStaticNavigation,
useNavigation,
} from '@react-navigation/native';
import { createNativeStackNavigator } from '@react-navigation/native-stack';
import { Button } from '@react-navigation/elements';
function HomeScreen() {
const navigation = useNavigation();
return (
Home Screen
// codeblock-focus-start
// codeblock-focus-end
);
}
const MyStack = createNativeStackNavigator({
screens: {
Home: {
screen: HomeScreen,
options: {
title: 'My home',
},
},
},
});
const Navigation = createStaticNavigation(MyStack);
export default function App() {
return ;
}
```
## Adjusting header styles
There are three key properties to use when customizing the style of your header:
- `headerStyle`: A style object that will be applied to the view that wraps the header. If you set `backgroundColor` on it, that will be the color of your header.
- `headerTintColor`: The back button and title both use this property as their color. In the example below, we set the tint color to white (`#fff`) so the back button and the header title would be white.
- `headerTitleStyle`: If we want to customize the `fontFamily`, `fontWeight` and other `Text` style properties for the title, we can use this to do it.
```js name="Header styles" snack static2dynamic
import * as React from 'react';
import { Text, View } from 'react-native';
import { createStaticNavigation } from '@react-navigation/native';
import { createNativeStackNavigator } from '@react-navigation/native-stack';
function HomeScreen() {
return (
Home Screen
);
}
// codeblock-focus-start
const MyStack = createNativeStackNavigator({
screens: {
Home: {
screen: HomeScreen,
options: {
title: 'My home',
// highlight-start
headerStyle: {
backgroundColor: '#f4511e',
},
headerTintColor: '#fff',
headerTitleStyle: {
fontWeight: 'bold',
},
// highlight-end
},
},
},
});
// codeblock-focus-end
const Navigation = createStaticNavigation(MyStack);
export default function App() {
return ;
}
```

There are a couple of things to notice here:
1. On iOS, the status bar text and icons are black by default, which doesn't look great over a dark background. We won't discuss it here, but see the [status bar guide](status-bar.md) to configure it.
2. The configuration we set only applies to the home screen; when we navigate to the details screen, the default styles are back. We'll look at how to share `options` between screens next.
## Sharing common `options` across screens
Often we want to apply the same options to all screens in a navigator. Instead of repeating the same options for each screen, we can use `screenOptions` on the navigator.
```js name="Common screen options" snack static2dynamic
import * as React from 'react';
import { Text, View } from 'react-native';
import {
createStaticNavigation,
useNavigation,
} from '@react-navigation/native';
import { createNativeStackNavigator } from '@react-navigation/native-stack';
import { Button } from '@react-navigation/elements';
function HomeScreen() {
const navigation = useNavigation();
return (
Home Screen
);
}
function DetailsScreen() {
return (
Details Screen
);
}
// codeblock-focus-start
const MyStack = createNativeStackNavigator({
// highlight-start
screenOptions: {
headerStyle: {
backgroundColor: '#f4511e',
},
headerTintColor: '#fff',
headerTitleStyle: {
fontWeight: 'bold',
},
},
// highlight-end
screens: {
Home: {
screen: HomeScreen,
},
Details: {
screen: DetailsScreen,
},
},
});
// codeblock-focus-end
const Navigation = createStaticNavigation(MyStack);
export default function App() {
return ;
}
```
All screens in this navigator will now share these styles. Individual screens can still override them in their own `options`.
## Replacing the title with a custom component
Sometimes you need more control than changing the text and styles of your title -- for example, you may want to render an image in place of the title, or make the title into a button. In these cases, you can completely override the component used for the title and provide your own.
```js name="Custom title" snack static2dynamic
import * as React from 'react';
import { Text, View, Image } from 'react-native';
import { createStaticNavigation } from '@react-navigation/native';
import { createNativeStackNavigator } from '@react-navigation/native-stack';
function HomeScreen() {
return (
Home Screen
);
}
// codeblock-focus-start
function LogoTitle() {
return (
);
}
const MyStack = createNativeStackNavigator({
screens: {
Home: {
screen: HomeScreen,
options: {
// highlight-next-line
headerTitle: (props) => ,
},
},
},
});
// codeblock-focus-end
const Navigation = createStaticNavigation(MyStack);
export default function App() {
return ;
}
```

:::note
`headerTitle` is header-specific, while `title` is also used by tab bars and drawers, or as page title on web. `headerTitle` defaults to displaying the `title` in a `Text` component.
:::
## Additional configuration
See the full list of header options in the [`createNativeStackNavigator` reference](native-stack-navigator.md#options).
## Summary
- Headers can be customized via the [`options`](screen-options.md) property on screens
- The `options` property can be an object or a function that receives the [`navigation`](navigation-object.md) and [`route`](route-object.md) objects
- The [`screenOptions`](screen-options.md#screenoptions-prop-on-the-navigator) property on the navigator can be used to apply shared styles across all screens
---
## Header buttons
Source: https://reactnavigation.org/docs/header-buttons
import Tabs from '@theme/Tabs';
import TabItem from '@theme/TabItem';
Now that we know how to customize the look of our headers, let's make them interactive!
## Adding a button to the header
The most common way to interact with a header is by tapping a button to the left or right of the title. Let's add a button to the right side of the header:
```js name="Header button" snack
import * as React from 'react';
import { Text, View } from 'react-native';
import { createStaticNavigation } from '@react-navigation/native';
import { createNativeStackNavigator } from '@react-navigation/native-stack';
import { Button } from '@react-navigation/elements';
function HomeScreen() {
return (
Home Screen
);
}
// codeblock-focus-start
const MyStack = createNativeStackNavigator({
screens: {
Home: {
screen: HomeScreen,
options: {
// highlight-start
headerRight: () => (
),
// highlight-end
},
},
},
});
// codeblock-focus-end
const Navigation = createStaticNavigation(MyStack);
export default function App() {
return ;
}
```
```js name="Header button" snack
import * as React from 'react';
import { Text, View } from 'react-native';
import { NavigationContainer } from '@react-navigation/native';
import { createNativeStackNavigator } from '@react-navigation/native-stack';
import { Button } from '@react-navigation/elements';
function HomeScreen() {
return (
Home Screen
);
}
const Stack = createNativeStackNavigator();
// codeblock-focus-start
function MyStack() {
return (
(
),
// highlight-end
}}
/>
);
}
// codeblock-focus-end
export default function App() {
return (
);
}
```

When we define our button this way, you can't access or update the screen component's state in it. This is pretty important because it's common to want the buttons in your header to interact with the screen that the header belongs to. So, we will look how to do this next.
## Header interaction with its screen component
To make header buttons interact with screen state, we can use [`navigation.setOptions`](navigation-object.md#setoptions) inside the screen component:
```js name="Header button" snack
import * as React from 'react';
import { Text, View } from 'react-native';
import {
createStaticNavigation,
useNavigation,
} from '@react-navigation/native';
import { createNativeStackNavigator } from '@react-navigation/native-stack';
import { Button } from '@react-navigation/elements';
// codeblock-focus-start
function HomeScreen() {
const navigation = useNavigation();
const [count, setCount] = React.useState(0);
React.useEffect(() => {
// Use `setOptions` to update the button that we previously specified
// Now the button includes an `onPress` handler to update the count
// highlight-start
navigation.setOptions({
headerRight: () => (
),
});
// highlight-end
}, [navigation]);
return Count: {count};
}
const MyStack = createNativeStackNavigator({
screens: {
Home: {
screen: HomeScreen,
options: {
// Add a placeholder button without the `onPress` to avoid flicker
// highlight-next-line
headerRight: () => ,
},
},
},
});
// codeblock-focus-end
const Navigation = createStaticNavigation(MyStack);
export default function App() {
return ;
}
```
```js name="Header button" snack
import * as React from 'react';
import { Text, View } from 'react-native';
import { NavigationContainer, useNavigation } from '@react-navigation/native';
import { createNativeStackNavigator } from '@react-navigation/native-stack';
import { Button } from '@react-navigation/elements';
const Stack = createNativeStackNavigator();
// codeblock-focus-start
function HomeScreen() {
const navigation = useNavigation();
const [count, setCount] = React.useState(0);
React.useEffect(() => {
// Use `setOptions` to update the button that we previously specified
// Now the button includes an `onPress` handler to update the count
// highlight-start
navigation.setOptions({
headerRight: () => (
),
});
// highlight-end
}, [navigation]);
return Count: {count};
}
function MyStack() {
return (
,
}}
/>
);
}
// codeblock-focus-end
export default function App() {
return (
);
}
```
Here we update `headerRight` with a button that has `onPress` handler that can access and update the component's state, since it's defined inside the component.
## Customizing the back button
The back button is rendered automatically in a stack navigator whenever there another screen to go back to.
The native stack navigator provides platform-specific defaults for this back button. On older iOS versions, this may includes a label next to the button showing the previous screen's title when space allows.
You can customize the back button using various options such as:
- `headerBackTitle`: Change the back button label (iOS)
- `headerBackTitleStyle`: Style the back button label
- `headerBackIcon`: Custom back button icon
```js static2dynamic
const MyStack = createNativeStackNavigator({
screens: {
Home: {
screen: HomeScreen,
options: {
headerBackTitle: 'Custom Back',
headerBackTitleStyle: { fontSize: 30 },
},
},
},
});
```

If you want to customize it beyond what the above options allow, you can use `headerLeft` to render your own component instead. The `headerLeft` option accepts a React Component, which you can use to override the onPress behavior or replace the button entirely. See the [API reference](native-stack-navigator.md#headerleft) for details.
## Summary
- Buttons can be added to the header using [`headerLeft`](elements.md#headerleft) and [`headerRight`](elements.md#headerright) in [`options`](screen-options.md)
- The back button can be customized with [`headerBackTitle`](native-stack-navigator.md#headerbacktitle), [`headerBackTitleStyle`](native-stack-navigator.md#headerbacktitlestyle), [`headerBackIcon`](native-stack-navigator.md#headerbackicon), or replaced entirely with `headerLeft`
- To make header buttons interact with screen state, use [`navigation.setOptions`](navigation-object.md#setoptions) inside the screen component
---
## Nesting navigators
Source: https://reactnavigation.org/docs/nesting-navigators
import Tabs from '@theme/Tabs';
import TabItem from '@theme/TabItem';
Nesting navigators means rendering a navigator inside a screen of another navigator, for example:
```js name="Nested navigators" snack
import * as React from 'react';
import { Text, View } from 'react-native';
import {
createStaticNavigation,
useNavigation,
} from '@react-navigation/native';
import { createNativeStackNavigator } from '@react-navigation/native-stack';
import { createBottomTabNavigator } from '@react-navigation/bottom-tabs';
import { Button } from '@react-navigation/elements';
function ProfileScreen() {
return (
Profile Screen
);
}
function FeedScreen() {
const navigation = useNavigation();
return (
Feed Screen
);
}
function MessagesScreen() {
return (
Messages Screen
);
}
// codeblock-focus-start
const HomeTabs = createBottomTabNavigator({
screens: {
Feed: FeedScreen,
Messages: MessagesScreen,
},
});
const RootStack = createNativeStackNavigator({
screens: {
Home: {
// highlight-next-line
screen: HomeTabs,
options: {
headerShown: false,
},
},
Profile: ProfileScreen,
},
});
// codeblock-focus-end
const Navigation = createStaticNavigation(RootStack);
export default function App() {
return ;
}
```
```js name="Nested navigators" snack
import * as React from 'react';
import { Text, View } from 'react-native';
import { NavigationContainer, useNavigation } from '@react-navigation/native';
import { createNativeStackNavigator } from '@react-navigation/native-stack';
import { createBottomTabNavigator } from '@react-navigation/bottom-tabs';
import { Button } from '@react-navigation/elements';
function ProfileScreen() {
return (
Profile Screen
);
}
function FeedScreen() {
const navigation = useNavigation();
return (
Feed Screen
);
}
function MessagesScreen() {
return (
Messages Screen
);
}
const Tab = createBottomTabNavigator();
const Stack = createNativeStackNavigator();
// codeblock-focus-start
function HomeTabs() {
return (
);
}
function RootStack() {
return (
);
}
// codeblock-focus-end
export default function App() {
return (
);
}
```
In this example, a tab navigator (`HomeTabs`) is nested inside a stack navigator (`RootStack`) under the `Home` screen. The structure looks like this:
- `RootStack` (Stack navigator)
- `HomeTabs` (Tab navigator)
- `Feed` (screen)
- `Messages` (screen)
- `Profile` (screen)
Nesting navigators work like nesting regular components. To achieve the behavior you want, it's often necessary to nest multiple navigators.
## How nesting navigators affects the behaviour
When nesting navigators, there are some things to keep in mind:
### Each navigator keeps its own navigation history
For example, when you press the back button in a screen inside a stack navigator nested within another navigator, it will go to the previous screen of the closest ancestor navigator of the screen. If it's the first screen in the nested stack, pressing back goes to the previous screen in the parent navigator.
### Each navigator has its own options
For example, specifying a `title` option in a screen nested in a child navigator won't affect the title shown in a parent navigator.
If you want to set parent navigator options based on the active screen in a child navigator, see [screen options with nested navigators](screen-options-resolution.md#setting-parent-screen-options-based-on-child-navigators-state).
### Each screen in a navigator has its own params
Any `params` passed to a screen in a nested navigator are in the `route` object of that screen and aren't accessible from a screen in a parent or child navigator.
If you need to access params of the parent screen from a child screen, you can use [React Context](https://react.dev/reference/react/useContext) to expose params to children.
### Navigation actions are handled by current navigator and bubble up if couldn't be handled
Navigation actions first go to the current navigator. If it can't handle them, they bubble up to the parent. For example, calling `goBack()` in a nested screen goes back in the nested navigator first, then the parent if already on the first screen.
### Navigator specific methods are available in the navigators nested inside
If you have a stack inside a drawer navigator, the drawer's `openDrawer`, `closeDrawer`, `toggleDrawer` methods etc. are available on the `navigation` object in the screens inside the stack navigator. Similarly, if you have a tab navigator inside stack navigator, the screens in the tab navigator will get the `push` and `replace` methods for stack in their `navigation` object.
If you need to dispatch actions to the nested child navigators from a parent, you can use [`navigation.dispatch`](navigation-object.md#dispatch):
```js
navigation.dispatch(DrawerActions.toggleDrawer());
```
### Nested navigators don't receive parent's events
Screens in a nested navigator don't receive events from the parent navigator (like `tabPress`). To listen to parent's events, use [`navigation.getParent`](navigation-object.md#getparent):
```js name="Events from parent" snack
import * as React from 'react';
import { Text, View } from 'react-native';
import {
createStaticNavigation,
useNavigation,
} from '@react-navigation/native';
import { createNativeStackNavigator } from '@react-navigation/native-stack';
import { createBottomTabNavigator } from '@react-navigation/bottom-tabs';
import { Button } from '@react-navigation/elements';
function ProfileScreen() {
return (
Profile Screen
);
}
function FeedScreen() {
const navigation = useNavigation();
return (
Feed Screen
);
}
function MessagesScreen() {
const navigation = useNavigation();
React.useEffect(() => {
// codeblock-focus-start
const unsubscribe = navigation
.getParent('MyTabs')
.addListener('tabPress', (e) => {
// Do something
alert('Tab pressed!');
});
// codeblock-focus-end
return unsubscribe;
}, [navigation]);
return (
Messages Screen
);
}
const HomeStack = createNativeStackNavigator({
screens: {
Feed: FeedScreen,
Messages: MessagesScreen,
},
});
const RootTabs = createBottomTabNavigator({
id: 'MyTabs',
screens: {
Home: {
screen: HomeStack,
options: {
headerShown: false,
},
},
Profile: ProfileScreen,
},
});
const Navigation = createStaticNavigation(RootTabs);
export default function App() {
return ;
}
```
```js name="Events from parent" snack
import * as React from 'react';
import { Text, View } from 'react-native';
import { NavigationContainer, useNavigation } from '@react-navigation/native';
import { createNativeStackNavigator } from '@react-navigation/native-stack';
import { createBottomTabNavigator } from '@react-navigation/bottom-tabs';
import { Button } from '@react-navigation/elements';
function ProfileScreen() {
return (
Profile Screen
);
}
function FeedScreen() {
const navigation = useNavigation();
return (
Feed Screen
);
}
function MessagesScreen() {
const navigation = useNavigation();
React.useEffect(() => {
// codeblock-focus-start
const unsubscribe = navigation
.getParent('MyTabs')
.addListener('tabPress', (e) => {
// Do something
alert('Tab pressed!');
});
// codeblock-focus-end
return unsubscribe;
}, [navigation]);
return (
Messages Screen
);
}
const Tab = createBottomTabNavigator();
const Stack = createNativeStackNavigator();
function HomeStack() {
return (
);
}
function RootTabs() {
return (
);
}
export default function App() {
return (
);
}
```
Here `'MyTabs'` is the `id` of the parent navigator whose events you want to listen to.
### Parent navigator's UI is rendered on top of child navigator
The parent navigator's UI renders on top of the child. For example, a drawer nested inside a stack appears below the stack's header, while a stack nested inside a drawer appears below the drawer.
Common patterns:
- Tab navigator nested inside the initial screen of stack navigator - New screens cover the tab bar when you push them.
- Drawer navigator nested inside the initial screen of stack navigator with the initial screen's stack header hidden - The drawer can only be opened from the first screen of the stack.
- Stack navigators nested inside each screen of drawer navigator - The drawer appears over the header from the stack.
- Stack navigators nested inside each screen of tab navigator - The tab bar is always visible. Usually pressing the tab again also pops the stack to top.
## Navigating to a screen in a nested navigator
Consider the following example:
```js name="Navigating to nested screen" snack
import * as React from 'react';
import { Text, View } from 'react-native';
import {
createStaticNavigation,
useNavigation,
} from '@react-navigation/native';
import { createNativeStackNavigator } from '@react-navigation/native-stack';
import { createBottomTabNavigator } from '@react-navigation/bottom-tabs';
import { Button } from '@react-navigation/elements';
function HomeScreen() {
const navigation = useNavigation();
return (
Home Screen
);
}
function FeedScreen() {
const navigation = useNavigation();
return (
Feed Screen
);
}
function MessagesScreen() {
const navigation = useNavigation();
return (
Messages Screen
);
}
// codeblock-focus-start
const MoreTabs = createBottomTabNavigator({
screens: {
Feed: FeedScreen,
Messages: MessagesScreen,
},
});
const RootStack = createNativeStackNavigator({
screens: {
Home: HomeScreen,
More: {
screen: MoreTabs,
options: {
headerShown: false,
},
},
},
});
// codeblock-focus-end
const Navigation = createStaticNavigation(RootStack);
export default function App() {
return ;
}
```
```js name="Navigating to nested screen" snack
import * as React from 'react';
import { Text, View } from 'react-native';
import { NavigationContainer, useNavigation } from '@react-navigation/native';
import { createNativeStackNavigator } from '@react-navigation/native-stack';
import { createBottomTabNavigator } from '@react-navigation/bottom-tabs';
import { Button } from '@react-navigation/elements';
function HomeScreen() {
const navigation = useNavigation();
return (
Home Screen
);
}
function FeedScreen() {
const navigation = useNavigation();
return (
Feed Screen
);
}
function MessagesScreen() {
const navigation = useNavigation();
return (
Messages Screen
);
}
const Tab = createBottomTabNavigator();
const Stack = createNativeStackNavigator();
// codeblock-focus-start
function MoreTabs() {
return (
);
}
function RootStack() {
return (
);
}
// codeblock-focus-end
export default function App() {
return (
);
}
```
To navigate to the `More` screen (which contains `MoreTabs`) from your `HomeScreen`:
```js
navigation.navigate('More');
```
This shows the initial screen inside `MoreTabs` (in this case, `Feed`). To navigate to a specific screen inside the nested navigator, pass the screen name in params:
```js
navigation.navigate('More', { screen: 'Messages' });
```
Now `Messages` will be shown instead of `Feed`.
### Passing params to a screen in a nested navigator
You can also pass params by specifying a `params` key:
```js name="Navigating to nested screen" snack
import * as React from 'react';
import { Text, View } from 'react-native';
import {
createStaticNavigation,
useNavigation,
} from '@react-navigation/native';
import { createNativeStackNavigator } from '@react-navigation/native-stack';
import { createBottomTabNavigator } from '@react-navigation/bottom-tabs';
import { Button } from '@react-navigation/elements';
function HomeScreen() {
const navigation = useNavigation();
return (
Home Screen
);
}
function FeedScreen() {
const navigation = useNavigation();
return (
Feed Screen
);
}
function MessagesScreen({ route }) {
const navigation = useNavigation();
return (
Messages Screen
User: {route.params.user}
);
}
const MoreTabs = createBottomTabNavigator({
screens: {
Feed: FeedScreen,
Messages: MessagesScreen,
},
});
const RootStack = createNativeStackNavigator({
screens: {
Home: HomeScreen,
More: {
screen: MoreTabs,
options: {
headerShown: false,
},
},
},
});
const Navigation = createStaticNavigation(RootStack);
export default function App() {
return ;
}
```
```js name="Navigating to nested screen" snack
import * as React from 'react';
import { Text, View } from 'react-native';
import { NavigationContainer, useNavigation } from '@react-navigation/native';
import { createNativeStackNavigator } from '@react-navigation/native-stack';
import { createBottomTabNavigator } from '@react-navigation/bottom-tabs';
import { Button } from '@react-navigation/elements';
function HomeScreen() {
const navigation = useNavigation();
return (
Home Screen
);
}
function FeedScreen() {
const navigation = useNavigation();
return (
Feed Screen
);
}
function MessagesScreen({ route }) {
const navigation = useNavigation();
return (
Messages Screen
User: {route.params.user}
);
}
const Tab = createBottomTabNavigator();
const Stack = createNativeStackNavigator();
function MoreTabs() {
return (
);
}
function RootStack() {
return (
);
}
export default function App() {
return (
);
}
```
If the navigator was already rendered, navigating to another screen will push a new screen in case of stack navigator.
You can follow a similar approach for deeply nested screens. Note that the second argument to `navigate` here is just `params`, so you can do something like:
```js
navigation.navigate('Home', {
screen: 'Settings',
params: {
screen: 'Sound',
params: {
screen: 'Media',
},
},
});
```
In the above case, you're navigating to the `Media` screen, which is in a navigator nested inside the `Sound` screen, which is in a navigator nested inside the `Settings` screen.
:::warning
The `screen` and related params are reserved for internal use and are managed by React Navigation. While you can access `route.params.screen` etc. in the parent screens, relying on them may lead to unexpected behavior.
:::
### Rendering initial route defined in the navigator
By default, when you navigate a screen in the nested navigator, the specified screen is used as the initial screen and the `initialRouteName` prop on the navigator is ignored.
If you need to render the initial route specified in the navigator, you can disable the behaviour of using the specified screen as the initial screen by setting `initial: false`:
```js
navigation.navigate('Root', {
screen: 'Settings',
initial: false,
});
```
This affects what happens when pressing the back button. When there's an initial screen, the back button will take the user there.
## Avoiding multiple headers when nesting
When nesting navigators, you may see headers from both parent and child. To show only the child navigator's header, set `headerShown: false` on the parent screen:
```js name="Nested navigators" snack
import * as React from 'react';
import { Text, View } from 'react-native';
import {
createStaticNavigation,
useNavigation,
} from '@react-navigation/native';
import { createNativeStackNavigator } from '@react-navigation/native-stack';
import { createBottomTabNavigator } from '@react-navigation/bottom-tabs';
import { Button } from '@react-navigation/elements';
function ProfileScreen() {
return (
Profile Screen
);
}
function FeedScreen() {
const navigation = useNavigation();
return (
Feed Screen
);
}
function MessagesScreen() {
return (
Messages Screen
);
}
// codeblock-focus-start
const HomeTabs = createBottomTabNavigator({
screens: {
Feed: FeedScreen,
Messages: MessagesScreen,
},
});
const RootStack = createNativeStackNavigator({
screens: {
Home: {
screen: HomeTabs,
options: {
// highlight-next-line
headerShown: false,
},
},
Profile: ProfileScreen,
},
});
// codeblock-focus-end
const Navigation = createStaticNavigation(RootStack);
export default function App() {
return ;
}
```
```js name="Nested navigators" snack
import * as React from 'react';
import { Text, View } from 'react-native';
import { NavigationContainer, useNavigation } from '@react-navigation/native';
import { createNativeStackNavigator } from '@react-navigation/native-stack';
import { createBottomTabNavigator } from '@react-navigation/bottom-tabs';
import { Button } from '@react-navigation/elements';
function ProfileScreen() {
return (
Profile Screen
);
}
function FeedScreen() {
const navigation = useNavigation();
return (
Feed Screen
);
}
function MessagesScreen() {
return (
Messages Screen
);
}
const Tab = createBottomTabNavigator();
const Stack = createNativeStackNavigator();
// codeblock-focus-start
function HomeTabs() {
return (
);
}
function RootStack() {
return (
);
}
// codeblock-focus-end
export default function App() {
return (
);
}
```
This applies regardless of the nesting structure. If you don't want headers in any of the navigators, specify `headerShown: false` in all of them:
```js
const HomeTabs = createBottomTabNavigator({
// highlight-start
screenOptions: {
headerShown: false,
},
// highlight-end
screens: {
Feed: FeedScreen,
Messages: MessagesScreen,
},
});
const RootStack = createStackNavigator({
// highlight-start
screenOptions: {
headerShown: false,
},
// highlight-end
screens: {
Home: HomeTabs,
Profile: ProfileScreen,
},
});
```
```js
function HomeTabs() {
return (
);
}
function RootStack() {
return (
);
}
```
## Best practices when nesting
Minimize nesting as much as possible. Nesting has many downsides:
- Deeply nested view hierarchy can cause memory and performance issues on lower end devices
- Nesting the same type of navigator (e.g. tabs inside tabs, drawer inside drawer etc.) leads to a confusing UX
- With excessive nesting, code becomes difficult to follow when navigating to nested screens, configuring deep links etc.
Think of nesting as a way to achieve the UI you want, not a way to organize your code. To group screens for organization, use the [`Group`](group.md) component for dynamic configuration or [`groups` property](static-configuration.md#groups) for static configuration.
```js
const MyStack = createStackNavigator({
screens: {
// Common screens
},
groups: {
// Common modal screens
Modal: {
screenOptions: {
presentation: 'modal',
},
screens: {
Help,
Invite,
},
},
// Screens for logged in users
User: {
if: useIsLoggedIn,
screens: {
Home,
Profile,
},
},
// Auth screens
Guest: {
if: useIsGuest,
screens: {
SignIn,
SignUp,
},
},
},
});
```
```js
{isLoggedIn ? (
// Screens for logged in users
) : (
// Auth screens
)}
{/* Common modal screens */}
```
---
## Navigation lifecycle
Source: https://reactnavigation.org/docs/navigation-lifecycle
import Tabs from '@theme/Tabs';
import TabItem from '@theme/TabItem';
If you're coming from a web background, you might expect that when navigating from route A to route B, A unmounts and remounts when you return. React Navigation works differently - this is driven by the more complex needs of mobile navigation.
Unlike web browsers, React Navigation doesn't unmount screens when navigating away. When you navigate from `Home` to `Profile`:
- `Profile` mounts
- `Home` stays mounted
When going back from `Profile` to `Home`:
- `Profile` unmounts
- `Home` is not remounted, existing instance is shown
Similar behavior can be observed (in combination) with other navigators as well. Consider a tab navigator with two tabs, where each tab is a stack navigator:
```js name="Navigation lifecycle" snack
import * as React from 'react';
import { Text, View } from 'react-native';
import {
createStaticNavigation,
useNavigation,
} from '@react-navigation/native';
import { createNativeStackNavigator } from '@react-navigation/native-stack';
import { createBottomTabNavigator } from '@react-navigation/bottom-tabs';
import { Button } from '@react-navigation/elements';
function SettingsScreen() {
const navigation = useNavigation();
React.useEffect(() => {
console.log('SettingsScreen mounted');
return () => console.log('SettingsScreen unmounted');
}, []);
return (
Settings Screen
);
}
function ProfileScreen() {
const navigation = useNavigation();
React.useEffect(() => {
console.log('ProfileScreen mounted');
return () => console.log('ProfileScreen unmounted');
}, []);
return (
Profile Screen
);
}
function HomeScreen() {
const navigation = useNavigation();
React.useEffect(() => {
console.log('HomeScreen mounted');
return () => console.log('HomeScreen unmounted');
}, []);
return (
Home Screen
);
}
function DetailsScreen() {
const navigation = useNavigation();
React.useEffect(() => {
console.log('DetailsScreen mounted');
return () => console.log('DetailsScreen unmounted');
}, []);
return (
Details Screen
);
}
// codeblock-focus-start
const SettingsStack = createNativeStackNavigator({
screens: {
Settings: SettingsScreen,
Profile: ProfileScreen,
},
});
const HomeStack = createNativeStackNavigator({
screens: {
Home: HomeScreen,
Details: DetailsScreen,
},
});
const MyTabs = createBottomTabNavigator({
screenOptions: {
headerShown: false,
},
screens: {
First: SettingsStack,
Second: HomeStack,
},
});
// codeblock-focus-end
const Navigation = createStaticNavigation(MyTabs);
export default function App() {
return ;
}
```
```js name="Navigation lifecycle" snack
import * as React from 'react';
import { Text, View } from 'react-native';
import { NavigationContainer, useNavigation } from '@react-navigation/native';
import { createNativeStackNavigator } from '@react-navigation/native-stack';
import { createBottomTabNavigator } from '@react-navigation/bottom-tabs';
import { Button } from '@react-navigation/elements';
function SettingsScreen() {
const navigation = useNavigation();
React.useEffect(() => {
console.log('SettingsScreen mounted');
return () => console.log('SettingsScreen unmounted');
}, []);
return (
Settings Screen
);
}
function ProfileScreen() {
const navigation = useNavigation();
React.useEffect(() => {
console.log('ProfileScreen mounted');
return () => console.log('ProfileScreen unmounted');
}, []);
return (
Profile Screen
);
}
function HomeScreen() {
const navigation = useNavigation();
React.useEffect(() => {
console.log('HomeScreen mounted');
return () => console.log('HomeScreen unmounted');
}, []);
return (
Home Screen
);
}
function DetailsScreen() {
const navigation = useNavigation();
React.useEffect(() => {
console.log('DetailsScreen mounted');
return () => console.log('DetailsScreen unmounted');
}, []);
return (
Details Screen
);
}
const SettingsStack = createNativeStackNavigator();
const HomeStack = createNativeStackNavigator();
const MyTabs = createBottomTabNavigator();
// codeblock-focus-start
function FirstScreen() {
return (
);
}
function SecondScreen() {
return (
);
}
function Root() {
return (
);
}
// codeblock-focus-end
export default function App() {
return (
);
}
```
We start on the `HomeScreen` and navigate to `DetailsScreen`. Then we use the tab bar to switch to the `SettingsScreen` and navigate to `ProfileScreen`. After this sequence of operations is done, all 4 of the screens are mounted! If you use the tab bar to switch back to the `HomeStack`, you'll notice you'll be presented with the `DetailsScreen` - the navigation state of the `HomeStack` has been preserved!
## React Navigation lifecycle events
Now that we understand how React lifecycle methods work in React Navigation, let's answer an important question: "How do we find out that a user is leaving (blur) it or coming back to it (focus)?"
To detect when a screen gains or loses focus, we can listen to `focus` and `blur` events:
```js name="Focus and blur" snack
import * as React from 'react';
import { Text, View } from 'react-native';
import {
createStaticNavigation,
useNavigation,
} from '@react-navigation/native';
import { createNativeStackNavigator } from '@react-navigation/native-stack';
import { Button } from '@react-navigation/elements';
// codeblock-focus-start
function ProfileScreen() {
const navigation = useNavigation();
React.useEffect(() => {
// highlight-start
const unsubscribe = navigation.addListener('focus', () => {
console.log('ProfileScreen focused');
});
// highlight-end
return unsubscribe;
}, [navigation]);
React.useEffect(() => {
// highlight-start
const unsubscribe = navigation.addListener('blur', () => {
console.log('ProfileScreen blurred');
});
// highlight-end
return unsubscribe;
}, [navigation]);
return (
Profile Screen
);
}
// codeblock-focus-end
function HomeScreen() {
const navigation = useNavigation();
React.useEffect(() => {
const unsubscribe = navigation.addListener('focus', () => {
console.log('HomeScreen focused');
});
return unsubscribe;
}, [navigation]);
React.useEffect(() => {
const unsubscribe = navigation.addListener('blur', () => {
console.log('HomeScreen blurred');
});
return unsubscribe;
}, [navigation]);
return (
Home Screen
);
}
const RootStack = createNativeStackNavigator({
screens: {
Home: HomeScreen,
Profile: ProfileScreen,
},
});
const Navigation = createStaticNavigation(RootStack);
export default function App() {
return ;
}
```
```js name="Focus and blur" snack
import * as React from 'react';
import { Text, View } from 'react-native';
import { NavigationContainer, useNavigation } from '@react-navigation/native';
import { createNativeStackNavigator } from '@react-navigation/native-stack';
import { Button } from '@react-navigation/elements';
// codeblock-focus-start
function ProfileScreen() {
const navigation = useNavigation();
React.useEffect(() => {
// highlight-start
const unsubscribe = navigation.addListener('focus', () => {
console.log('ProfileScreen focused');
});
// highlight-end
return unsubscribe;
}, [navigation]);
React.useEffect(() => {
// highlight-start
const unsubscribe = navigation.addListener('blur', () => {
console.log('ProfileScreen blurred');
});
// highlight-end
return unsubscribe;
}, [navigation]);
return (
Profile Screen
);
}
// codeblock-focus-end
function HomeScreen() {
const navigation = useNavigation();
React.useEffect(() => {
const unsubscribe = navigation.addListener('focus', () => {
console.log('HomeScreen focused');
});
return unsubscribe;
}, [navigation]);
React.useEffect(() => {
const unsubscribe = navigation.addListener('blur', () => {
console.log('HomeScreen blurred');
});
return unsubscribe;
}, [navigation]);
return (
Home Screen
);
}
const Stack = createNativeStackNavigator();
function RootStack() {
return (
);
}
export default function App() {
return (
);
}
```
See [Navigation events](navigation-events.md) for more details.
For performing side effects, we can use the [`useFocusEffect`](use-focus-effect.md) - it's like `useEffect` but ties to the navigation lifecycle -- it runs the effect when the screen comes into focus and cleans it up when the screen goes out of focus:
```js name="Focus effect" snack
import * as React from 'react';
import { Text, View } from 'react-native';
import {
createStaticNavigation,
useNavigation,
} from '@react-navigation/native';
import { createNativeStackNavigator } from '@react-navigation/native-stack';
import { Button } from '@react-navigation/elements';
// codeblock-focus-start
import { useFocusEffect } from '@react-navigation/native';
function ProfileScreen() {
// highlight-start
useFocusEffect(
React.useCallback(() => {
// Do something when the screen is focused
console.log('ProfileScreen focus effect');
return () => {
// Do something when the screen is unfocused
// Useful for cleanup functions
console.log('ProfileScreen focus effect cleanup');
};
}, [])
);
// highlight-end
return (
Profile Screen
);
}
// codeblock-focus-end
function HomeScreen() {
const navigation = useNavigation();
return (
Home Screen
);
}
const RootStack = createNativeStackNavigator({
screens: {
Home: HomeScreen,
Profile: ProfileScreen,
},
});
const Navigation = createStaticNavigation(RootStack);
export default function App() {
return ;
}
```
```js name="Focus effect" snack
import * as React from 'react';
import { Text, View } from 'react-native';
import { NavigationContainer, useNavigation } from '@react-navigation/native';
import { createNativeStackNavigator } from '@react-navigation/native-stack';
import { Button } from '@react-navigation/elements';
// codeblock-focus-start
import { useFocusEffect } from '@react-navigation/native';
function ProfileScreen() {
// highlight-start
useFocusEffect(
React.useCallback(() => {
// Do something when the screen is focused
console.log('ProfileScreen focus effect');
return () => {
// Do something when the screen is unfocused
// Useful for cleanup functions
console.log('ProfileScreen focus effect cleanup');
};
}, [])
);
// highlight-end
return (
Profile Screen
);
}
// codeblock-focus-end
function HomeScreen() {
const navigation = useNavigation();
return (
Home Screen
);
}
const Stack = createNativeStackNavigator();
function RootStack() {
return (
);
}
export default function App() {
return (
);
}
```
To render different things based on whether the screen is focused, we can use the [`useIsFocused`](use-is-focused.md) hook which returns a boolean indicating whether the screen is focused.
To know the focus state inside of an event listener, we can use the [`navigation.isFocused()`](navigation-object.md#isfocused) method. Note that using this method doesn't trigger a re-render like the `useIsFocused` hook does, so it is not suitable for rendering different things based on focus state.
## Summary
- Screens stay mounted when navigating away from them
- The [`useFocusEffect`](use-focus-effect.md) hook is like [`useEffect`](https://react.dev/reference/react/useEffect) but tied to the navigation lifecycle instead of the component lifecycle
- The [`useIsFocused`](use-is-focused.md) hook and [`navigation.isFocused()`](navigation-object.md#isfocused) method can be used to determine if a screen is currently focused
- The [`focus`](navigation-events.md#focus) and [`blur`](navigation-events.md#blur) events can be used to know when a screen gains or loses focus
---
## Next steps
Source: https://reactnavigation.org/docs/next-steps
You're now familiar with stack navigators, navigation between routes, and displaying [modals](modal.md). For tab-based navigation, check out the [Bottom Tabs Navigator](bottom-tab-navigator.md).
See the **"Navigators"** section in the sidebar to learn more about the different navigators.
The rest of the documentation is organized around specific use cases under **"Guides"**. Some guides you may want to check out:
- [Authentication flows](auth-flow.md)
- [Supporting safe areas](handling-safe-area.md)
- [Deep linking](deep-linking.md)
- [Themes](themes.md)
- [Testing with Jest](testing.md)
- [Configuring TypeScript](typescript.md)
To learn more about how React Navigation works internally, see the [Navigation State reference](navigation-state.md) and [Build your own Navigator](custom-navigators.md) sections.
Good luck!
---
## Authentication flows
Source: https://reactnavigation.org/docs/auth-flow
import Tabs from '@theme/Tabs';
import TabItem from '@theme/TabItem';
Most apps require that a user authenticates in some way to have access to data associated with a user or other private content. Typically the flow will look like this:
- The user opens the app.
- The app loads some authentication state from encrypted persistent storage (for example, [`SecureStore`](https://docs.expo.io/versions/latest/sdk/securestore/)).
- When the state has loaded, the user is presented with either authentication screens or the main app, depending on whether valid authentication state was loaded.
- When the user signs out, we clear the authentication state and send them back to authentication screens.
:::note
We say "authentication screens" because usually there is more than one. You may have a main screen with a username and password field, another for "forgot password", and another set for sign up.
:::
## What we need
We want the following behavior from our authentication flow:
- When the user is signed in, we want to show the main app screens and not the authentication-related screens.
- When the user is signed out, we want to show the authentication screens and not the main app screens.
- After the user goes through the authentication flow and signs in, we want to unmount all of the screens related to authentication, and when we press the hardware back button, we expect to not be able to go back to the authentication flow.
## How it will work
We can configure different screens to be available based on some condition. For example, if the user is signed in, we want `Home` to be available. If the user is not signed in, we want `SignIn` to be available.
```js name="Authentication flow" snack
import * as React from 'react';
import { View } from 'react-native';
import { createStaticNavigation } from '@react-navigation/native';
import { createNativeStackNavigator } from '@react-navigation/native-stack';
const useIsSignedIn = () => {
return true;
};
const useIsSignedOut = () => {
return !useIsSignedIn();
};
// codeblock-focus-start
const RootStack = createNativeStackNavigator({
screens: {
Home: {
if: useIsSignedIn,
screen: HomeScreen,
},
SignIn: {
if: useIsSignedOut,
screen: SignInScreen,
},
},
});
// codeblock-focus-end
const Navigation = createStaticNavigation(RootStack);
export default function App() {
return ;
}
function HomeScreen() {
return ;
}
function SignInScreen() {
return ;
}
```
Here, for each screen, we have defined a condition using the `if` property which takes a hook. The hook returns a boolean value indicating whether the user is signed in or not. If the hook returns `true`, the screen will be available, otherwise it won't.
This means:
- When `useIsSignedIn` returns `true`, React Navigation will only use the `Home` screen, since it's the only screen matching the condition.
- Similarly, when `useIsSignedOut` returns `true`, React Navigation will use the `SignIn` screen.
This makes it impossible to navigate to the `Home` when the user is not signed in, and to `SignIn` when the user is signed in.
When the values returned by `useIsSignedin` and `useIsSignedOut` change, the screens matching the condition will change:
- Let's say, initially `useIsSignedOut` returns `true`. This means that `SignIn` screens is shown.
- After the user signs in, the return value of `useIsSignedIn` will change to `true` and `useIsSignedOut` will change to `false`, which means:
- React Navigation will see that the `SignIn` screen is no longer matches the condition, so it will remove the screen.
- Then it'll show the `Home` screen automatically because that's the first screen available when `useIsSignedIn` returns `true`.
The order of the screens matters when there are multiple screens matching the condition. For example, if there are two screens matching `useIsSignedIn`, the first screen will be shown when the condition is `true`.
## Define the hooks
To implement the `useIsSignedIn` and `useIsSignedOut` hooks, we can start by creating a context to store the authentication state. Let's call it `SignInContext`:
```js
import * as React from 'react';
const SignInContext = React.createContext();
```
Then we can implement the `useIsSignedIn` and `useIsSignedOut` hooks as follows:
```js
function useIsSignedIn() {
const isSignedIn = React.useContext(SignInContext);
return isSignedIn;
}
function useIsSignedOut() {
return !useIsSignedIn();
}
```
We'll discuss how to provide the context value later.
```js name="Authentication flow" snack
import * as React from 'react';
import { View } from 'react-native';
import { NavigationContainer } from '@react-navigation/native';
import { createNativeStackNavigator } from '@react-navigation/native-stack';
const Stack = createNativeStackNavigator();
export default function App() {
const isSignedIn = true;
return (
// codeblock-focus-start
{isSignedIn ? (
) : (
)}
// codeblock-focus-end
);
}
function HomeScreen() {
return ;
}
function SignInScreen() {
return ;
}
```
Here, we have conditionally defined the screens based on the value of `isSignedIn`.
This means:
- When `isSignedIn` is `true`, React Navigation will only see the `Home` screen, since it's the only screen defined based on the condition.
- Similarly, when `isSignedIn` is `false`, React Navigation will only see the `SignIn` screen.
This makes it impossible to navigate to the `Home` when the user is not signed in, and to `SignIn` when the user is signed in.
When the value of `isSignedin` changes, the screens defined based on the condition will change:
- Let's say, initially `isSignedin` is `false`. This means that `SignIn` screens is shown.
- After the user signs in, the value of `isSignedin` will change to `true`, which means:
- React Navigation will see that the `SignIn` screen is no longer defined, so it will remove the screen.
- Then it'll show the `Home` screen automatically because that's the first screen defined when `isSignedin` returns `true`.
The order of the screens matters when there are multiple screens matching the condition. For example, if there are two screens defined based on `isSignedin`, the first screen will be shown when the condition is `true`.
## Add more screens
For our case, let's say we have 3 screens:
- `SplashScreen` - This will show a splash or loading screen when we're restoring the token.
- `SignIn` - This is the screen we show if the user isn't signed in already (we couldn't find a token).
- `Home` - This is the screen we show if the user is already signed in.
So our navigator will look like:
```js
const RootStack = createNativeStackNavigator({
screens: {
Home: {
if: useIsSignedIn,
screen: HomeScreen,
},
SignIn: {
if: useIsSignedOut,
screen: SignInScreen,
options: {
title: 'Sign in',
},
},
},
});
const Navigation = createStaticNavigation(RootStack);
```
```js
const Stack = createNativeStackNavigator();
export default function App() {
const isSignedIn = true;
return (
{isSignedIn ? (
) : (
)}
);
}
```
Notice how we have only defined the `Home` and `SignIn` screens here, and not the `SplashScreen`. The `SplashScreen` should be rendered before we render any navigators so that we don't render incorrect screens before we know whether the user is signed in or not.
When we use this in our component, it'd look something like this:
```js
if (isLoading) {
// We haven't finished checking for the token yet
return ;
}
const isSignedIn = userToken != null;
return (
);
```
```js
if (isLoading) {
// We haven't finished checking for the token yet
return ;
}
const isSignedIn = userToken != null;
return (
{isSignedIn ? (
) : (
)}
);
```
In the above snippet, `isLoading` means that we're still checking if we have a token. This can usually be done by checking if we have a token in `SecureStore` and validating the token.
Next, we're exposing the sign in status via the `SignInContext` so that it's available to the `useIsSignedIn` and `useIsSignedOut` hooks.
In the above example, we have one screen for each case. But you could also define multiple screens. For example, you probably want to define password reset, signup, etc screens as well when the user isn't signed in. Similarly for the screens accessible after sign in, you probably have more than one screen.
We can use [`groups`](static-configuration.md#groups) to define multiple screens:
```js
const RootStack = createNativeStackNavigator({
screens: {
// Common screens
},
groups: {
SignedIn: {
if: useIsSignedIn,
screens: {
Home: HomeScreen,
Profile: ProfileScreen,
},
},
SignedOut: {
if: useIsSignedOut,
screens: {
SignIn: SignInScreen,
SignUp: SignUpScreen,
ResetPassword: ResetPasswordScreen,
},
},
},
});
```
We can use [`React.Fragment`](https://react.dev/reference/react/Fragment) or [`Group`](group.md) to define multiple screens:
```js
isSignedIn ? (
<>
) : (
<>
);
```
:::tip
Instead of having your login-related screens and rest of the screens in two different Stack navigators and render them conditionally, we recommend to use a single Stack navigator and place the conditional inside. This makes it possible to have a proper transition animation during login/logout.
:::
## Implement the logic for restoring the token
:::note
The following is just an example of how you might implement the logic for authentication in your app. You don't need to follow it as is.
:::
From the previous snippet, we can see that we need 3 state variables:
- `isLoading` - We set this to `true` when we're trying to check if we already have a token saved in `SecureStore`.
- `isSignout` - We set this to `true` when user is signing out, otherwise set it to `false`. This can be used to customize the animation when signing out.
- `userToken` - The token for the user. If it's non-null, we assume the user is logged in, otherwise not.
So we need to:
- Add some logic for restoring token, signing in and signing out
- Expose methods for signing in and signing out to other components
We'll use `React.useReducer` and `React.useContext` in this guide. But if you're using a state management library such as Redux or Mobx, you can use them for this functionality instead. In fact, in bigger apps, a global state management library is more suitable for storing authentication tokens. You can adapt the same approach to your state management library.
First we'll need to create a context for auth where we can expose the necessary methods:
```js
import * as React from 'react';
const AuthContext = React.createContext();
```
In our component, we will:
- Store the token and loading state in `useReducer`
- Persist it to `SecureStore` and read it from there on app launch
- Expose the methods for sign in and sign out to child components using `AuthContext`
So our component will look like this:
```js name="Signing in and signing out with AuthContext" snack dependencies=expo-secure-store
// codeblock-focus-start
import * as React from 'react';
import * as SecureStore from 'expo-secure-store';
// codeblock-focus-end
import { Text, TextInput, View } from 'react-native';
import { createStaticNavigation } from '@react-navigation/native';
import { createNativeStackNavigator } from '@react-navigation/native-stack';
import { Button } from '@react-navigation/elements';
const AuthContext = React.createContext();
const SignInContext = React.createContext();
function useIsSignedIn() {
const isSignedIn = React.useContext(SignInContext);
return isSignedIn;
}
function useIsSignedOut() {
return !useIsSignedIn();
}
function SplashScreen() {
return (
Loading...
);
}
function HomeScreen() {
const { signOut } = React.useContext(AuthContext);
return (
Signed in!
);
}
function SignInScreen() {
const [username, setUsername] = React.useState('');
const [password, setPassword] = React.useState('');
const { signIn } = React.useContext(AuthContext);
return (
);
}
// codeblock-focus-start
export default function App() {
const [state, dispatch] = React.useReducer(
(prevState, action) => {
switch (action.type) {
case 'RESTORE_TOKEN':
return {
...prevState,
userToken: action.token,
isLoading: false,
};
case 'SIGN_IN':
return {
...prevState,
isSignout: false,
userToken: action.token,
};
case 'SIGN_OUT':
return {
...prevState,
isSignout: true,
userToken: null,
};
}
},
{
isLoading: true,
isSignout: false,
userToken: null,
}
);
React.useEffect(() => {
// Fetch the token from storage then navigate to our appropriate place
const bootstrapAsync = async () => {
let userToken;
try {
// Restore token stored in `SecureStore` or any other encrypted storage
userToken = await SecureStore.getItemAsync('userToken');
} catch (e) {
// Restoring token failed
}
// After restoring token, we may need to validate it in production apps
// This will switch to the App screen or Auth screen and this loading
// screen will be unmounted and thrown away.
dispatch({ type: 'RESTORE_TOKEN', token: userToken });
};
bootstrapAsync();
}, []);
const authContext = React.useMemo(
() => ({
signIn: async (data) => {
// In a production app, we need to send some data (usually username, password) to server and get a token
// We will also need to handle errors if sign in failed
// After getting token, we need to persist the token using `SecureStore` or any other encrypted storage
// In the example, we'll use a dummy token
dispatch({ type: 'SIGN_IN', token: 'dummy-auth-token' });
},
signOut: () => dispatch({ type: 'SIGN_OUT' }),
signUp: async (data) => {
// In a production app, we need to send user data to server and get a token
// We will also need to handle errors if sign up failed
// After getting token, we need to persist the token using `SecureStore` or any other encrypted storage
// In the example, we'll use a dummy token
dispatch({ type: 'SIGN_IN', token: 'dummy-auth-token' });
},
}),
[]
);
if (state.isLoading) {
// We haven't finished checking for the token yet
return ;
}
const isSignedIn = state.userToken != null;
return (
);
}
const RootStack = createNativeStackNavigator({
screens: {
Home: {
if: useIsSignedIn,
screen: HomeScreen,
},
SignIn: {
if: useIsSignedOut,
screen: SignInScreen,
options: {
title: 'Sign in',
},
},
},
});
const Navigation = createStaticNavigation(RootStack);
// codeblock-focus-end
```
```js name="Signing in and signing out with AuthContext" snack dependencies=expo-secure-store
// codeblock-focus-start
import * as React from 'react';
import * as SecureStore from 'expo-secure-store';
// codeblock-focus-end
import { Text, TextInput, View } from 'react-native';
import { NavigationContainer } from '@react-navigation/native';
import { createNativeStackNavigator } from '@react-navigation/native-stack';
import { Button } from '@react-navigation/elements';
const AuthContext = React.createContext();
function SplashScreen() {
return (
Loading...
);
}
function HomeScreen() {
const { signOut } = React.useContext(AuthContext);
return (
Signed in!
);
}
function SignInScreen() {
const [username, setUsername] = React.useState('');
const [password, setPassword] = React.useState('');
const { signIn } = React.useContext(AuthContext);
return (
);
}
const Stack = createNativeStackNavigator();
// codeblock-focus-start
export default function App() {
const [state, dispatch] = React.useReducer(
(prevState, action) => {
switch (action.type) {
case 'RESTORE_TOKEN':
return {
...prevState,
userToken: action.token,
isLoading: false,
};
case 'SIGN_IN':
return {
...prevState,
isSignout: false,
userToken: action.token,
};
case 'SIGN_OUT':
return {
...prevState,
isSignout: true,
userToken: null,
};
}
},
{
isLoading: true,
isSignout: false,
userToken: null,
}
);
React.useEffect(() => {
// Fetch the token from storage then navigate to our appropriate place
const bootstrapAsync = async () => {
let userToken;
try {
// Restore token stored in `SecureStore` or any other encrypted storage
userToken = await SecureStore.getItemAsync('userToken');
} catch (e) {
// Restoring token failed
}
// After restoring token, we may need to validate it in production apps
// This will switch to the App screen or Auth screen and this loading
// screen will be unmounted and thrown away.
dispatch({ type: 'RESTORE_TOKEN', token: userToken });
};
bootstrapAsync();
}, []);
const authContext = React.useMemo(
() => ({
signIn: async (data) => {
// In a production app, we need to send some data (usually username, password) to server and get a token
// We will also need to handle errors if sign in failed
// After getting token, we need to persist the token using `SecureStore` or any other encrypted storage
// In the example, we'll use a dummy token
dispatch({ type: 'SIGN_IN', token: 'dummy-auth-token' });
},
signOut: () => dispatch({ type: 'SIGN_OUT' }),
signUp: async (data) => {
// In a production app, we need to send user data to server and get a token
// We will also need to handle errors if sign up failed
// After getting token, we need to persist the token using `SecureStore` or any other encrypted storage
// In the example, we'll use a dummy token
dispatch({ type: 'SIGN_IN', token: 'dummy-auth-token' });
},
}),
[]
);
return (
{state.isLoading ? (
// We haven't finished checking for the token yet
) : state.userToken == null ? (
// No token found, user isn't signed in
) : (
// User is signed in
)}
);
}
// codeblock-focus-end
```
## Fill in other components
We won't talk about how to implement the text inputs and buttons for the authentication screen, that is outside of the scope of navigation. We'll just fill in some placeholder content.
```js
function SignInScreen() {
const [username, setUsername] = React.useState('');
const [password, setPassword] = React.useState('');
const { signIn } = React.useContext(AuthContext);
return (
);
}
```
You can similarly fill in the other screens according to your requirements.
## Removing shared screens when auth state changes
Consider the following example:
```js
const RootStack = createNativeStackNavigator({
groups: {
LoggedIn: {
if: useIsSignedIn,
screens: {
Home: HomeScreen,
Profile: ProfileScreen,
},
},
LoggedOut: {
if: useIsSignedOut,
screens: {
SignIn: SignInScreen,
SignUp: SignUpScreen,
},
},
},
screens: {
Help: HelpScreen,
},
});
```
```js
isSignedIn ? (
<>
) : (
<>
);
```
Here we have specific screens such as `SignIn`, `Home` etc. which are only shown depending on the sign in state. But we also have the `Help` screen which can be shown regardless of the login status. This also means that if the sign in state changes when the user is in the `Help` screen, they'll stay on the `Help` screen.
This can be a problem, we probably want the user to be taken to the `SignIn` screen or `Home` screen instead of keeping them on the `Help` screen.
To make this work, we can move the `Help` screen to both of the groups instead of keeping it outside. This will ensure that the [`navigationKey`](screen.md#navigation-key) (the name of the group) for the screen changes when the sign in state changes.
So our updated code will look like the following:
```js
const RootStack = createNativeStackNavigator({
groups: {
LoggedIn: {
if: useIsSignedIn,
screens: {
Home: HomeScreen,
Profile: ProfileScreen,
Help: HelpScreen,
},
},
LoggedOut: {
if: useIsSignedOut,
screens: {
SignIn: SignInScreen,
SignUp: SignUpScreen,
Help: HelpScreen,
},
},
},
});
```
To make this work, we can use [`navigationKey`](screen.md#navigation-key). When the `navigationKey` changes, React Navigation will remove all the screen.
So our updated code will look like the following:
```js
<>
{isSignedIn ? (
<>
) : (
<>
)}
```
If you have a bunch of shared screens, you can also use [`navigationKey` with a `Group`](group.md#navigation-key) to remove all of the screens in the group. For example:
```js
<>
{isSignedIn ? (
<>
) : (
<>
)}
```
The examples above show stack navigator, but you can use the same approach with any navigator.
By specifying a condition for our screens, we can implement auth flow in a simple way that doesn't require additional logic to make sure that the correct screen is shown.
## Don't manually navigate when conditionally rendering screens
It's important to note that when using such a setup, you **don't manually navigate** to the `Home` screen by calling `navigation.navigate('Home')` or any other method. **React Navigation will automatically navigate to the correct screen** when `isSignedIn` changes - `Home` screen when `isSignedIn` becomes `true`, and to `SignIn` screen when `isSignedIn` becomes `false`. You'll get an error if you attempt to navigate manually.
## Handling deep links after auth
When using deep links, you may want to handle the case where the user opens a deep link that requires authentication.
Example scenario:
- User opens a deep link to `myapp://profile` but is not signed in.
- The app shows the `SignIn` screen.
- After the user signs in, you want to navigate them to the `Profile` screen.
To achieve this, you can set [`UNSTABLE_routeNamesChangeBehavior`](navigator.md#route-names-change-behavior) to `"lastUnhandled"`:
:::warning
This API is experimental and may change in a minor release.
:::
```js
const RootStack = createNativeStackNavigator({
// highlight-next-line
UNSTABLE_routeNamesChangeBehavior: 'lastUnhandled',
screens: {
Home: {
if: useIsSignedIn,
screen: HomeScreen,
},
SignIn: {
if: useIsSignedOut,
screen: SignInScreen,
options: {
title: 'Sign in',
},
},
},
});
```
```js
{isSignedIn ? (
) : (
)}
```
The `UNSTABLE_routeNamesChangeBehavior` option allows you to control how React Navigation handles navigation when the available screens change because of conditions such as authentication state. When `lastUnhandled` is specified, React Navigation will remember the last screen that couldn't be handled, and after the condition changes, it'll automatically navigate to that screen if it's now available.
---
## Supporting safe areas
Source: https://reactnavigation.org/docs/handling-safe-area
import Tabs from '@theme/Tabs';
import TabItem from '@theme/TabItem';
By default, React Navigation tries to ensure that the elements of the navigators display correctly on devices with notches (e.g. iPhone X) and UI elements which may overlap the app content. Such items include:
- Physical notches
- Status bar overlay
- Home activity indicator on iOS
- Navigation bar on Android
The area not overlapped by such items is referred to as "safe area".
We try to apply proper insets on the UI elements of the navigators to avoid being overlapped by such items. The goal is to (a) maximize usage of the screen (b) without hiding content or making it difficult to interact with by having it obscured by a physical display cutout or some operating system UI.
While React Navigation handles safe areas for the built-in UI elements by default, your own content may also need to handle it to ensure that content isn't hidden by these items.
It's tempting to solve (a) by wrapping your entire app in a container with padding that ensures all content will not be occluded. But in doing so, we waste a bunch of space on the screen, as pictured in the image on the left below. What we ideally want is the image pictured on the right.
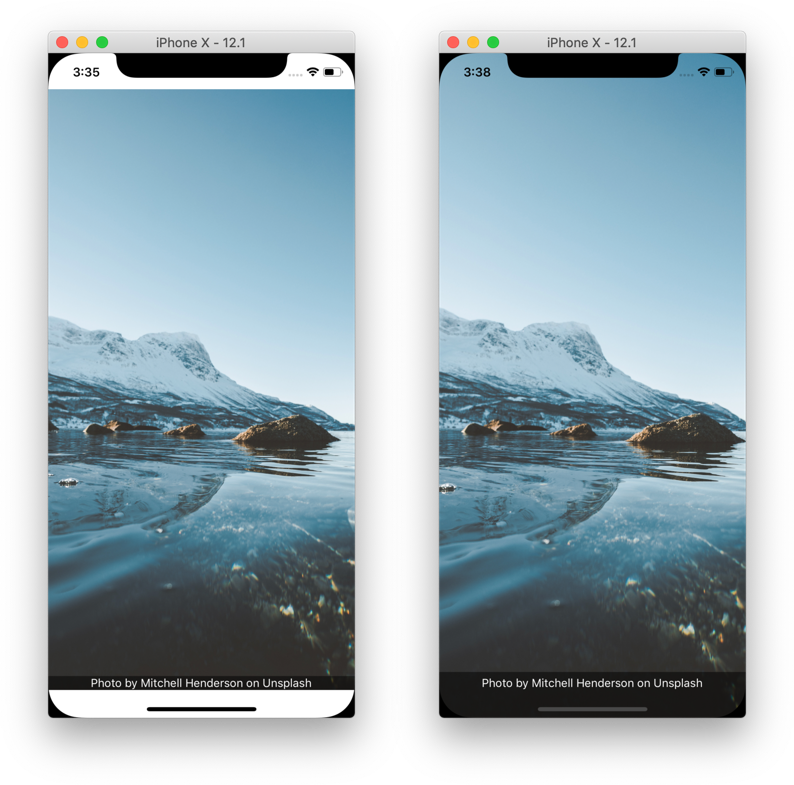
While React Native exports a `SafeAreaView` component, this component only supports iOS 10+ with no support for older iOS versions or Android. In addition, it also has some issues, i.e. if a screen containing safe area is animating, it causes jumpy behavior. So we recommend to use the `useSafeAreaInsets` hook from the [react-native-safe-area-context](https://github.com/th3rdwave/react-native-safe-area-context) library to handle safe areas in a more reliable way.
:::warning
The `react-native-safe-area-context` library also exports a `SafeAreaView` component. While it works on Android, it also has the same issues with jumpy behavior on vertical animations. In addition, the `SafeAreaView` component and `useSafeAreaInsets` hook can update at different times, resulting in flickering when using them together. So we recommend always using the `useSafeAreaInsets` hook instead and avoid using the `SafeAreaView` component for consistent behavior.
:::
The rest of this guide gives more information on how to support safe areas in React Navigation.
## Hidden/Custom Header or Tab Bar
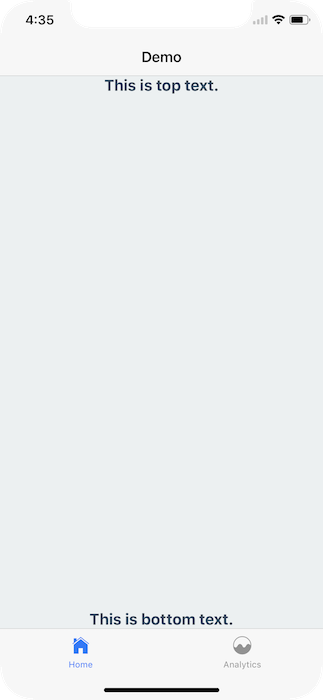
React Navigation handles safe area in the default header. However, if you're using a custom header, it's important to ensure your UI is within the safe area.
For example, if I render nothing for the `header` or `tabBar`, nothing renders
```js name="Hidden components" snack
import * as React from 'react';
import { Text, View } from 'react-native';
import { createStaticNavigation } from '@react-navigation/native';
import { createBottomTabNavigator } from '@react-navigation/bottom-tabs';
import { createNativeStackNavigator } from '@react-navigation/native-stack';
function Demo() {
return (
This is top text.
This is bottom text.
);
}
// codeblock-focus-start
const MyTabs = createBottomTabNavigator({
initialRouteName: 'Analytics',
// highlight-start
tabBar: () => null,
screenOptions: {
headerShown: false,
},
// highlight-end
screens: {
Analytics: Demo,
Profile: Demo,
},
});
const RootStack = createNativeStackNavigator({
initialRouteName: 'Home',
// highlight-start
screenOptions: {
headerShown: false,
},
// highlight-end
screens: {
Home: MyTabs,
Settings: Demo,
},
});
// codeblock-focus-end
const Navigation = createStaticNavigation(RootStack);
export default function App() {
return ;
}
```
```js name="Hidden components" snack
import * as React from 'react';
import { Text, View } from 'react-native';
import { NavigationContainer } from '@react-navigation/native';
import { createBottomTabNavigator } from '@react-navigation/bottom-tabs';
import { createNativeStackNavigator } from '@react-navigation/native-stack';
function Demo() {
return (
This is top text.
This is bottom text.
);
}
const Stack = createNativeStackNavigator();
const Tab = createBottomTabNavigator();
export default function App() {
return (
{() => (
null}
screenOptions={{ headerShown: false }}
>
)}
);
}
```
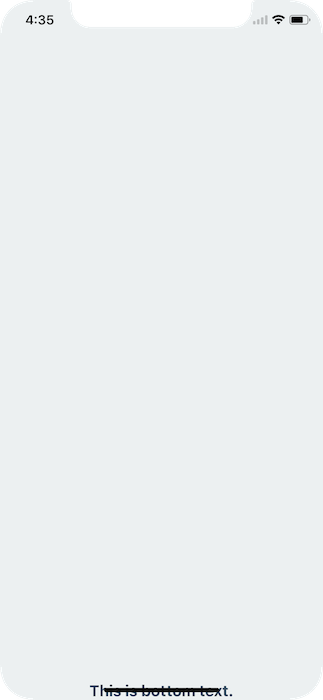
To fix this issue you can apply safe area insets on your content. This can be achieved using the `useSafeAreaInsets` hook from the `react-native-safe-area-context` library:
```js name="Safe area example" snack
import * as React from 'react';
import { Text, View } from 'react-native';
import { createStaticNavigation } from '@react-navigation/native';
import { createBottomTabNavigator } from '@react-navigation/bottom-tabs';
import { createNativeStackNavigator } from '@react-navigation/native-stack';
import {
SafeAreaProvider,
useSafeAreaInsets,
} from 'react-native-safe-area-context';
// codeblock-focus-start
function Demo() {
const insets = useSafeAreaInsets();
return (
This is top text.
This is bottom text.
);
}
// codeblock-focus-end
const MyTabs = createBottomTabNavigator({
initialRouteName: 'Analytics',
tabBar: () => null,
screenOptions: {
headerShown: false,
},
screens: {
Analytics: Demo,
Profile: Demo,
},
});
const RootStack = createNativeStackNavigator({
initialRouteName: 'Home',
screenOptions: {
headerShown: false,
},
screens: {
Home: MyTabs,
Settings: Demo,
},
});
// codeblock-focus-start
const Navigation = createStaticNavigation(RootStack);
export default function App() {
return (
);
}
// codeblock-focus-end
```
```js name="Safe area example" snack
import * as React from 'react';
import { View, Text } from 'react-native';
import { NavigationContainer } from '@react-navigation/native';
import { createBottomTabNavigator } from '@react-navigation/bottom-tabs';
import { createNativeStackNavigator } from '@react-navigation/native-stack';
import {
SafeAreaProvider,
useSafeAreaInsets,
} from 'react-native-safe-area-context';
// codeblock-focus-start
function Demo() {
const insets = useSafeAreaInsets();
return (
This is top text.
This is bottom text.
);
}
// codeblock-focus-end
const Stack = createNativeStackNavigator();
const Tab = createBottomTabNavigator();
// codeblock-focus-start
export default function App() {
return (
{/*(...) */}
// codeblock-focus-end
{() => (
null}
screenOptions={{ headerShown: false }}
>
)}
// codeblock-focus-start
);
}
// codeblock-focus-end
```
Make sure to wrap your app in `SafeAreaProvider` as per the instructions [here](https://github.com/th3rdwave/react-native-safe-area-context#usage).

This will detect if the app is running on a device with notches, if so, ensure the content isn't hidden behind any hardware elements.
## Landscape Mode
Even if you're using the default navigation bar and tab bar - if your application works in landscape mode it's important to ensure your content isn't hidden behind the sensor cluster.
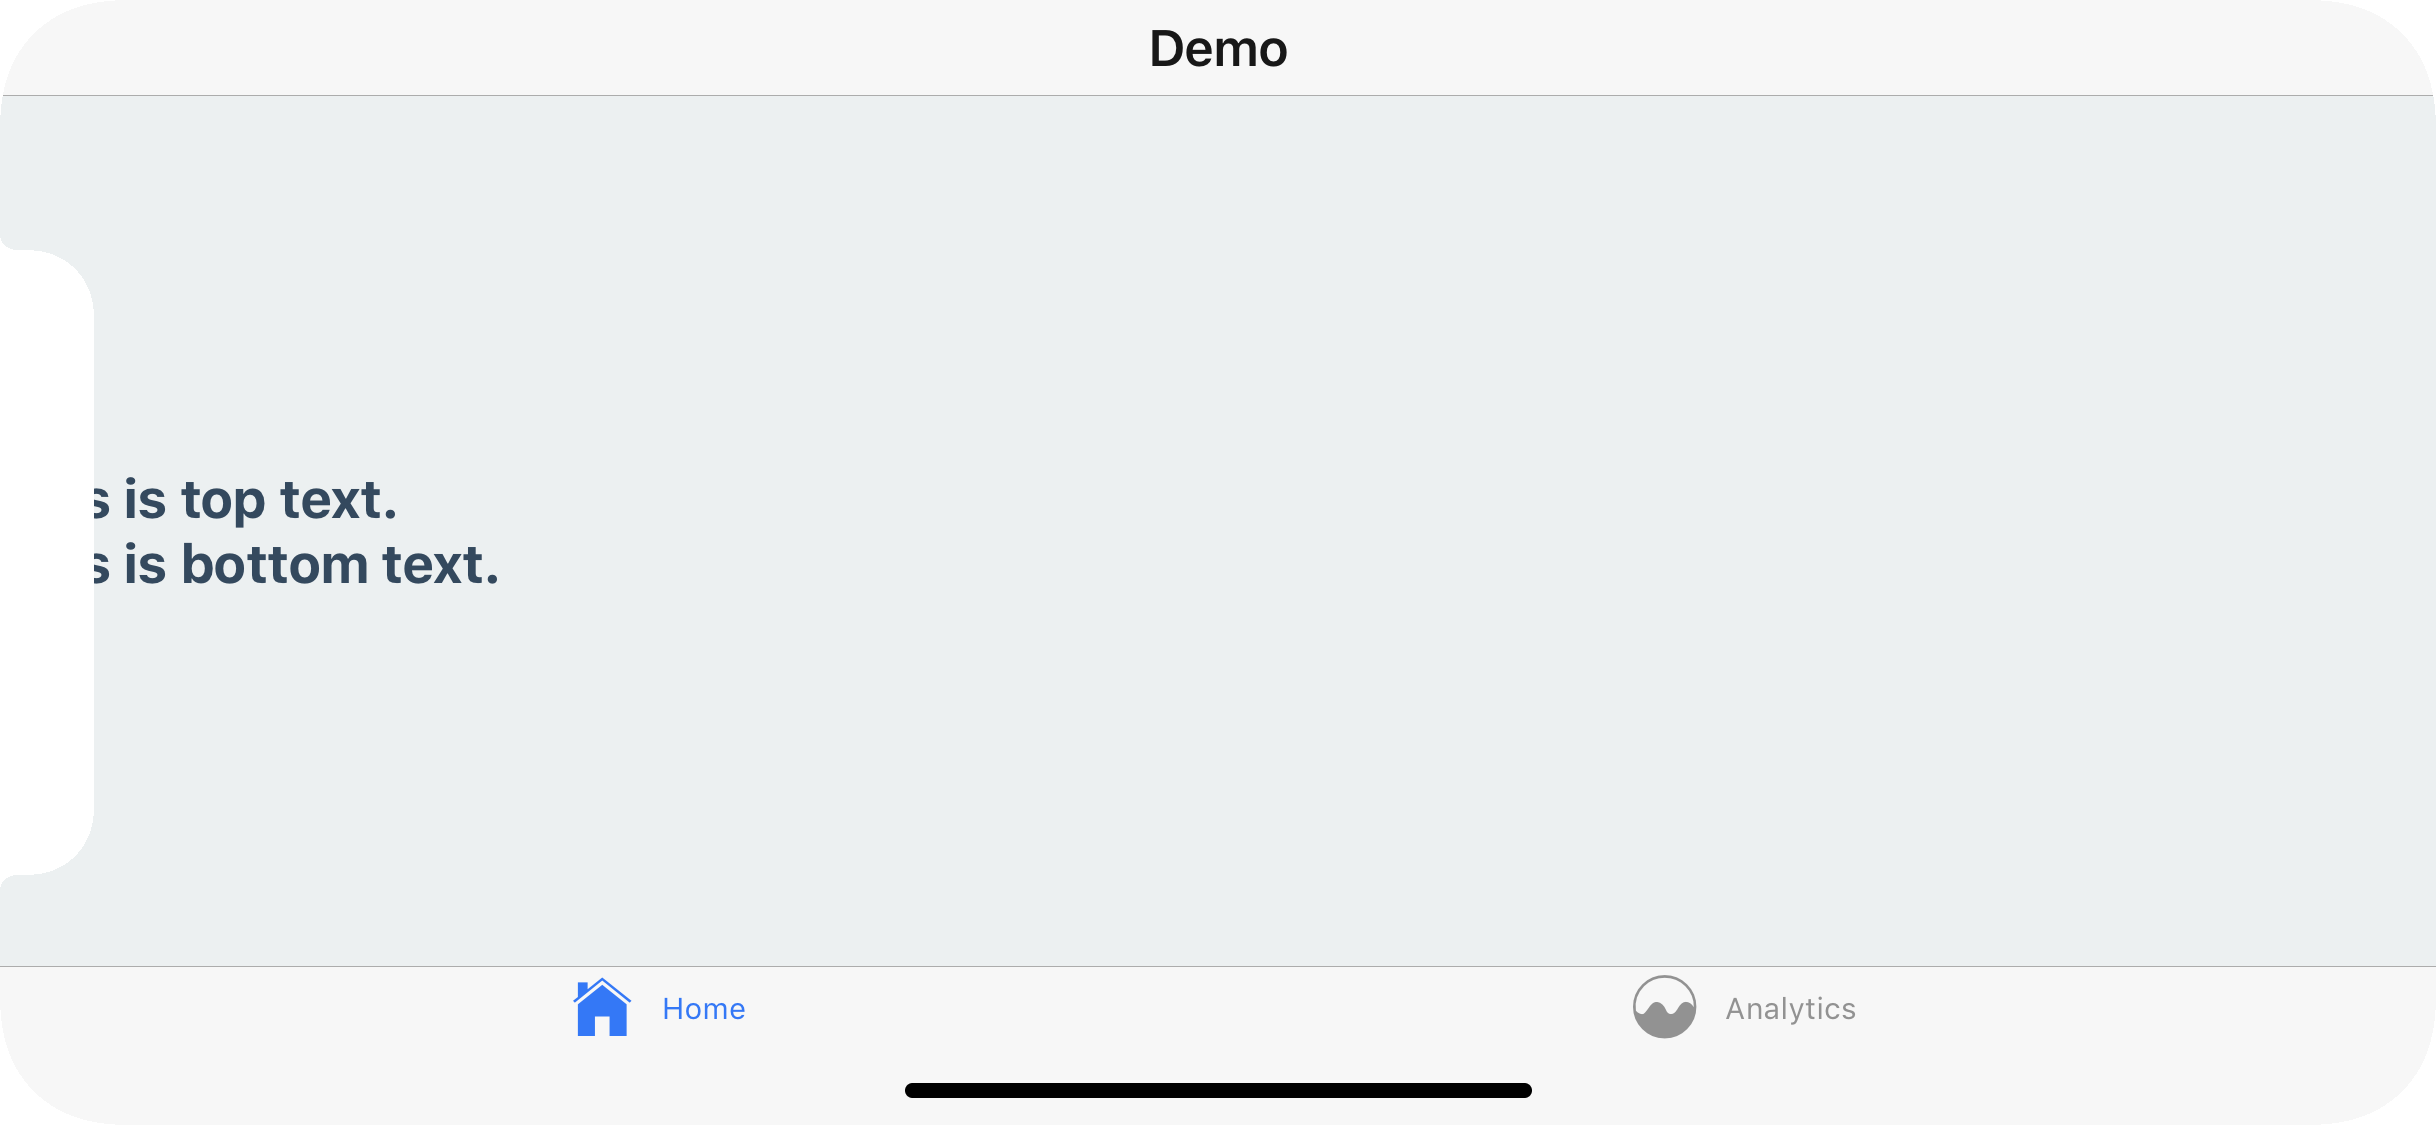
To fix this you can, once again, apply safe area insets to your content. This will not conflict with the navigation bar nor the tab bar's default behavior in portrait mode.

## Use the hook for more control
In some cases you might need more control over which paddings are applied. For example, you can only apply the top and the bottom padding by changing the `style` object:
```js name="useSafeAreaInsets hook" snack
import * as React from 'react';
import { Text, View } from 'react-native';
import { createStaticNavigation } from '@react-navigation/native';
import { createBottomTabNavigator } from '@react-navigation/bottom-tabs';
import { createNativeStackNavigator } from '@react-navigation/native-stack';
// codeblock-focus-start
import {
SafeAreaProvider,
useSafeAreaInsets,
} from 'react-native-safe-area-context';
function Demo() {
const insets = useSafeAreaInsets();
return (
This is top text.
This is bottom text.
);
}
// codeblock-focus-end
const MyTabs = createBottomTabNavigator({
initialRouteName: 'Analytics',
tabBar: () => null,
screenOptions: {
headerShown: false,
},
screens: {
Analytics: Demo,
Profile: Demo,
},
});
const RootStack = createNativeStackNavigator({
initialRouteName: 'Home',
screenOptions: {
headerShown: false,
},
screens: {
Home: MyTabs,
Settings: Demo,
},
});
// codeblock-focus-start
const Navigation = createStaticNavigation(RootStack);
export default function App() {
return (
);
}
// codeblock-focus-end
```
```js name="useSafeAreaInsets hook" snack
import * as React from 'react';
import { Text, View } from 'react-native';
import { NavigationContainer } from '@react-navigation/native';
import { createBottomTabNavigator } from '@react-navigation/bottom-tabs';
import { createStackNavigator } from '@react-navigation/stack';
// codeblock-focus-start
import {
SafeAreaProvider,
useSafeAreaInsets,
} from 'react-native-safe-area-context';
function Demo() {
const insets = useSafeAreaInsets();
return (
This is top text.
This is bottom text.
);
}
// codeblock-focus-end
const Stack = createStackNavigator();
const Tab = createBottomTabNavigator();
export default function App() {
return (
{() => (
null}
screenOptions={{ headerShown: false }}
>
)}
);
}
```
Similarly, you could apply these paddings in `contentContainerStyle` of `FlatList` to have the content avoid the safe areas, but still show them under the statusbar and navigation bar when scrolling.
## Summary
- Use [`useSafeAreaInsets`](https://appandflow.github.io/react-native-safe-area-context/api/use-safe-area-insets) hook from `react-native-safe-area-context` instead of [`SafeAreaView`](https://reactnative.dev/docs/safeareaview) component
- Don't wrap your whole app in `SafeAreaView`, instead apply the styles to content inside your screens
- Apply only specific insets using the `useSafeAreaInsets` hook for more control
---
## Hiding tab bar in specific screens
Source: https://reactnavigation.org/docs/hiding-tabbar-in-screens
import Tabs from '@theme/Tabs';
import TabItem from '@theme/TabItem';
Sometimes we may want to hide the tab bar in specific screens in a stack navigator nested in a tab navigator. Let's say we have 5 screens: `Home`, `Feed`, `Notifications`, `Profile` and `Settings`, and your navigation structure looks like this:
```js name="Hiding tab bar in screens"
const HomeStack = createNativeStackNavigator({
screens: {
Home: Home,
Profile: Profile,
Settings: Settings,
},
});
const MyTabs = createBottomTabNavigator({
screens: {
Home: HomeStack,
Feed: Feed,
Notifications: Notifications,
},
});
const Navigation = createStaticNavigation(MyTabs);
export default function App() {
return ;
}
```
```js
function HomeStack() {
return (
);
}
function App() {
return (
);
}
```
With this structure, when we navigate to the `Profile` or `Settings` screen, the tab bar will still stay visible over those screens.
But if we want to show the tab bar only on the `Home`, `Feed` and `Notifications` screens, but not on the `Profile` and `Settings` screens, we'll need to change the navigation structure. The easiest way to achieve this is to nest the tab navigator inside the first screen of the stack instead of nesting stack inside tab navigator:
```js name="Hiding tabbar" snack
import * as React from 'react';
import { Text, View } from 'react-native';
import {
createStaticNavigation,
useNavigation,
} from '@react-navigation/native';
import { createNativeStackNavigator } from '@react-navigation/native-stack';
import { createBottomTabNavigator } from '@react-navigation/bottom-tabs';
import { Button } from '@react-navigation/elements';
function EmptyScreen() {
return ;
}
function Home() {
const navigation = useNavigation();
return (
Home Screen
);
}
// codeblock-focus-start
const HomeTabs = createBottomTabNavigator({
screens: {
Home: Home,
Feed: EmptyScreen,
Notifications: EmptyScreen,
},
});
const RootStack = createNativeStackNavigator({
screens: {
Home: HomeTabs,
Profile: EmptyScreen,
Settings: EmptyScreen,
},
});
// codeblock-focus-end
const Navigation = createStaticNavigation(RootStack);
export default function App() {
return ;
}
```
```js name="Hiding tabbar" snack
import * as React from 'react';
import { Text, View } from 'react-native';
import { NavigationContainer, useNavigation } from '@react-navigation/native';
import { createNativeStackNavigator } from '@react-navigation/native-stack';
import { createBottomTabNavigator } from '@react-navigation/bottom-tabs';
import { Button } from '@react-navigation/elements';
const Tab = createBottomTabNavigator();
const Stack = createNativeStackNavigator();
function EmptyScreen() {
return ;
}
function Home() {
const navigation = useNavigation();
return (
Home Screen
);
}
// codeblock-focus-start
function HomeTabs() {
return (
);
}
function App() {
return (
);
}
// codeblock-focus-end
export default App;
```
After re-organizing the navigation structure, now if we navigate to the `Profile` or `Settings` screens, the tab bar won't be visible over the screen anymore.
---
## Different status bar configuration based on route
Source: https://reactnavigation.org/docs/status-bar
import Tabs from '@theme/Tabs';
import TabItem from '@theme/TabItem';
If you don't have a navigation header, or your navigation header changes color based on the route, you'll want to ensure that the correct color is used for the content.
## Stack
This is a simple task when using a stack. You can render the `StatusBar` component, which is exposed by React Native, and set your config.
```js name="Different status bar" snack
import * as React from 'react';
import { View, Text, StatusBar, StyleSheet } from 'react-native';
import {
createStaticNavigation,
useNavigation,
} from '@react-navigation/native';
import { createNativeStackNavigator } from '@react-navigation/native-stack';
import { Button } from '@react-navigation/elements';
import { useSafeAreaInsets } from 'react-native-safe-area-context';
function Screen1() {
const navigation = useNavigation();
const insets = useSafeAreaInsets();
return (
// highlight-start
// highlight-end
Light Screen
);
}
function Screen2() {
const navigation = useNavigation();
const insets = useSafeAreaInsets();
return (
// highlight-start
// highlight-end
Dark Screen
);
}
const RootStack = createNativeStackNavigator({
screenOptions: {
headerShown: false,
},
screens: {
Screen1: Screen1,
Screen2: Screen2,
},
});
const Navigation = createStaticNavigation(RootStack);
export default function App() {
return ;
}
const styles = StyleSheet.create({
container: { flex: 1, justifyContent: 'center', alignItems: 'center' },
});
```
```js name="Different status bar" snack
import * as React from 'react';
import { View, Text, StatusBar, StyleSheet } from 'react-native';
import { NavigationContainer, useNavigation } from '@react-navigation/native';
import { createNativeStackNavigator } from '@react-navigation/native-stack';
import { Button } from '@react-navigation/elements';
import {
SafeAreaProvider,
useSafeAreaInsets,
} from 'react-native-safe-area-context';
function Screen1() {
const navigation = useNavigation();
const insets = useSafeAreaInsets();
return (
// highlight-start
// highlight-end
Light Screen
);
}
function Screen2() {
const navigation = useNavigation();
const insets = useSafeAreaInsets();
return (
// highlight-start
// highlight-end
Dark Screen
);
}
const Stack = createNativeStackNavigator();
export default function App() {
return (
);
}
const styles = StyleSheet.create({
container: {
flex: 1,
justifyContent: 'center',
alignItems: 'center',
},
});
```
## Tabs and Drawer
If you're using a tab or drawer navigator, it's a bit more complex because all of the screens in the navigator might be rendered at once and kept rendered - that means that the last `StatusBar` config you set will be used (likely on the final tab of your tab navigator, not what the user is seeing).
To fix this, we'll have to do make the status bar component aware of screen focus and render it only when the screen is focused. We can achieve this by using the [`useIsFocused` hook](use-is-focused.md) and creating a wrapper component:
```js
import * as React from 'react';
import { StatusBar } from 'react-native';
import { useIsFocused } from '@react-navigation/native';
function FocusAwareStatusBar(props) {
const isFocused = useIsFocused();
return isFocused ? : null;
}
```
Now, our screens (both `Screen1.js` and `Screen2.js`) will use the `FocusAwareStatusBar` component instead of the `StatusBar` component from React Native:
```js name="Different status bar based on tabs" snack
import * as React from 'react';
import { View, Text, StatusBar, StyleSheet } from 'react-native';
import { useIsFocused } from '@react-navigation/native';
import {
createStaticNavigation,
useNavigation,
} from '@react-navigation/native';
import { createNativeStackNavigator } from '@react-navigation/native-stack';
import { Button } from '@react-navigation/elements';
import { useSafeAreaInsets } from 'react-native-safe-area-context';
function FocusAwareStatusBar(props) {
const isFocused = useIsFocused();
return isFocused ? : null;
}
// codeblock-focus-start
function Screen1() {
const navigation = useNavigation();
const insets = useSafeAreaInsets();
return (
Light Screen
);
}
function Screen2() {
const navigation = useNavigation();
const insets = useSafeAreaInsets();
return (
Dark Screen
);
}
// codeblock-focus-end
const RootStack = createNativeStackNavigator({
screenOptions: {
headerShown: false,
},
screens: {
Screen1: Screen1,
Screen2: Screen2,
},
});
const Navigation = createStaticNavigation(RootStack);
export default function App() {
return ;
}
const styles = StyleSheet.create({
container: {
flex: 1,
justifyContent: 'center',
alignItems: 'center',
},
});
```
```js name="Different status bar based on tabs" snack
import * as React from 'react';
import { View, Text, StatusBar, StyleSheet } from 'react-native';
import { useIsFocused } from '@react-navigation/native';
import { NavigationContainer, useNavigation } from '@react-navigation/native';
import { createNativeStackNavigator } from '@react-navigation/native-stack';
import { Button } from '@react-navigation/elements';
import {
SafeAreaProvider,
useSafeAreaInsets,
} from 'react-native-safe-area-context';
function FocusAwareStatusBar(props) {
const isFocused = useIsFocused();
return isFocused ? : null;
}
// codeblock-focus-start
function Screen1() {
const navigation = useNavigation();
const insets = useSafeAreaInsets();
return (
Light Screen
);
}
function Screen2() {
const navigation = useNavigation();
const insets = useSafeAreaInsets();
return (
Dark Screen
);
}
// codeblock-focus-end
const Stack = createNativeStackNavigator();
export default function App() {
return (
);
}
const styles = StyleSheet.create({
container: {
flex: 1,
justifyContent: 'center',
alignItems: 'center',
},
});
```
Although not necessary, you can use the `FocusAwareStatusBar` component in the screens of the native stack navigator as well.
---
## Opening a modal
Source: https://reactnavigation.org/docs/modal
import Tabs from '@theme/Tabs';
import TabItem from '@theme/TabItem';
A modal displays content that temporarily blocks interactions with the main view.
A modal is like a popup — it usually has a different transition animation, and is intended to focus on one particular interaction or piece of content.
## Creating a stack with modal screens
```js name="Modal" snack static2dynamic
import * as React from 'react';
import { View, Text } from 'react-native';
import {
createStaticNavigation,
useNavigation,
} from '@react-navigation/native';
import { createStackNavigator } from '@react-navigation/stack';
import { Button } from '@react-navigation/elements';
function HomeScreen() {
const navigation = useNavigation();
return (
This is the home screen!
);
}
function ModalScreen() {
const navigation = useNavigation();
return (
This is a modal!
);
}
function DetailsScreen() {
return (
Details
);
}
// codeblock-focus-start
const HomeStack = createStackNavigator({
screens: {
Home: {
screen: HomeScreen,
options: {
headerShown: false,
},
},
Details: {
screen: DetailsScreen,
options: {
headerShown: false,
},
},
},
});
const RootStack = createStackNavigator({
groups: {
Home: {
screens: {
App: {
screen: HomeStack,
options: { title: 'My App' },
},
},
},
// highlight-start
Modal: {
screenOptions: {
presentation: 'modal',
},
screens: {
MyModal: ModalScreen,
},
},
// highlight-end
},
});
const Navigation = createStaticNavigation(RootStack);
export default function App() {
return ;
}
// codeblock-focus-end
```
Here, we are creating 2 groups of screens using the `RootStack.Group` component. The first group is for our regular screens, and the second group is for our modal screens. For the modal group, we have specified `presentation: 'modal'` in `screenOptions`. This will apply this option to all the screens inside the group. This option will change the animation for the screens to animate from bottom-to-top rather than right to left. The `presentation` option for stack navigator can be either `card` (default) or `modal`. The `modal` behavior slides the screen in from the bottom and allows the user to swipe down from the top to dismiss it on iOS.
Instead of specifying this option for a group, it's also possible to specify it for a single screen using the `options` prop on `RootStack.Screen`.
## Summary
- To change the type of transition on a stack navigator you can use the [`presentation`](native-stack-navigator.md#presentation) option.
- When `presentation` is set to `modal`, the screens behave like a modal, i.e. they have a bottom to top transition and may show part of the previous screen in the background.
- Setting `presentation: 'modal'` on a group makes all the screens in the group modals, so to use non-modal transitions on other screens, we add another group with the default configuration.
## Best practices
Since modals are intended to be on top of other content, there are a couple of things to keep in mind when using modals:
- Avoid nesting them inside other navigators like tab or drawer. Modal screens should be defined as part of the root stack.
- Modal screens should be the last in the stack - avoid pushing regular screens on top of modals.
- The first screen in a stack appears as a regular screen even if configured as a modal, since there is no screen before it to show behind. So always make sure that modal screens are pushed on top of a regular screen or another modal screen.
---
## Multiple drawers
Source: https://reactnavigation.org/docs/multiple-drawers
import Tabs from '@theme/Tabs';
import TabItem from '@theme/TabItem';
Sometimes we want to have multiple drawers on the same screen: one on the left and one on the right. This can be achieved in 2 ways:
1. By using [`react-native-drawer-layout`](drawer-layout.md) directly (Recommended).
2. By [nesting](nesting-navigators.md) 2 [drawer navigators](drawer-navigator.md).
## Using `react-native-drawer-layout`
When we have multiple drawers, only one of them shows the list of screens. The second drawer may often be used to show some additional information such as the list of users etc.
In such cases, we can use [`react-native-drawer-layout`](drawer-layout.md) directly to render the second drawer. The drawer navigator will be used to render the first drawer and can be nested inside the second drawer:
```js
import * as React from 'react';
import { View } from 'react-native';
import { Drawer } from 'react-native-drawer-layout';
import { createDrawerNavigator } from '@react-navigation/drawer';
import {
createStaticNavigation,
useNavigation,
} from '@react-navigation/native';
import { Button } from '@react-navigation/elements';
function HomeScreen() {
const navigation = useNavigation();
return (
);
}
const LeftDrawerScreen = createDrawerNavigator({
screenOptions: {
drawerPosition: 'left',
},
screens: {
Home: HomeScreen,
},
});
function RightDrawerScreen() {
const [rightDrawerOpen, setRightDrawerOpen] = React.useState(false);
return (
setRightDrawerOpen(true)}
onClose={() => setRightDrawerOpen(false)}
drawerPosition="right"
renderDrawerContent={() => <>{/* Right drawer content */}}
>
);
}
const Navigation = createStaticNavigation(RightDrawerScreen);
export default function App() {
return ;
}
```
```js
import * as React from 'react';
import { View } from 'react-native';
import { Drawer } from 'react-native-drawer-layout';
import { useNavigation } from '@react-navigation/native';
import { createDrawerNavigator } from '@react-navigation/drawer';
import { Button } from '@react-navigation/elements';
function HomeScreen() {
const navigation = useNavigation();
return (
);
}
const LeftDrawer = createDrawerNavigator();
const LeftDrawerScreen = () => {
return (
);
};
function RightDrawerScreen() {
const [rightDrawerOpen, setRightDrawerOpen] = React.useState(false);
return (
setRightDrawerOpen(true)}
onClose={() => setRightDrawerOpen(false)}
drawerPosition="right"
renderDrawerContent={() => <>{/* Right drawer content */}}
>
);
}
export default function App() {
return (
);
}
```
But there is one problem. When we call `navigation.openDrawer()` in our `HomeScreen`, it always opens the left drawer. We don't have access to the right drawer via the `navigation` object since it's not a navigator.
To solve this, we need to use context API to pass down a function to control the right drawer:
```js
import * as React from 'react';
import { View } from 'react-native';
import { Drawer } from 'react-native-drawer-layout';
import { createDrawerNavigator } from '@react-navigation/drawer';
import {
useNavigation,
createStaticNavigation,
} from '@react-navigation/native';
import { Button } from '@react-navigation/elements';
const RightDrawerContext = React.createContext();
function HomeScreen() {
const { openRightDrawer } = React.useContext(RightDrawerContext);
const navigation = useNavigation();
return (
);
}
const LeftDrawerScreen = createDrawerNavigator({
screenOptions: {
drawerPosition: 'left',
},
screens: {
Home: HomeScreen,
},
});
function RightDrawerScreen() {
const [rightDrawerOpen, setRightDrawerOpen] = React.useState(false);
const value = React.useMemo(
() => ({
openRightDrawer: () => setRightDrawerOpen(true),
closeRightDrawer: () => setRightDrawerOpen(false),
}),
[]
);
return (
setRightDrawerOpen(true)}
onClose={() => setRightDrawerOpen(false)}
drawerPosition="right"
renderDrawerContent={() => <>{/* Right drawer content */}}
>
);
}
const Navigation = createStaticNavigation(RightDrawerScreen);
export default function App() {
return ;
}
```
```js
import * as React from 'react';
import { View } from 'react-native';
import { Drawer } from 'react-native-drawer-layout';
import { useNavigation } from '@react-navigation/native';
import { createDrawerNavigator } from '@react-navigation/drawer';
import { Button } from '@react-navigation/elements';
const RightDrawerContext = React.createContext();
function HomeScreen() {
const navigation = useNavigation();
const { openRightDrawer } = React.useContext(RightDrawerContext);
return (
);
}
const LeftDrawer = createDrawerNavigator();
const LeftDrawerScreen = () => {
return (
);
};
function RightDrawerScreen() {
const [rightDrawerOpen, setRightDrawerOpen] = React.useState(false);
const value = React.useMemo(
() => ({
openRightDrawer: () => setRightDrawerOpen(true),
closeRightDrawer: () => setRightDrawerOpen(false),
}),
[]
);
return (
setRightDrawerOpen(true)}
onClose={() => setRightDrawerOpen(false)}
drawerPosition="right"
renderDrawerContent={() => <>{/* Right drawer content */}}
>
);
}
export default function App() {
return (
);
}
```
Here, we are using the `RightDrawerContext` to pass down the `openRightDrawer` function to the `HomeScreen`. Then we use `openRightDrawer` to open the right drawer.
## Nesting 2 drawer navigators
An alternative approach is to nest 2 [drawer navigators](drawer-navigator.md) inside each other. This is not recommended since it requires creating an additional screen and more nesting - which can make navigating and type checking more verbose. But this can be useful if both navigators include multiple screens.
Here we have 2 drawer navigators nested inside each other, one is positioned on left and the other on the right:
```js name="Multiple drawers" snack
import * as React from 'react';
import { View } from 'react-native';
import { createDrawerNavigator } from '@react-navigation/drawer';
import {
createStaticNavigation,
useNavigation,
} from '@react-navigation/native';
import { Button } from '@react-navigation/elements';
function HomeScreen() {
const navigation = useNavigation();
return (
);
}
const LeftDrawerScreen = createDrawerNavigator({
screenOptions: {
drawerPosition: 'left',
},
screens: {
Home: HomeScreen,
},
});
const RightDrawerScreen = createDrawerNavigator({
screenOptions: {
drawerPosition: 'right',
headerShown: false,
},
screens: {
HomeDrawer: LeftDrawerScreen,
},
});
const Navigation = createStaticNavigation(RightDrawerScreen);
export default function App() {
return ;
}
```
```js name="Multiple drawers" snack
import * as React from 'react';
import { View } from 'react-native';
import { createDrawerNavigator } from '@react-navigation/drawer';
import { NavigationContainer, useNavigation } from '@react-navigation/native';
import { Button } from '@react-navigation/elements';
function HomeScreen() {
const navigation = useNavigation();
return (
);
}
const LeftDrawer = createDrawerNavigator();
const LeftDrawerScreen = () => {
return (
);
};
const RightDrawer = createDrawerNavigator();
const RightDrawerScreen = () => {
return (
);
};
export default function App() {
return (
);
}
```
But there is one problem. When we call `navigation.openDrawer()` in our `HomeScreen`, it always opens the left drawer since it's the immediate parent of the screen.
To solve this, we need to use [`navigation.getParent`](navigation-object.md#getparent) to refer to the right drawer which is the parent of the left drawer. So our code would look like:
```js
```
However, this means that our button needs to know about the parent navigators, which isn't ideal. If our button is further nested inside other navigators, it'd need multiple `getParent()` calls. To address this, we can use the [`id` prop](navigator.md#id) to identify the parent navigator.
To customize the contents of the drawer, we can use the [`drawerContent` prop](drawer-navigator.md#drawercontent) to pass in a function that renders a custom component.
The final code would look like this:
```js name="Multiple drawers navigators" snack
import * as React from 'react';
import { Text, View } from 'react-native';
import { createDrawerNavigator } from '@react-navigation/drawer';
import {
createStaticNavigation,
useNavigation,
} from '@react-navigation/native';
import { Button } from '@react-navigation/elements';
function HomeScreen() {
const navigation = useNavigation();
return (
);
}
function RightDrawerContent() {
return (
This is the right drawer
);
}
const LeftDrawerScreen = createDrawerNavigator({
id: 'LeftDrawer',
screenOptions: {
drawerPosition: 'left',
},
screens: {
Home: HomeScreen,
},
});
const RightDrawerScreen = createDrawerNavigator({
id: 'RightDrawer',
drawerContent: (props) => ,
screenOptions: {
drawerPosition: 'right',
headerShown: false,
},
screens: {
HomeDrawer: LeftDrawerScreen,
},
});
const Navigation = createStaticNavigation(RightDrawerScreen);
export default function App() {
return ;
}
```
```js name="Multiple drawers navigators" snack
import * as React from 'react';
import { Text, View } from 'react-native';
import { createDrawerNavigator } from '@react-navigation/drawer';
import { NavigationContainer, useNavigation } from '@react-navigation/native';
import { Button } from '@react-navigation/elements';
function HomeScreen() {
const navigation = useNavigation();
return (
);
}
function RightDrawerContent() {
return (
This is the right drawer
);
}
const LeftDrawer = createDrawerNavigator();
function LeftDrawerScreen() {
return (
);
}
const RightDrawer = createDrawerNavigator();
function RightDrawerScreen() {
return (
}
screenOptions={{
drawerPosition: 'right',
headerShown: false,
}}
>
);
}
export default function App() {
return (
);
}
```
Here, we are passing `"LeftDrawer"` and `"RightDrawer"` strings (you can use any string here) in the `id` prop of the drawer navigators. Then we use `navigation.getParent('LeftDrawer').openDrawer()` to open the left drawer and `navigation.getParent('RightDrawer').openDrawer()` to open the right drawer.
## Summary
- To have multiple drawers, you can use [`react-native-drawer-layout`](drawer-layout.md) directly in combination with a drawer navigator.
- The [`drawerPosition`](drawer-layout.md#drawerposition) prop can be used to position the drawer on the right.
- The methods to control the drawer can be passed down using context API when using [`react-native-drawer-layout`](drawer-layout.md).
- When nesting multiple navigators, you can use [`navigation.getParent`](navigation-object.md#getparent) in combination with the [`id` prop](navigator.md#id) to refer to the desired drawer.
---
## Screen options with nested navigators
Source: https://reactnavigation.org/docs/screen-options-resolution
import Tabs from '@theme/Tabs';
import TabItem from '@theme/TabItem';
In this document we'll explain how [screen options](screen-options.md) work when there are multiple navigators. It's important to understand this so that you put your `options` in the correct place and can properly configure your navigators. If you put them in the wrong place, at best nothing will happen and at worst something confusing and unexpected will happen.
**You can only modify navigation options for a navigator from one of its screen components. This applies equally to navigators that are nested as screens.**
Let's take for example a tab navigator that contains a native stack in each tab. What happens if we set the `options` on a screen inside of the stack?
```js name="Tabs with native stack" snack
import * as React from 'react';
import { View } from 'react-native';
import { createStaticNavigation } from '@react-navigation/native';
import { createBottomTabNavigator } from '@react-navigation/bottom-tabs';
import { createNativeStackNavigator } from '@react-navigation/native-stack';
function A() {
return ;
}
function B() {
return ;
}
// codeblock-focus-start
const HomeStackScreen = createNativeStackNavigator({
screens: {
A: {
screen: A,
options: {
tabBarLabel: 'Home',
},
},
},
});
const SettingsStackScreen = createNativeStackNavigator({
screens: {
B: {
screen: B,
options: {
tabBarLabel: 'Settings!',
},
},
},
});
const Tab = createBottomTabNavigator({
screens: {
Home: HomeStackScreen,
Settings: SettingsStackScreen,
},
});
// codeblock-focus-end
const Navigation = createStaticNavigation(Tab);
export default function App() {
return ;
}
```
```js name="Tabs with native stack" snack
import * as React from 'react';
import { View } from 'react-native';
import { NavigationContainer } from '@react-navigation/native';
import { createBottomTabNavigator } from '@react-navigation/bottom-tabs';
import { createNativeStackNavigator } from '@react-navigation/native-stack';
const Tab = createBottomTabNavigator();
const HomeStack = createNativeStackNavigator();
const SettingsStack = createNativeStackNavigator();
function A() {
return ;
}
function B() {
return ;
}
// codeblock-focus-start
function HomeStackScreen() {
return (
);
}
function SettingsStackScreen() {
return (
);
}
export default function App() {
return (
);
}
// codeblock-focus-end
```
As we mentioned earlier, you can only modify navigation options for a navigator from one of its screen components. `A` and `B` above are screen components in `HomeStack` and `SettingsStack` respectively, not in the tab navigator. So the result will be that the `tabBarLabel` property is not applied to the tab navigator. We can fix this though!
```js name="Tabs with native stack" snack
import * as React from 'react';
import { View } from 'react-native';
import { createStaticNavigation } from '@react-navigation/native';
import { createBottomTabNavigator } from '@react-navigation/bottom-tabs';
import { createNativeStackNavigator } from '@react-navigation/native-stack';
function A() {
return ;
}
function B() {
return ;
}
const HomeStackScreen = createNativeStackNavigator({
screens: {
A: A,
},
});
const SettingsStackScreen = createNativeStackNavigator({
screens: {
B: B,
},
});
// codeblock-focus-start
const Tab = createBottomTabNavigator({
screens: {
Home: {
screen: HomeStackScreen,
options: {
tabBarLabel: 'Home!',
},
},
Settings: {
screen: SettingsStackScreen,
options: {
tabBarLabel: 'Settings!',
},
},
},
});
// codeblock-focus-start
const Navigation = createStaticNavigation(Tab);
export default function App() {
return ;
}
```
```js name="Tabs with native stack" snack
import * as React from 'react';
import { View } from 'react-native';
import { NavigationContainer } from '@react-navigation/native';
import { createBottomTabNavigator } from '@react-navigation/bottom-tabs';
import { createNativeStackNavigator } from '@react-navigation/native-stack';
const Tab = createBottomTabNavigator();
const HomeStack = createNativeStackNavigator();
const SettingsStack = createNativeStackNavigator();
function A() {
return ;
}
function B() {
return ;
}
function HomeStackScreen() {
return (
);
}
function SettingsStackScreen() {
return (
);
}
// codeblock-focus-start
export default function App() {
return (
);
}
// codeblock-focus-end
```
When we set the `options` directly on `Screen` components containing the `HomeStack` and `SettingsStack` component, it allows us to control the options for its parent navigator when its used as a screen component. In this case, the options on our stack components configure the label in the tab navigator that renders the stacks.
## Setting parent screen options based on child navigator's state
Imagine the following configuration:
```js name="Parent options from a child" snack
import * as React from 'react';
import { View } from 'react-native';
import {
createStaticNavigation,
useNavigation,
} from '@react-navigation/native';
import { createBottomTabNavigator } from '@react-navigation/bottom-tabs';
import { createNativeStackNavigator } from '@react-navigation/native-stack';
import { Button } from '@react-navigation/elements';
function FeedScreen() {
const navigation = useNavigation();
return (
);
}
function ProfileScreen() {
return ;
}
function AccountScreen() {
return ;
}
function SettingsScreen() {
return ;
}
// codeblock-focus-start
const HomeTabs = createBottomTabNavigator({
screens: {
Feed: FeedScreen,
Profile: ProfileScreen,
Account: AccountScreen,
},
});
const RootStack = createNativeStackNavigator({
screens: {
Home: HomeTabs,
Settings: SettingsScreen,
},
});
const Navigation = createStaticNavigation(RootStack);
export default function App() {
return ;
}
// codeblock-focus-end
```
```js name="Parent options from a child" snack
import * as React from 'react';
import { View } from 'react-native';
import { NavigationContainer, useNavigation } from '@react-navigation/native';
import { createBottomTabNavigator } from '@react-navigation/bottom-tabs';
import { createNativeStackNavigator } from '@react-navigation/native-stack';
import { Button } from '@react-navigation/elements';
function FeedScreen() {
const navigation = useNavigation();
return (
);
}
function ProfileScreen() {
return ;
}
function AccountScreen() {
return ;
}
function SettingsScreen() {
return ;
}
// codeblock-focus-start
const Tab = createBottomTabNavigator();
function HomeTabs() {
return (
);
}
const Stack = createNativeStackNavigator();
export default function App() {
return (
);
}
// codeblock-focus-end
```
If we were to set the `headerTitle` with `options` for the `FeedScreen`, this would not work. This is because `App` stack will only look at its immediate children for configuration: `HomeTabs` and `SettingsScreen`.
But we can determine the `headerTitle` option based on the [navigation state](navigation-state.md) of our tab navigator using the `getFocusedRouteNameFromRoute` helper. Let's create a function to get the title first:
```js
import { getFocusedRouteNameFromRoute } from '@react-navigation/native';
function getHeaderTitle(route) {
// If the focused route is not found, we need to assume it's the initial screen
// This can happen during if there hasn't been any navigation inside the screen
// In our case, it's "Feed" as that's the first screen inside the navigator
const routeName = getFocusedRouteNameFromRoute(route) ?? 'Feed';
switch (routeName) {
case 'Feed':
return 'News feed';
case 'Profile':
return 'My profile';
case 'Account':
return 'My account';
}
}
```
Then we can use this function with the `options` prop on `Screen`:
```js name="Parent options from a child" snack
import * as React from 'react';
import { View } from 'react-native';
import { getFocusedRouteNameFromRoute } from '@react-navigation/native';
import {
createStaticNavigation,
useNavigation,
} from '@react-navigation/native';
import { createBottomTabNavigator } from '@react-navigation/bottom-tabs';
import { createNativeStackNavigator } from '@react-navigation/native-stack';
import { Button } from '@react-navigation/elements';
function getHeaderTitle(route) {
// If the focused route is not found, we need to assume it's the initial screen
// This can happen during if there hasn't been any navigation inside the screen
// In our case, it's "Feed" as that's the first screen inside the navigator
const routeName = getFocusedRouteNameFromRoute(route) ?? 'Feed';
switch (routeName) {
case 'Feed':
return 'News feed';
case 'Profile':
return 'My profile';
case 'Account':
return 'My account';
}
}
function FeedScreen() {
const navigation = useNavigation();
return (
);
}
function ProfileScreen() {
return ;
}
function AccountScreen() {
return ;
}
function SettingsScreen() {
return ;
}
const HomeTabs = createBottomTabNavigator({
screenOptions: {
headerShown: false,
},
screens: {
Feed: FeedScreen,
Profile: ProfileScreen,
Account: AccountScreen,
},
});
// codeblock-focus-start
const RootStack = createNativeStackNavigator({
screens: {
Home: {
screen: HomeTabs,
options: ({ route }) => ({
headerTitle: getHeaderTitle(route),
}),
},
Settings: SettingsScreen,
},
});
// codeblock-focus-end
const Navigation = createStaticNavigation(RootStack);
export default function App() {
return ;
}
```
```js name="Parent options from a child" snack
import * as React from 'react';
import { View } from 'react-native';
import {
NavigationContainer,
useNavigation,
getFocusedRouteNameFromRoute,
} from '@react-navigation/native';
import { createBottomTabNavigator } from '@react-navigation/bottom-tabs';
import { createNativeStackNavigator } from '@react-navigation/native-stack';
import { Button } from '@react-navigation/elements';
function getHeaderTitle(route) {
// If the focused route is not found, we need to assume it's the initial screen
// This can happen during if there hasn't been any navigation inside the screen
// In our case, it's "Feed" as that's the first screen inside the navigator
const routeName = getFocusedRouteNameFromRoute(route) ?? 'Feed';
switch (routeName) {
case 'Feed':
return 'News feed';
case 'Profile':
return 'My profile';
case 'Account':
return 'My account';
}
}
function FeedScreen() {
const navigation = useNavigation();
return (
);
}
function ProfileScreen() {
return ;
}
function AccountScreen() {
return ;
}
function SettingsScreen() {
return ;
}
const Tab = createBottomTabNavigator();
function HomeTabs() {
return (
);
}
const Stack = createNativeStackNavigator();
export default function App() {
return (
// codeblock-focus-start
({
headerTitle: getHeaderTitle(route),
})}
/>
// codeblock-focus-end
);
}
```
So what's happening here? With the `getFocusedRouteNameFromRoute` helper, we can get the currently active route name from this child navigator (in this case it's the tab navigator since that's what we're rendering) and setting an appropriate title for the header.
This approach can be used anytime you want to set options for a parent navigator based on a child navigator's state. Common use cases are:
1. Show tab title in stack header: a stack contains a tab navigator and you want to set the title on the stack header (above example)
2. Show screens without tab bar: a tab navigator contains a stack and you want to hide the tab bar on specific screens (not recommended, see [Hiding tab bar in specific screens](hiding-tabbar-in-screens.md) instead)
3. Lock drawer on certain screens: a drawer has a stack inside of it and you want to lock the drawer on certain screens
In many cases, similar behavior can be achieved by reorganizing our navigators. We usually recommend this option if it fits your use case.
For example, for the above use case, instead of adding a tab navigator inside a stack navigator, we can add a stack navigator inside each of the tabs.
```js name="Reorganized navigators" snack
import * as React from 'react';
import { View } from 'react-native';
import {
createStaticNavigation,
useNavigation,
} from '@react-navigation/native';
import { createBottomTabNavigator } from '@react-navigation/bottom-tabs';
import { createNativeStackNavigator } from '@react-navigation/native-stack';
import { Button } from '@react-navigation/elements';
function FeedScreen() {
const navigation = useNavigation();
return (
);
}
function ProfileScreen() {
return ;
}
function SettingsScreen() {
return ;
}
// codeblock-focus-start
const FeedStackScreen = createNativeStackNavigator({
screens: {
Feed: FeedScreen,
/* other screens */
},
});
const ProfileStackScreen = createNativeStackNavigator({
screens: {
Profile: ProfileScreen,
/* other screens */
},
});
const HomeTabs = createBottomTabNavigator({
screens: {
Feed: FeedStackScreen,
Profile: ProfileStackScreen,
},
});
const RootStack = createNativeStackNavigator({
screens: {
Home: HomeTabs,
Settings: SettingsScreen,
},
});
const Navigation = createStaticNavigation(RootStack);
export default function App() {
return ;
}
// codeblock-focus-end
```
```js name="Reorganized navigators" snack
import * as React from 'react';
import { View } from 'react-native';
import { NavigationContainer, useNavigation } from '@react-navigation/native';
import { createBottomTabNavigator } from '@react-navigation/bottom-tabs';
import { createNativeStackNavigator } from '@react-navigation/native-stack';
import { Button } from '@react-navigation/elements';
function FeedScreen() {
const navigation = useNavigation();
return (
);
}
function ProfileScreen() {
return ;
}
function SettingsScreen() {
return ;
}
const FeedStack = createNativeStackNavigator();
// codeblock-focus-start
function FeedStackScreen() {
return (
{/* other screens */}
);
}
const ProfileStack = createNativeStackNavigator();
function ProfileStackScreen() {
return (
{/* other screens */}
);
}
const Tab = createBottomTabNavigator();
function HomeTabs() {
return (
);
}
const RootStack = createNativeStackNavigator();
export default function App() {
return (
);
}
// codeblock-focus-end
```
Additionally, this lets you push new screens to the feed and profile stacks without hiding the tab bar by adding more routes to those stacks.
If you want to push screens on top of the tab bar (i.e. that don't show the tab bar), then you can add them to the `App` stack instead of adding them into the screens inside the tab navigator.
---
## Custom Android back button behavior
Source: https://reactnavigation.org/docs/custom-android-back-button-handling
import Tabs from '@theme/Tabs';
import TabItem from '@theme/TabItem';
By default, when user presses the Android hardware back button, react-navigation will pop a screen or exit the app if there are no screens to pop. This is a sensible default behavior, but there are situations when you might want to implement custom handling.
As an example, consider a screen where user is selecting items in a list, and a "selection mode" is active. On a back button press, you would first want the "selection mode" to be deactivated, and the screen should be popped only on the second back button press. The following code snippet demonstrates the situation. We make use of [`BackHandler`](https://reactnative.dev/docs/backhandler.html) which comes with react-native, along with the `useFocusEffect` hook to add our custom `hardwareBackPress` listener.
Returning `true` from `onBackPress` denotes that we have handled the event, and react-navigation's listener will not get called, thus not popping the screen. Returning `false` will cause the event to bubble up and react-navigation's listener will pop the screen.
```js name="Custom android back button" snack
import * as React from 'react';
import { Text, View, BackHandler, StyleSheet } from 'react-native';
import { createStaticNavigation } from '@react-navigation/native';
import { useFocusEffect } from '@react-navigation/native';
import { createNativeStackNavigator } from '@react-navigation/native-stack';
import { PlatformPressable, Button } from '@react-navigation/elements';
const listData = [{ key: 'Apple' }, { key: 'Orange' }, { key: 'Carrot' }];
// codeblock-focus-start
function ScreenWithCustomBackBehavior() {
// codeblock-focus-end
const [selected, setSelected] = React.useState(listData[0].key);
const [isSelectionModeEnabled, setIsSelectionModeEnabled] =
React.useState(false);
// codeblock-focus-start
// ...
useFocusEffect(
React.useCallback(() => {
const onBackPress = () => {
if (isSelectionModeEnabled) {
setIsSelectionModeEnabled(false);
return true;
} else {
return false;
}
};
const subscription = BackHandler.addEventListener(
'hardwareBackPress',
onBackPress
);
return () => subscription.remove();
}, [isSelectionModeEnabled])
);
// codeblock-focus-end
return (
{listData.map((item) => (
<>
{isSelectionModeEnabled ? (
{
setSelected(item.key);
}}
style={{
textDecorationLine: item.key === selected ? 'underline' : '',
}}
>
{item.key}
) : (
{item.key === selected ? 'Selected: ' : ''}
{item.key}
)}
))}
Selection mode: {isSelectionModeEnabled ? 'ON' : 'OFF'}
);
// codeblock-focus-start
// ...
}
// codeblock-focus-end
const RootStack = createNativeStackNavigator({
screens: {
CustomScreen: ScreenWithCustomBackBehavior,
},
});
const Navigation = createStaticNavigation(RootStack);
export default function App() {
return ;
}
const styles = StyleSheet.create({
container: {
flex: 1,
alignItems: 'center',
justifyContent: 'center',
},
text: {
fontSize: 20,
marginBottom: 20,
},
});
```
```js name="Custom android back button" snack
import * as React from 'react';
import { Text, View, BackHandler, StyleSheet } from 'react-native';
import { NavigationContainer } from '@react-navigation/native';
import { useFocusEffect } from '@react-navigation/native';
import { createNativeStackNavigator } from '@react-navigation/native-stack';
import { PlatformPressable, Button } from '@react-navigation/elements';
const Stack = createNativeStackNavigator();
const listData = [{ key: 'Apple' }, { key: 'Orange' }, { key: 'Carrot' }];
// codeblock-focus-start
function ScreenWithCustomBackBehavior() {
// codeblock-focus-end
const [selected, setSelected] = React.useState(listData[0].key);
const [isSelectionModeEnabled, setIsSelectionModeEnabled] =
React.useState(false);
// codeblock-focus-start
// ...
useFocusEffect(
React.useCallback(() => {
const onBackPress = () => {
if (isSelectionModeEnabled) {
setIsSelectionModeEnabled(false);
return true;
} else {
return false;
}
};
const subscription = BackHandler.addEventListener(
'hardwareBackPress',
onBackPress
);
return () => subscription.remove();
}, [isSelectionModeEnabled])
);
// codeblock-focus-end
return (
{listData.map((item) => (
<>
{isSelectionModeEnabled ? (
{
setSelected(item.key);
}}
style={{
textDecorationLine: item.key === selected ? 'underline' : '',
}}
>
{item.key}
) : (
{item.key === selected ? 'Selected: ' : ''}
{item.key}
)}
))}
Selection mode: {isSelectionModeEnabled ? 'ON' : 'OFF'}
);
// codeblock-focus-start
// ...
}
// codeblock-focus-end
export default function App() {
return (
);
}
const styles = StyleSheet.create({
container: {
flex: 1,
alignItems: 'center',
justifyContent: 'center',
},
text: {
fontSize: 20,
marginBottom: 20,
},
});
```
The presented approach will work well for screens that are shown in a `StackNavigator`. Custom back button handling in other situations may not be supported at the moment (eg. A known case when this does not work is when you want to handle back button press in an open drawer. PRs for such use cases are welcome!).
If instead of overriding system back button, you'd like to prevent going back from the screen, see docs for [preventing going back](preventing-going-back.md).
## Why not use component lifecycle methods
At first, you may be inclined to use `componentDidMount` to subscribe for the back press event and `componentWillUnmount` to unsubscribe, or use `useEffect` to add the listener. This approach will not work - learn more about this in [navigation lifecycle](navigation-lifecycle.md).
---
## Animating elements between screens
Source: https://reactnavigation.org/docs/shared-element-transitions
import Tabs from '@theme/Tabs';
import TabItem from '@theme/TabItem';
This guide covers how to animate elements between screens. This feature is known as a [Shared Element Transition](https://docs.swmansion.com/react-native-reanimated/docs/shared-element-transitions/overview/) and it's implemented in the [`@react-navigation/native-stack`](native-stack-navigator.md) with [React Native Reanimated](https://docs.swmansion.com/react-native-reanimated/).
:::warning
Shared Element Transitions are an experimental feature not recommended for production use yet.
**Architecture support:**
- **Reanimated 3** supports Shared Element Transitions on the **Old Architecture** (Paper).
- **Reanimated 4** supports them on the **New Architecture** (Fabric) since **4.2.0**, but the feature is behind a feature flag. You need to [enable the `ENABLE_SHARED_ELEMENT_TRANSITIONS` feature flag](https://docs.swmansion.com/react-native-reanimated/docs/guides/feature-flags#enable_shared_element_transitions) to use it.
Check [the Reanimated documentation](https://docs.swmansion.com/react-native-reanimated/docs/shared-element-transitions/overview/) for details and [send feedback to the Reanimated team](https://github.com/software-mansion/react-native-reanimated)
:::
## Pre-requisites
Before continuing this guide make sure your app meets these criteria:
- You are using [`@react-navigation/native-stack`](native-stack-navigator.md). JS-based [`@react-navigation/stack`](stack-navigator.md) or other navigators are not supported.
- You have [`react-native-reanimated`](https://docs.swmansion.com/react-native-reanimated/docs/fundamentals/getting-started) **v3.0.0 or higher** installed and configured.
- If you are using **Reanimated 4** (New Architecture), you must [enable the `ENABLE_SHARED_ELEMENT_TRANSITIONS` feature flag](https://docs.swmansion.com/react-native-reanimated/docs/guides/feature-flags#enable_shared_element_transitions).
## Minimal example
To create a shared transition:
1. Use `Animated` components imported from `react-native-reanimated`.
2. Assign the same `sharedTransitionTag` to elements on different screens.
3. Navigate between screens. The transition will start automatically.
```js static2dynamic name="Shared transition"
import * as React from 'react';
import { View, StyleSheet } from 'react-native';
import {
useNavigation,
createStaticNavigation,
} from '@react-navigation/native';
import { createNativeStackNavigator } from '@react-navigation/native-stack';
import { Button } from '@react-navigation/elements';
import Animated from 'react-native-reanimated';
// codeblock-focus-start
function HomeScreen() {
const navigation = useNavigation();
return (
);
}
function DetailsScreen() {
const navigation = useNavigation();
return (
);
}
// codeblock-focus-end
const RootStack = createNativeStackNavigator({
screens: {
Home: HomeScreen,
Details: DetailsScreen,
},
});
const Navigation = createStaticNavigation(RootStack);
export default function App() {
return ;
}
const styles = StyleSheet.create({
container: {
flex: 1,
alignItems: 'center',
},
});
```
`sharedTransitionTag` is a string that has to be unique in the context of a single screen, but has to match elements between screens. This prop allows Reanimated to identify and animate the elements, similarly to the [`key`](https://react.dev/learn/rendering-lists#keeping-list-items-in-order-with-key) property, which tells React which element in the list is which.
## Customizing the transition
You can customize the transition by passing a custom `SharedTransition` configuration via the `sharedTransitionStyle` prop. Apply the same `sharedTransitionStyle` to the matching element on the target screen.
Custom transition configuration is not fully finalized and might change in a future release.
On the New Architecture, the default transition animates `width`, `height`, `originX`, `originY`, `transform`, `backgroundColor`, and `opacity` using `withTiming` with a 500 ms duration.
Currently customization is more limited due to ongoing development. You can't define fully custom animation functions. Instead, use the `SharedTransition` builder class to configure duration and spring-based animations:
```jsx
import { SharedTransition } from 'react-native-reanimated';
// Customize duration and use spring animation
// highlight-next-line
const customTransition = SharedTransition.duration(550).springify();
function HomeScreen() {
return (
);
}
```
By default, the transition animates `width`, `height`, `originX`, `originY`, and `transform` using `withTiming` with a 500 ms duration. You can customize the transition using `SharedTransition.custom()`:
```jsx
import { SharedTransition, withSpring } from 'react-native-reanimated';
// highlight-start
const customTransition = SharedTransition.custom((values) => {
'worklet';
return {
height: withSpring(values.targetHeight),
width: withSpring(values.targetWidth),
originX: withSpring(values.targetOriginX),
originY: withSpring(values.targetOriginY),
};
});
// highlight-end
function HomeScreen() {
return (
);
}
```
## Reference
You can find a full Shared Element Transitions reference in the [React Native Reanimated documentation](https://docs.swmansion.com/react-native-reanimated/docs/shared-element-transitions/overview/).
## Limitations
Shared Element Transitions currently have several limitations to be aware of:
- Only the [native stack navigator](native-stack-navigator.md) is supported
- Other navigators such as JS stack, drawer, and bottom tabs are not supported
- Transitions with native modals don't work properly on iOS
### New Architecture specific limitations (Reanimated 4)
The following limitations apply specifically when using Reanimated 4 on the New Architecture:
- The feature must be enabled via the `ENABLE_SHARED_ELEMENT_TRANSITIONS` feature flag
- Custom animation functions are not supported; you can only customize duration and use spring-based animations
- Some properties (e.g., `backgroundColor`) are not supported in progress-based transitions (iOS back gesture)
- There are performance bottlenecks with transforms being recalculated too eagerly
- On iOS, you may encounter issues with vertical positioning due to header height information propagation
The limitations will be addressed in future Reanimated releases.
---
## Preventing going back
Source: https://reactnavigation.org/docs/preventing-going-back
import Tabs from '@theme/Tabs';
import TabItem from '@theme/TabItem';
Sometimes you may want to prevent the user from leaving a screen to avoid losing unsaved changes. There are a couple of things you may want to do in this case:
## Prevent the user from leaving the screen
The `usePreventRemove` hook allows you to prevent the user from leaving a screen. See the [`usePreventRemove`](use-prevent-remove.md) docs for more details.
Previous approach
Previously, the way to do this was to:
- Override the back button in the header
- Disable back swipe gesture
- Override system back button/gesture on Android
However, using the hook has many important differences in addition to being less code:
- It's not coupled to any specific buttons, going back from custom buttons will trigger it as well
- It's not coupled to any specific actions, any action that removes the route from the state will trigger it
- It works across nested navigators, e.g. if the screen is being removed due to an action in the parent navigator
- The user can still swipe back in the stack navigator, however, the swipe will be canceled if the event is prevented
- It's possible to continue the same action that triggered the event
## Prevent the user from leaving the app
To be able to prompt the user before they leave the app on Android, you can use the `BackHandler` API from React Native:
```js
import { Alert, BackHandler } from 'react-native';
// ...
React.useEffect(() => {
const onBackPress = () => {
Alert.alert(
'Exit App',
'Do you want to exit?',
[
{
text: 'Cancel',
onPress: () => {
// Do nothing
},
style: 'cancel',
},
{ text: 'YES', onPress: () => BackHandler.exitApp() },
],
{ cancelable: false }
);
return true;
};
const backHandler = BackHandler.addEventListener(
'hardwareBackPress',
onBackPress
);
return () => backHandler.remove();
}, []);
```
On the Web, you can use the `beforeunload` event to prompt the user before they leave the browser tab:
```js
React.useEffect(() => {
const onBeforeUnload = (event) => {
// Prevent the user from leaving the page
event.preventDefault();
event.returnValue = true;
};
window.addEventListener('beforeunload', onBeforeUnload);
return () => {
window.removeEventListener('beforeunload', onBeforeUnload);
};
}, []);
```
:::warning
The user can still close the app by swiping it away from the app switcher or closing the browser tab. Or the app can be closed by the system due to low memory or other reasons. It's also not possible to prevent leaving the app on iOS. We recommend persisting the data and restoring it when the app is opened again instead of prompting the user before they leave the app.
:::
---
## Call a function when focused screen changes
Source: https://reactnavigation.org/docs/function-after-focusing-screen
import Tabs from '@theme/Tabs';
import TabItem from '@theme/TabItem';
In this guide we will call a function or render something on screen focusing. This is useful for making additional API calls when a user revisits a particular screen in a Tab Navigator, or to track user events as they tap around our app.
There are multiple approaches available to us:
1. Listening to the `'focus'` event with an event listener.
2. Using the `useFocusEffect` hook provided by react-navigation.
3. Using the `useIsFocused` hook provided by react-navigation.
## Triggering an action with a `'focus'` event listener
We can also listen to the `'focus'` event with an event listener. After setting up an event listener, we must also stop listening to the event when the screen is unmounted.
With this approach, we will only be able to call an action when the screen focuses. This is useful for performing an action such as logging the screen view for analytics.
Example:
```js name="Focus event listener" snack
// codeblock-focus-start
import * as React from 'react';
import { View } from 'react-native';
// codeblock-focus-end
import {
useNavigation,
createStaticNavigation,
} from '@react-navigation/native';
import { createBottomTabNavigator } from '@react-navigation/bottom-tabs';
// codeblock-focus-start
function ProfileScreen() {
const navigation = useNavigation();
React.useEffect(() => {
const unsubscribe = navigation.addListener('focus', () => {
alert('Screen is focused');
// The screen is focused
// Call any action
});
// Return the function to unsubscribe from the event so it gets removed on unmount
return unsubscribe;
}, [navigation]);
return ;
}
// codeblock-focus-end
function HomeScreen() {
return ;
}
const MyTabs = createBottomTabNavigator({
screens: {
Home: HomeScreen,
Profile: ProfileScreen,
},
});
const Navigation = createStaticNavigation(MyTabs);
export default function App() {
return ;
}
```
```js name="Focus event listener" snack
// codeblock-focus-start
import * as React from 'react';
import { View } from 'react-native';
// codeblock-focus-end
import { NavigationContainer, useNavigation } from '@react-navigation/native';
import { createBottomTabNavigator } from '@react-navigation/bottom-tabs';
// codeblock-focus-start
function ProfileScreen() {
const navigation = useNavigation();
React.useEffect(() => {
const unsubscribe = navigation.addListener('focus', () => {
alert('Screen is focused');
// The screen is focused
// Call any action
});
// Return the function to unsubscribe from the event so it gets removed on unmount
return unsubscribe;
}, [navigation]);
return ;
}
// codeblock-focus-end
function HomeScreen() {
return ;
}
const Tab = createBottomTabNavigator();
export default function App() {
return (
);
}
```
See the [navigation events guide](navigation-events.md) for more details on the event listener API.
In most cases, it's recommended to use the `useFocusEffect` hook instead of adding the listener manually. See below for details.
## Triggering an action with the `useFocusEffect` hook
React Navigation provides a [hook](use-focus-effect.md) that runs an effect when the screen comes into focus and cleans it up when it goes out of focus. This is useful for cases such as adding event listeners, for fetching data with an API call when a screen becomes focused, or any other action that needs to happen once the screen comes into view.
This is particularly handy when we are trying to stop something when the page is unfocused, like stopping a video or audio file from playing, or stopping the tracking of a user's location.
```js name="useFocusEffect hook" snack
import * as React from 'react';
import { View } from 'react-native';
import {
useFocusEffect,
createStaticNavigation,
} from '@react-navigation/native';
import { createBottomTabNavigator } from '@react-navigation/bottom-tabs';
// codeblock-focus-start
function ProfileScreen() {
useFocusEffect(
React.useCallback(() => {
alert('Screen was focused');
// Do something when the screen is focused
return () => {
alert('Screen was unfocused');
// Do something when the screen is unfocused
// Useful for cleanup functions
};
}, [])
);
return ;
}
// codeblock-focus-end
function HomeScreen() {
return ;
}
const MyTabs = createBottomTabNavigator({
screens: {
Home: HomeScreen,
Profile: ProfileScreen,
},
});
const Navigation = createStaticNavigation(MyTabs);
export default function App() {
return ;
}
```
```js name="useFocusEffect hook" snack
import * as React from 'react';
import { View } from 'react-native';
import { NavigationContainer, useFocusEffect } from '@react-navigation/native';
import { createBottomTabNavigator } from '@react-navigation/bottom-tabs';
// codeblock-focus-start
function ProfileScreen() {
useFocusEffect(
React.useCallback(() => {
alert('Screen was focused');
// Do something when the screen is focused
return () => {
alert('Screen was unfocused');
// Do something when the screen is unfocused
// Useful for cleanup functions
};
}, [])
);
return ;
}
// codeblock-focus-end
function HomeScreen() {
return ;
}
const Tab = createBottomTabNavigator();
export default function App() {
return (
);
}
```
See the [`useFocusEffect`](https://reactnavigation.org/docs/use-focus-effect/) documentation for more details.
## Re-rendering screen with the `useIsFocused` hook
React Navigation provides a [hook](use-is-focused.md) that returns a boolean indicating whether the screen is focused or not.
The hook will return `true` when the screen is focused and `false` when our component is no longer focused. This enables us to render something conditionally based on whether the user is on the screen or not.
The `useIsFocused` hook will cause our component to re-render when we focus and unfocus a screen. Using this hook component may introduce unnecessary component re-renders as a screen comes in and out of focus. This could cause issues depending on the type of action we're calling on focusing. Hence we recommend to use this hook only if you need to trigger a re-render. For side-effects such as subscribing to events or fetching data, use the methods described above.
```js name="useIsFocused hook" snack
import * as React from 'react';
import { View, Text } from 'react-native';
import { useIsFocused, createStaticNavigation } from '@react-navigation/native';
import { createMaterialTopTabNavigator } from '@react-navigation/material-top-tabs';
// codeblock-focus-start
function ProfileScreen() {
// codeblock-focus-end
// This hook returns `true` if the screen is focused, `false` otherwise
// codeblock-focus-start
const isFocused = useIsFocused();
return (
{isFocused ? 'focused' : 'unfocused'}
);
}
// codeblock-focus-end
function HomeScreen() {
return ;
}
const MyTabs = createMaterialTopTabNavigator({
screens: {
Home: HomeScreen,
Profile: ProfileScreen,
},
});
const Navigation = createStaticNavigation(MyTabs);
export default function App() {
return ;
}
```
```js name="useIsFocused hook" snack
import * as React from 'react';
import { View, Text } from 'react-native';
import { NavigationContainer, useIsFocused } from '@react-navigation/native';
import { createMaterialTopTabNavigator } from '@react-navigation/material-top-tabs';
// codeblock-focus-start
function ProfileScreen() {
// codeblock-focus-end
// This hook returns `true` if the screen is focused, `false` otherwise
// codeblock-focus-start
const isFocused = useIsFocused();
return (
{isFocused ? 'focused' : 'unfocused'}
);
}
// codeblock-focus-end
function HomeScreen() {
return ;
}
const Tab = createMaterialTopTabNavigator();
export default function App() {
return (
);
}
```
This example is also documented in the [`useIsFocused` API documentation](use-is-focused.md).
---
## Navigating without the navigation prop
Source: https://reactnavigation.org/docs/navigating-without-navigation-prop
import Tabs from '@theme/Tabs';
import TabItem from '@theme/TabItem';
Sometimes you need to trigger a navigation action from places where you do not have access to the `navigation` object, such as a Redux middleware. For such cases, you can dispatch navigation actions use a [`ref` on the navigation container](navigation-container.md#ref).
**Do not** use the `ref` if:
- You need to navigate from inside a component without needing to pass the `navigation` prop down, see [`useNavigation`](use-navigation.md) instead. The `ref` behaves differently, and many helper methods specific to screens aren't available.
- You need to handle deep links or universal links. Doing this with the `ref` has many edge cases. See [configuring links](configuring-links.md) for more information on handling deep linking.
- You need to integrate with third party libraries, such as push notifications, branch etc. See [Integrating with other tools](deep-linking.md#integrating-with-other-tools) instead.
**Do** use the `ref` if:
- You use a state management library such as Redux, where you need to dispatch navigation actions from a middleware.
Note that it's usually better to trigger navigation from user actions such as button presses, rather than from a Redux middleware. Navigating on user action makes the app feel more responsive and provides better UX. So consider this before using the `ref` for navigation. The `ref` is an escape hatch for scenarios that can't be handled with the existing APIs and should only be used in rare situations.
## Usage
You can get access to the root navigation object through a `ref` and pass it to the `RootNavigation` which we will later use to navigate.
```js
import { createStaticNavigation } from '@react-navigation/native';
import { navigationRef } from './RootNavigation';
/* ... */
const Navigation = createStaticNavigation(RootStack);
export default function App() {
return ;
}
```
```js
import { NavigationContainer } from '@react-navigation/native';
import { navigationRef } from './RootNavigation';
export default function App() {
return (
{/* ... */}
);
}
```
In the next step, we define `RootNavigation`, which is a simple module with functions that dispatch user-defined navigation actions.
```js
// RootNavigation.js
import { createNavigationContainerRef } from '@react-navigation/native';
export const navigationRef = createNavigationContainerRef();
export function navigate(name, params) {
if (navigationRef.isReady()) {
navigationRef.navigate(name, params);
}
}
// add other navigation functions that you need and export them
```
Then, in any of your javascript modules, import the `RootNavigation` and call functions which you exported from it. You may use this approach outside of your React components and, in fact, it works as well when used from within them.
```js name="Using navigate in any js module" snack
import * as React from 'react';
import { View, Text } from 'react-native';
import {
createStaticNavigation,
createNavigationContainerRef,
} from '@react-navigation/native';
import { createNativeStackNavigator } from '@react-navigation/native-stack';
import { Button } from '@react-navigation/elements';
const navigationRef = createNavigationContainerRef();
// codeblock-focus-start
function navigate(name, params) {
if (navigationRef.isReady()) {
navigationRef.navigate(name, params);
}
}
// Example of usage in any of js modules
//import * as RootNavigation from './path/to/RootNavigation.js';
// ...
// RootNavigation.navigate('ChatScreen', { userName: 'Lucy' });
function Home() {
return (
);
}
// codeblock-focus-end
function Settings({ route }) {
return (
Hello {route.params.userName}
);
}
const RootStack = createNativeStackNavigator({
screens: {
Home: Home,
Settings: Settings,
},
});
const Navigation = createStaticNavigation(RootStack);
export default function App() {
return ;
}
```
```js name="Using navigate in any js module" snack
import * as React from 'react';
import { View, Text } from 'react-native';
import {
NavigationContainer,
createNavigationContainerRef,
} from '@react-navigation/native';
import { createNativeStackNavigator } from '@react-navigation/native-stack';
import { Button } from '@react-navigation/elements';
const navigationRef = createNavigationContainerRef();
// codeblock-focus-start
function navigate(name, params) {
if (navigationRef.isReady()) {
navigationRef.navigate(name, params);
}
}
// Example of usage in any of js modules
//import * as RootNavigation from './path/to/RootNavigation.js';
// ...
// RootNavigation.navigate('ChatScreen', { userName: 'Lucy' });
function Home() {
return (
);
}
// codeblock-focus-end
function Settings({ route }) {
return (
Hello {route.params.userName}
);
}
const RootStack = createNativeStackNavigator();
export default function App() {
return (
);
}
```
Apart from `navigate`, you can add other navigation actions:
```js
import { StackActions } from '@react-navigation/native';
// ...
export function push(...args) {
if (navigationRef.isReady()) {
navigationRef.dispatch(StackActions.push(...args));
}
}
```
Note that a stack navigators needs to be rendered to handle this action. You may want to check the [docs for nesting](nesting-navigators.md#navigating-to-a-screen-in-a-nested-navigator) for more details.
When writing tests, you may mock the navigation functions, and make assertions on whether the correct functions are called with the correct parameters.
## Handling initialization
When using this pattern, you need to keep few things in mind to avoid navigation from failing in your app.
- The `ref` is set only after the navigation container renders, this can be async when handling deep links
- A navigator needs to be rendered to be able to handle actions, the `ref` won't be ready without a navigator
If you try to navigate without rendering a navigator or before the navigator finishes mounting, it will print an error and do nothing. So you'll need to add an additional check to decide what to do until your app mounts.
For an example, consider the following scenario, you have a screen somewhere in the app, and that screen dispatches a redux action on `useEffect`/`componentDidMount`. You are listening for this action in your middleware and try to perform navigation when you get it. This will throw an error, because by this time, the parent navigator hasn't finished mounting and isn't ready. Parent's `useEffect`/`componentDidMount` is always called **after** child's `useEffect`/`componentDidMount`.
To avoid this, you can use the `isReady()` method available on the ref as shown in the above examples.
```js name="Handling navigation init" snack
import * as React from 'react';
import { Text, View } from 'react-native';
import {
createStaticNavigation,
createNavigationContainerRef,
} from '@react-navigation/native';
import { createNativeStackNavigator } from '@react-navigation/native-stack';
import { Button } from '@react-navigation/elements';
// codeblock-focus-start
const navigationRef = createNavigationContainerRef();
function navigate(name, params) {
if (navigationRef.isReady()) {
// Perform navigation if the react navigation is ready to handle actions
navigationRef.navigate(name, params);
} else {
// You can decide what to do if react navigation is not ready
// You can ignore this, or add these actions to a queue you can call later
}
}
// codeblock-focus-end
function Home() {
return (
Home
);
}
function Profile() {
return (
Profile
);
}
const RootStack = createNativeStackNavigator({
screens: {
Home: Home,
Profile: Profile,
},
});
const Navigation = createStaticNavigation(RootStack);
export default function App() {
return ;
}
```
```js name="Handling navigation init" snack
import * as React from 'react';
import { Text, View } from 'react-native';
import {
NavigationContainer,
createNavigationContainerRef,
} from '@react-navigation/native';
import { createNativeStackNavigator } from '@react-navigation/native-stack';
import { Button } from '@react-navigation/elements';
const Stack = createNativeStackNavigator();
// codeblock-focus-start
const navigationRef = createNavigationContainerRef();
function navigate(name, params) {
if (navigationRef.isReady()) {
// Perform navigation if the react navigation is ready to handle actions
navigationRef.navigate(name, params);
} else {
// You can decide what to do if react navigation is not ready
// You can ignore this, or add these actions to a queue you can call later
}
}
// codeblock-focus-end
function Home() {
return (
Home
);
}
function Profile() {
return (
Profile
);
}
export default function App() {
return (
);
}
```
If you're unsure if a navigator is rendered, you can call `navigationRef.current.getRootState()`, and it'll return a valid state object if any navigators are rendered, otherwise it will return `undefined`.
---
## Deep linking
Source: https://reactnavigation.org/docs/deep-linking
import Tabs from '@theme/Tabs';
import TabItem from '@theme/TabItem';
This guide will describe how to configure your app to handle deep links on various platforms. To handle incoming links, you need to handle 2 scenarios:
1. If the app wasn't previously open, the deep link needs to set the initial state
2. If the app was already open, the deep link needs to update the state to reflect the incoming link
React Native provides a [`Linking`](https://reactnative.dev/docs/linking) to get notified of incoming links. React Navigation can integrate with the `Linking` module to automatically handle deep links. On Web, React Navigation can integrate with browser's `history` API to handle URLs on client side. See [configuring links](configuring-links.md) to see more details on how to configure links in React Navigation.
While you don't need to use the `linking` prop from React Navigation, and can handle deep links yourself by using the `Linking` API and navigating from there, it'll be significantly more complicated than using the `linking` prop which handles many edge cases for you. So we don't recommend implementing it by yourself.
Below, we'll go through required configurations so that the deep link integration works.
## Setting up deep links
### Configuring URL scheme
First, you will want to specify a URL scheme for your app. This corresponds to the string before `://` in a URL, so if your scheme is `example` then a link to your app would be `example://`. You can register for a scheme in your `app.json` by adding a string under the scheme key:
```json
{
"expo": {
"scheme": "example"
}
}
```
Next, install `expo-linking` which we'd need to get the deep link prefix:
```bash
npx expo install expo-linking
```
Then you can use `Linking.createURL` to get the prefix for your app:
```js
const linking = {
prefixes: [Linking.createURL('/'),
};
```
See more details below at [Configuring React Navigation](#configuring-react-navigation).
Why use `Linking.createURL`?
It is necessary to use `Linking.createURL` since the scheme differs between the [Expo Dev Client](https://docs.expo.dev/versions/latest/sdk/dev-client/) and standalone apps.
The scheme specified in `app.json` only applies to standalone apps. In the Expo client app you can deep link using `exp://ADDRESS:PORT/--/` where `ADDRESS` is often `127.0.0.1` and `PORT` is often `19000` - the URL is printed when you run `expo start`. The `Linking.createURL` function abstracts it out so that you don't need to specify them manually.
If you are using universal links, you need to add your domain to the prefixes as well:
```js
const linking = {
prefixes: [Linking.createURL('/'), 'https://app.example.com'],
};
```
### Universal Links on iOS
To set up iOS universal Links in your Expo app, you need to configure your [app config](https://docs.expo.dev/workflow/configuration) to include the associated domains and entitlements:
```json
{
"expo": {
"ios": {
"associatedDomains": ["applinks:app.example.com"],
"entitlements": {
"com.apple.developer.associated-domains": ["applinks:app.example.com"]
}
}
}
}
```
You will also need to setup [Associated Domains](https://developer.apple.com/documentation/Xcode/supporting-associated-domains) on your server.
See [Expo's documentation on iOS Universal Links](https://docs.expo.dev/linking/ios-universal-links/) for more details.
### App Links on Android
To set up Android App Links in your Expo app, you need to configure your [app config](https://docs.expo.dev/workflow/configuration) to include the `intentFilters`:
```json
{
"expo": {
"android": {
"intentFilters": [
{
"action": "VIEW",
"autoVerify": true,
"data": [
{
"scheme": "https",
"host": "app.example.com"
}
],
"category": ["BROWSABLE", "DEFAULT"]
}
]
}
}
}
```
You will also need to [declare the association](https://developer.android.com/training/app-links/verify-android-applinks#web-assoc) between your website and your intent filters by hosting a Digital Asset Links JSON file.
See [Expo's documentation on Android App Links](https://docs.expo.dev/linking/android-app-links/) for more details.
### Setup on iOS
Let's configure the native iOS app to open based on the `example://` URI scheme.
You'll need to add the `LinkingIOS` folder into your header search paths as described [here](https://reactnative.dev/docs/linking-libraries-ios#step-3). Then you'll need to add the following lines to your or `AppDelegate.swift` or `AppDelegate.mm` file:
```swift
func application(_ app: UIApplication, open url: URL, options: [UIApplication.OpenURLOptionsKey : Any] = [:]) -> Bool {
return RCTLinkingManager.application(app, open: url, options: options)
}
```
```objc
#import
- (BOOL)application:(UIApplication *)application
openURL:(NSURL *)url
options:(NSDictionary *)options
{
return [RCTLinkingManager application:application openURL:url options:options];
}
```
If your app is using [Universal Links](https://developer.apple.com/ios/universal-links/), you'll need to add the following code as well:
```swift
func application(
_ application: UIApplication,
continue userActivity: NSUserActivity,
restorationHandler: @escaping ([UIUserActivityRestoring]?) -> Void) -> Bool {
return RCTLinkingManager.application(
application,
continue: userActivity,
restorationHandler: restorationHandler
)
}
```
```objc
- (BOOL)application:(UIApplication *)application continueUserActivity:(nonnull NSUserActivity *)userActivity
restorationHandler:(nonnull void (^)(NSArray> * _Nullable))restorationHandler
{
return [RCTLinkingManager application:application
continueUserActivity:userActivity
restorationHandler:restorationHandler];
}
```
Now you need to add the scheme to your project configuration.
The easiest way to do this is with the `uri-scheme` package by running the following:
```bash
npx uri-scheme add example --ios
```
If you want to do it manually, open the project (e.g. `SimpleApp/ios/SimpleApp.xcworkspace`) in Xcode. Select the project in sidebar and navigate to the info tab. Scroll down to "URL Types" and add one. In the new URL type, set the identifier and the URL scheme to your desired URL scheme.

To make sure Universal Links work in your app, you also need to setup [Associated Domains](https://developer.apple.com/documentation/Xcode/supporting-associated-domains) on your server.
#### Hybrid React Native and native iOS Applications
If you're using React Navigation within a hybrid app - an iOS app that has both Swift/ObjC and React Native parts - you may be missing the `RCTLinkingIOS` subspec in your `Podfile`, which is installed by default in new React Native projects. To add this, ensure your `Podfile` looks like the following:
```pod
pod 'React', :path => '../node_modules/react-native', :subspecs => [
. . . // other subspecs
'RCTLinkingIOS',
. . .
]
```
### Setup on Android
To configure the external linking in Android, you can create a new intent in the manifest.
The easiest way to do this is with the `uri-scheme` package: `npx uri-scheme add example --android`.
If you want to add it manually, open up `SimpleApp/android/app/src/main/AndroidManifest.xml`, and make the following adjustments:
1. Set `launchMode` of `MainActivity` to `singleTask` in order to receive intent on existing `MainActivity` (this is the default, so you may not need to actually change anything).
2. Add the new [`intent-filter`](http://developer.android.com/training/app-indexing/deep-linking.html#adding-filters) inside the `MainActivity` entry with a `VIEW` type action:
```xml
```
Similar to Universal Links on iOS, you can also use a domain to associate the app with your website on Android by [verifying Android App Links](https://developer.android.com/training/app-links/verify-android-applinks). First, you need to configure your `AndroidManifest.xml`:
1. Add `android:autoVerify="true"` to your `` entry.
2. Add your domain's `scheme` and `host` in a new `` entry inside the ``.
After adding them, it should look like this:
```xml
```
Then, you need to [declare the association](https://developer.android.com/training/app-links/verify-android-applinks#web-assoc) between your website and your intent filters by hosting a Digital Asset Links JSON file.
## Configuring React Navigation
To handle deep links, you need to configure React Navigation to use the `scheme` for parsing incoming deep links:
```js
const linking = {
prefixes: [
'example://', // Or `Linking.createURL('/')` for Expo apps
],
};
function App() {
return ;
}
```
```js
const linking = {
prefixes: [
'example://', // Or `Linking.createURL('/')` for Expo apps
],
};
function App() {
return (
Loading...}>
{/* content */}
);
}
```
If you are using universal links, you need to add your domain to the prefixes as well:
```js
const linking = {
prefixes: [
'example://', // Or `Linking.createURL('/')` for Expo apps
'https://app.example.com',
],
};
```
See [configuring links](configuring-links.md) to see further details on how to configure links in React Navigation.
## Testing deep links
Before testing deep links, make sure that you rebuild and install the app in your emulator/simulator/device.
If you're testing on iOS, run:
```bash
npx react-native run-ios
```
If you're testing on Android, run:
```bash
npx react-native run-android
```
If you're using Expo managed workflow and testing on Expo client, you don't need to rebuild the app. However, you will need to use the correct address and port that's printed when you run `expo start`, e.g. `exp://127.0.0.1:19000/--/`.
If you want to test with your custom scheme in your Expo app, you will need rebuild your standalone app by running `expo build:ios -t simulator` or `expo build:android` and install the resulting binaries.
### Testing with `npx uri-scheme`
The `uri-scheme` package is a command line tool that can be used to test deep links on both iOS & Android. It can be used as follows:
```bash
npx uri-scheme open [your deep link] --[ios|android]
```
For example:
```bash
npx uri-scheme open "example://chat/jane" --ios
```
Or if using Expo client:
```bash
npx uri-scheme open "exp://127.0.0.1:19000/--/chat/jane" --ios
```
### Testing with `xcrun` on iOS
The `xcrun` command can be used as follows to test deep links with the iOS simulator:
```bash
xcrun simctl openurl booted [your deep link]
```
For example:
```bash
xcrun simctl openurl booted "example://chat/jane"
```
### Testing with `adb` on Android
The `adb` command can be used as follows to test deep links with the Android emulator or a connected device:
```bash
adb shell am start -W -a android.intent.action.VIEW -d [your deep link] [your android package name]
```
For example:
```bash
adb shell am start -W -a android.intent.action.VIEW -d "example://chat/jane" com.simpleapp
```
Or if using Expo client:
```bash
adb shell am start -W -a android.intent.action.VIEW -d "exp://127.0.0.1:19000/--/chat/jane" host.exp.exponent
```
## Integrating with other tools
In addition to deep links and universal links with React Native's `Linking` API, you may also want to integrate other tools for handling incoming links, e.g. Push Notifications - so that tapping on a notification can open the app to a specific screen.
To achieve this, you'd need to override how React Navigation subscribes to incoming links. To do so, you can provide your own [`getInitialURL`](navigation-container.md#linkinggetinitialurl) and [`subscribe`](navigation-container.md#linkingsubscribe) functions.
Here is an example integration with [expo-notifications](https://docs.expo.dev/versions/latest/sdk/notifications):
```js name="Expo Notifications"
const linking = {
prefixes: ['example://', 'https://app.example.com'],
// Custom function to get the URL which was used to open the app
async getInitialURL() {
// First, handle deep links
const url = await Linking.getInitialURL();
if (url != null) {
return url;
}
// Handle URL from expo push notifications
const response = await Notifications.getLastNotificationResponseAsync();
return response?.notification.request.content.data.url;
},
// Custom function to subscribe to incoming links
subscribe(listener) {
// Listen to incoming links for deep links
const linkingSubscription = Linking.addEventListener('url', ({ url }) => {
listener(url);
});
// Listen to expo push notifications when user interacts with them
const pushNotificationSubscription =
Notifications.addNotificationResponseReceivedListener((response) => {
const url = response.notification.request.content.data.url;
listener(url);
});
return () => {
// Clean up the event listeners
linkingSubscription.remove();
pushNotificationSubscription.remove();
};
},
};
```
```js name="Expo Notifications"
const linking = {
prefixes: ['example://', 'https://app.example.com'],
// Custom function to get the URL which was used to open the app
async getInitialURL() {
// First, handle deep links
const url = await Linking.getInitialURL();
if (url != null) {
return url;
}
// Handle URL from expo push notifications
const response = await Notifications.getLastNotificationResponseAsync();
return response?.notification.request.content.data.url;
},
// Custom function to subscribe to incoming links
subscribe(listener) {
// Listen to incoming links for deep links
const linkingSubscription = Linking.addEventListener('url', ({ url }) => {
listener(url);
});
// Listen to expo push notifications when user interacts with them
const pushNotificationSubscription =
Notifications.addNotificationResponseReceivedListener((response) => {
const url = response.notification.request.content.data.url;
listener(url);
});
return () => {
// Clean up the event listeners
linkingSubscription.remove();
pushNotificationSubscription.remove();
};
},
config: {
// Deep link configuration
},
};
```
Similar to the above example, you can integrate any API that provides a way to get the initial URL and to subscribe to new incoming URLs using the `getInitialURL` and `subscribe` options.
---
## Configuring links
Source: https://reactnavigation.org/docs/configuring-links
import Tabs from '@theme/Tabs';
import TabItem from '@theme/TabItem';
In this guide, we will configure React Navigation to handle external links. This is necessary if you want to:
1. Handle deep links in React Native apps on Android and iOS
2. Enable URL integration in browser when using on web
3. Use [``](link.md) or [`useLinkTo`](use-link-to.md) to navigate using paths.
Make sure that you have [configured deep links](deep-linking.md) in your app before proceeding. If you have an Android or iOS app, remember to specify the [`prefixes`](navigation-container.md#linkingprefixes) option.
The [`Navigation`](static-configuration.md#createstaticnavigation) component accepts a [`linking`](static-configuration.md#differences-in-the-linking-prop) prop that makes it easier to handle incoming links:
```js
import { createStaticNavigation } from '@react-navigation/native';
// highlight-start
const linking = {
enabled: 'auto' /* Automatically generate paths for all screens */,
prefixes: [
/* your linking prefixes */
],
};
// highlight-end
function App() {
return (
Loading...}
/>
);
}
const Navigation = createStaticNavigation(RootStack);
```
The `NavigationContainer` accepts a [`linking`](navigation-container.md#linking) prop that makes it easier to handle incoming links. The 2 of the most important properties you can specify in the `linking` prop are `prefixes` and `config`:
```js
import { NavigationContainer } from '@react-navigation/native';
// highlight-start
const linking = {
prefixes: [
/* your linking prefixes */
],
config: {
/* configuration for matching screens with paths */
},
};
// highlight-end
function App() {
return (
Loading...}
>
{/* content */}
);
}
```
When you specify the `linking` prop, React Navigation will handle incoming links automatically. On Android and iOS, it'll use React Native's [`Linking` module](https://reactnative.dev/docs/linking) to handle incoming links, both when the app was opened with the link, and when new links are received when the app is open. On the Web, it'll use the [History API](https://developer.mozilla.org/en-US/docs/Web/API/History_API) to sync the URL with the browser.
:::warning
Currently there seems to be bug ([facebook/react-native#25675](https://github.com/facebook/react-native/issues/25675)) which results in it never resolving on Android. We add a timeout to avoid getting stuck forever, but it means that the link might not be handled in some cases.
:::
You can also pass a [`fallback`](navigation-container.md#fallback) prop that controls what's displayed when React Navigation is trying to resolve the initial deep link URL.
## Prefixes
The `prefixes` option can be used to specify custom schemes (e.g. `example://`) as well as host & domain names (e.g. `https://example.com`) if you have configured [Universal Links](https://developer.apple.com/ios/universal-links/) or [Android App Links](https://developer.android.com/training/app-links).
For example:
```js
const linking = {
prefixes: ['example://', 'https://example.com'],
};
```
Note that the `prefixes` option is not supported on Web. The host & domain names will be automatically determined from the Website URL in the browser. If your app runs only on Web, then you can omit this option from the config.
### Multiple subdomains
To match all subdomains of an associated domain, you can specify a wildcard by prefixing `*`. before the beginning of a specific domain. Note that an entry for `*.example.com` does not match `example.com` because of the period after the asterisk. To enable matching for both `*.example.com` and `example.com`, you need to provide a separate prefix entry for each.
```js
const linking = {
prefixes: ['example://', 'https://example.com', 'https://*.example.com'],
};
```
## Filtering certain paths
Sometimes we may not want to handle all incoming links. For example, we may want to filter out links meant for authentication (e.g. `expo-auth-session`) or other purposes instead of navigating to a specific screen.
To achieve this, you can use the `filter` option:
```js
const linking = {
prefixes: ['example://', 'https://example.com'],
// highlight-next-line
filter: (url) => !url.includes('+expo-auth-session'),
};
```
This is not supported on Web as we always need to handle the URL of the page.
## Apps under subpaths
If your app is hosted under a subpath, you can specify the subpath at the top-level of the `config`. For example, if your app is hosted at `https://example.com/app`, you can specify the `path` as `app`:
```js
const linking = {
prefixes: ['example://', 'https://example.com'],
config: {
// highlight-next-line
path: 'app',
// ...
},
};
```
It's not possible to specify params here since this doesn't belong to a screen, e.g. `app/:id` won't work.
## Mapping path to route names
If you specify `enabled: 'auto'` in the `linking` prop, React Navigation will automatically generate paths for all screens. For example, if you have a `Profile` screen in the navigator, it'll automatically generate a path for it as `profile`.
If you wish to handle the configuration manually, or want to override the generated path for a specific screen, you can specify `linking` property next to the screen in the navigator to map a path to a screen. For example:
```js
const RootStack = createStackNavigator({
screens: {
Profile: {
screen: ProfileScreen,
// highlight-start
linking: {
path: 'user',
},
// highlight-end
},
Chat: {
screen: ChatScreen,
// highlight-start
linking: {
path: 'feed/:sort',
},
// highlight-end
},
},
});
```
In this example:
- `Chat` screen that handles the URL `/feed` with the param `sort` (e.g. `/feed/latest` - the `Chat` screen will receive a param `sort` with the value `latest`).
- `Profile` screen that handles the URL `/user`.
Similarly, when you have a nested navigator, you can specify the `linking` property for the screens in the navigator to handle the path for the nested screens:
```js
const HomeTabs = createBottomTabNavigator({
screens: {
Home: {
screen: HomeScreen,
// highlight-start
linking: {
path: 'home',
},
// highlight-end
},
Settings: {
screen: SettingsScreen,
// highlight-start
linking: {
path: 'settings',
},
// highlight-end
},
},
});
const RootStack = createStackNavigator({
screens: {
HomeTabs: {
screen: HomeTabs,
},
Profile: {
screen: ProfileScreen,
// highlight-start
linking: {
path: 'user',
},
// highlight-end
},
Chat: {
screen: ChatScreen,
// highlight-start
linking: {
path: 'feed/:sort',
},
// highlight-end
},
},
});
```
In the above example, the following path formats are handled:
- `/home` navigates to the `HomeTabs` -> `Home` screen
- `/settings` navigates to the `HomeTabs` -> `Settings` screen
- `/user` navigates to the `Profile` screen
- `/feed/:sort` navigates to the `Chat` screen with the param `sort`
### How does automatic path generation work?
When using automatic path generation with `enabled: 'auto'`, the following rules are applied:
- Screens with an explicit `linking` property are not used for path generation and will be added as-is.
- Screen names will be converted from `PascalCase` to `kebab-case` to use as the path (e.g. `NewsFeed` -> `news-feed`).
- Unless a screen has explicit empty path (`path: ''`) to use for the homepage, the first leaf screen encountered will be used as the homepage.
- Path generation only handles leaf screens, i.e. no path is generated for screens containing nested navigators. It's still possible to specify a path for them with an explicit `linking` property.
Let's say we have the following navigation structure:
```js
const HomeTabs = createBottomTabNavigator({
screens: {
Home: {
screen: HomeScreen,
},
Settings: {
screen: SettingsScreen,
},
},
});
const RootStack = createStackNavigator({
screens: {
HomeTabs: {
screen: HomeTabs,
},
Profile: {
screen: ProfileScreen,
},
Chat: {
screen: ChatScreen,
},
},
});
```
With automatic path generation, the following paths will be generated:
- `/` navigates to the `HomeTabs` -> `Home` screen
- `/settings` navigates to the `HomeTabs` -> `Settings` screen
- `/profile` navigates to the `Profile` screen
- `/chat` navigates to the `Chat` screen
If the URL contains a query string, it'll be passed as params to the screen. For example, the URL `/profile?user=jane` will pass the `user` param to the `Profile` screen.
If you specify a `linking` option, by default React Navigation will use the path segments as the route name when parsing the URL. However, directly translating path segments to route names may not be the expected behavior.
You can specify the [`config`](navigation-container.md#linkingconfig) option in `linking` to control how the deep link is parsed to suit your needs. The config should specify the mapping between route names and path patterns:
```js
const config = {
screens: {
Chat: 'feed/:sort',
Profile: 'user',
},
};
```
In this example:
- `Chat` screen that handles the URL `/feed` with the param `sort` (e.g. `/feed/latest` - the `Chat` screen will receive a param `sort` with the value `latest`).
- `Profile` screen that handles the URL `/user`.
The config option can then be passed in the `linking` prop to the container:
```js
import { NavigationContainer } from '@react-navigation/native';
const config = {
screens: {
Chat: 'feed/:sort',
Profile: 'user',
},
};
const linking = {
prefixes: ['https://example.com', 'example://'],
config,
};
function App() {
return (
Loading...}>
{/* content */}
);
}
```
The config object must match the navigation structure for your app. For example, the above configuration is if you have `Chat` and `Profile` screens in the navigator at the root:
```js
function App() {
return (
);
}
```
If your `Chat` screen is inside a nested navigator, we'd need to account for that. For example, consider the following structure where your `Profile` screen is at the root, but the `Chat` screen is nested inside `Home`:
```js
function App() {
return (
);
}
function HomeScreen() {
return (
);
}
```
For the above structure, our configuration will look like this:
```js
const config = {
screens: {
Home: {
screens: {
Chat: 'feed/:sort',
},
},
Profile: 'user',
},
};
```
Similarly, any nesting needs to be reflected in the configuration.
How it works
The linking works by translating the URL to a valid [navigation state](navigation-state.md) and vice versa using the configuration provided. For example, the path `/rooms/chat?user=jane` may be translated to a state object like this:
```js
const state = {
routes: [
{
name: 'rooms',
state: {
routes: [
{
name: 'chat',
params: { user: 'jane' },
},
],
},
},
],
};
```
For example, you might want to parse the path `/feed/latest` to something like:
```js
const state = {
routes: [
{
name: 'Chat',
params: {
sort: 'latest',
},
},
];
}
```
See [Navigation State reference](navigation-state.md) for more details on how the state object is structured.
## Passing params
A common use case is to pass params to a screen to pass some data. For example, you may want the `Profile` screen to have an `id` param to know which user's profile it is. It's possible to pass params to a screen through a URL when handling deep links.
By default, query params are parsed to get the params for a screen. For example, with the above example, the URL `/user?id=jane` will pass the `id` param to the `Profile` screen.
You can also customize how the params are parsed from the URL. Let's say you want the URL to look like `/user/jane` where the `id` param is `jane` instead of having the `id` in query params. You can do this by specifying `user/:id` for the `path`. **When the path segment starts with `:`, it'll be treated as a param**. For example, the URL `/user/jane` would resolve to `Profile` screen with the string `jane` as a value of the `id` param and will be available in `route.params.id` in `Profile` screen.
By default, all params are treated as strings. You can also customize how to parse them by specifying a function in the `parse` property to parse the param, and a function in the `stringify` property to convert it back to a string.
If you wanted to resolve `/user/@jane/settings` to result in the params `{ id: 'jane' section: 'settings' }`, you could make `Profile`'s config to look like this:
```js
const RootStack = createStackNavigator({
screens: {
Profile: {
screen: ProfileScreen,
// highlight-start
linking: {
path: 'user/:id/:section',
parse: {
id: (id) => id.replace(/^@/, ''),
},
stringify: {
id: (id) => `@${id}`,
},
},
// highlight-end
},
},
});
```
```js
const config = {
screens: {
Profile: {
// highlight-start
path: 'user/:id/:section',
parse: {
id: (id) => id.replace(/^@/, ''),
},
stringify: {
id: (id) => `@${id}`,
},
// highlight-end
},
},
};
```
Result Navigation State
With this configuration, the path `/user/@jane/settings` will resolve to the following state object:
```js
const state = {
routes: [
{
name: 'Profile',
params: { id: 'jane', section: 'settings' },
},
],
};
```
## Marking params as optional
Sometimes a param may or may not be present in the URL depending on certain conditions. For example, in the above scenario, you may not always have the section parameter in the URL, i.e. both `/user/jane/settings` and `/user/jane` should go to the `Profile` screen, but the `section` param (with the value `settings` in this case) may or may not be present.
In this case, you would need to mark the `section` param as optional. You can do it by adding the `?` suffix after the param name:
```js
const RootStack = createStackNavigator({
screens: {
Profile: {
screen: ProfileScreen,
linking: {
// highlight-next-line
path: 'user/:id/:section?',
parse: {
id: (id) => `user-${id}`,
},
stringify: {
id: (id) => id.replace(/^user-/, ''),
},
},
},
},
});
```
```js
const config = {
screens: {
Profile: {
// highlight-next-line
path: 'user/:id/:section?',
parse: {
id: (id) => `user-${id}`,
},
stringify: {
id: (id) => id.replace(/^user-/, ''),
},
},
},
};
```
Result Navigation State
With this configuration, the path `/user/jane` will resolve to the following state object:
```js
const state = {
routes: [
{
name: 'Profile',
params: { id: 'user-jane' },
},
],
};
```
If the URL contains a `section` param (e.g. `/user/jane/settings`), this will result in the following with the same config:
```js
const state = {
routes: [
{
name: 'Profile',
params: { id: 'user-jane', section: 'settings' },
},
],
};
```
## Handling unmatched routes or 404
If your app is opened with an invalid URL, most of the times you'd want to show an error page with some information. On the web, this is commonly known as 404 - or page not found error.
To handle this, you'll need to define a catch-all route that will be rendered if no other routes match the path. You can do it by specifying `*` for the path matching pattern:
```js
const HomeTabs = createBottomTabNavigator({
screens: {
Feed: {
screen: FeedScreen,
},
Profile: {
screen: HomeScreen,
linking: {
path: 'users/:id',
},
},
Settings: {
screen: SettingsScreen,
linking: {
path: 'settings',
},
},
},
});
const RootStack = createStackNavigator({
screens: {
Home: {
screen: HomeTabs,
},
NotFound: {
screen: NotFoundScreen,
linking: {
// highlight-next-line
path: '*',
},
},
},
});
```
```js
const config = {
screens: {
Home: {
initialRouteName: 'Feed',
screens: {
Profile: 'users/:id',
Settings: 'settings',
},
},
NotFound: {
// highlight-start
path: '*',
},
},
};
```
Here, we have defined a route named `NotFound` and set it to match `*` aka everything. If the path didn't match `user/:id` or `settings`, it'll be matched by this route.
Result Navigation State
With this configuration, a path like `/library` or `/settings/notification` will resolve to the following state object:
```js
const state = {
routes: [{ name: 'NotFound' }],
};
```
You can even go more specific, for example, say if you want to show a different screen for invalid paths under `/settings`, you can specify such a pattern under `Settings`:
```js
const SettingsStack = createStackNavigator({
screens: {
UserSettings: {
screen: UserSettingsScreen,
linking: {
path: 'user-settings',
},
},
InvalidSettings: {
screen: InvalidSettingsScreen,
linking: {
// highlight-next-line
path: '*',
},
},
},
});
const HomeTabs = createBottomTabNavigator({
screens: {
Feed: {
screen: FeedScreen,
},
Profile: {
screen: HomeScreen,
linking: {
path: 'users/:id',
},
},
Settings: {
screen: SettingsStack,
},
},
});
const RootStack = createStackNavigator({
screens: {
Home: {
screen: HomeTabs,
},
NotFound: {
screen: NotFoundScreen,
linking: {
path: '*',
},
},
},
});
```
```js
const config = {
screens: {
Home: {
initialRouteName: 'Feed',
screens: {
Profile: 'users/:id',
Settings: {
path: 'settings',
screens: {
InvalidSettings: '*',
},
},
},
},
NotFound: '*',
},
};
```
Result Navigation State
With this configuration, the path `/settings/notification` will resolve to the following state object:
```js
const state = {
routes: [
{
name: 'Home',
state: {
index: 1,
routes: [
{ name: 'Feed' },
{
name: 'Settings',
state: {
routes: [
{ name: 'InvalidSettings', path: '/settings/notification' },
],
},
},
],
},
},
],
};
```
The `route` passed to the `NotFound` screen will contain a `path` property which corresponds to the path that opened the page. If you need, you can use this property to customize what's shown in this screen, e.g. load the page in a `WebView`:
```js
function NotFoundScreen({ route }) {
if (route.path) {
return ;
}
return This screen doesn't exist!;
}
```
When doing server rendering, you'd also want to return correct status code for 404 errors. See [server rendering docs](server-rendering.md#handling-404-or-other-status-codes) for a guide on how to handle it.
## Rendering an initial route
Sometimes you want to ensure that a certain screen will always be present as the first screen in the navigator's state. You can use the `initialRouteName` property to specify the screen to use for the initial screen.
In the above example, if you want the `Feed` screen to be the initial route in the navigator under `Home`, your config will look like this:
```js
const HomeTabs = createBottomTabNavigator({
screens: {
Feed: {
screen: FeedScreen,
},
Profile: {
screen: HomeScreen,
linking: {
path: 'users/:id',
},
},
Settings: {
screen: SettingsScreen,
linking: {
path: 'settings',
},
},
},
});
const RootStack = createStackNavigator({
screens: {
Home: {
screen: HomeTabs,
linking: {
// highlight-next-line
initialRouteName: 'Feed',
},
},
NotFound: {
screen: NotFoundScreen,
linking: {
path: '*',
},
},
},
});
```
```js
const config = {
screens: {
Home: {
// highlight-next-line
initialRouteName: 'Feed',
screens: {
Profile: 'users/:id',
Settings: 'settings',
},
},
},
};
```
Result Navigation State
With this configuration, the path `/users/42` will resolve to the following state object:
```js
const state = {
routes: [
{
name: 'Home',
state: {
index: 1,
routes: [
{ name: 'Feed' },
{
name: 'Profile',
params: { id: '42' },
},
],
},
},
],
};
```
:::warning
The `initialRouteName` will add the screen to React Navigation's state only. If your app is running on the Web, the browser's history will not contain this screen as the user has never visited it. So, if the user presses the browser's back button, it'll not go back to this screen.
:::
Another thing to keep in mind is that it's not possible to pass params to the initial screen through the URL. So make sure that your initial route doesn't need any params or specify `initialParams` in the screen configuration to pass the required params.
In this case, any params in the URL are only passed to the `Profile` screen which matches the path pattern `users/:id`, and the `Feed` screen doesn't receive any params. If you want to have the same params in the `Feed` screen, you can specify a [custom `getStateFromPath` function](navigation-container.md#linkinggetstatefrompath) and copy those params.
Similarly, if you want to access params of a parent screen from a child screen, you can use [React Context](https://react.dev/reference/react/useContext) to expose them.
## Matching exact paths
By default, paths defined for each screen are matched against the URL relative to their parent screen's path. Consider the following config:
```js
const ProfileTabs = createBottomTabNavigator({
screens: {
Profile: {
screen: HomeScreen,
linking: {
path: 'users/:id',
},
},
},
});
const RootStack = createStackNavigator({
screens: {
Home: {
screen: ProfileTabs,
linking: {
path: 'feed',
},
},
},
});
```
```js
const config = {
screens: {
Home: {
path: 'feed',
screens: {
Profile: 'users/:id',
},
},
},
};
```
Here, you have a `path` property defined for the `Home` screen, as well as the child `Profile` screen. The profile screen specifies the path `users/:id`, but since it's nested inside a screen with the path `feed`, it'll try to match the pattern `feed/users/:id`.
This will result in the URL `/feed` navigating to `Home` screen, and `/feed/users/cal` navigating to the `Profile` screen.
In this case, it makes more sense to navigate to the `Profile` screen using a URL like `/users/cal`, rather than `/feed/users/cal`. To achieve this, you can override the relative matching behavior to `exact` matching:
```js
const ProfileTabs = createBottomTabNavigator({
screens: {
Profile: {
screen: HomeScreen,
linking: {
path: 'users/:id',
// highlight-next-line
exact: true,
},
},
},
});
const RootStack = createStackNavigator({
screens: {
Home: {
screen: ProfileTabs,
linking: {
path: 'feed',
},
},
},
});
```
```js
const config = {
screens: {
Home: {
path: 'feed',
screens: {
Profile: {
path: 'users/:id',
// highlight-next-line
exact: true,
},
},
},
},
};
```
With `exact` property set to `true`, `Profile` will ignore the parent screen's `path` config and you'll be able to navigate to `Profile` using a URL like `users/cal`.
## Omitting a screen from path
Sometimes, you may not want to have the route name of a screen in the path. For example, let's say you have a `Home` screen and the following config. When the page is opened in the browser you'll get `/home` as the URL:
```js
const RootStack = createStackNavigator({
screens: {
Home: {
screen: ProfileScreen,
linking: {
path: 'home',
},
},
Profile: {
screen: HomeScreen,
linking: {
path: 'users/:id',
},
},
},
});
```
```js
const config = {
screens: {
Home: {
path: 'home',
},
Profile: 'users/:id',
},
};
```
But it'll be nicer if the URL was just `/` when visiting the home screen.
You can specify an empty string as path or not specify a path at all, and React Navigation won't add the screen to the path (think of it like adding empty string to the path, which doesn't change anything):
```js
const RootStack = createStackNavigator({
screens: {
Home: {
screen: ProfileScreen,
linking: {
path: '',
},
},
Profile: {
screen: HomeScreen,
linking: {
path: 'users/:id',
},
},
},
});
```
```js
const config = {
screens: {
Home: {
path: '',
},
Profile: 'users/:id',
},
};
```
## Serializing and parsing params
Since URLs are strings, any params you have for routes are also converted to strings when constructing the path.
For example, say you have the URL `/chat/1589842744264` with the following config:
```js
const RootStack = createStackNavigator({
screens: {
Chat: {
screen: ChatScreen,
linking: {
path: 'chat/:date',
},
},
},
});
```
```js
const config = {
screens: {
Chat: 'chat/:date',
},
};
```
When handling the URL, your params will look like this:
```json
{ "date": "1589842744264" }
```
Here, the `date` param was parsed as a string because React Navigation doesn't know that it's supposed to be a timestamp, and hence number. You can customize it by providing a custom function to use for parsing:
```js
const RootStack = createStackNavigator({
screens: {
Chat: {
screen: ChatScreen,
linking: {
path: 'chat/:date',
parse: {
date: Number,
},
},
},
},
});
```
```js
const config = {
screens: {
Chat: {
path: 'chat/:date',
parse: {
date: Number,
},
},
},
};
```
You can also provide a your own function to serialize the params. For example, let's say that you want to use a DD-MM-YYYY format in the path instead of a timestamp:
```js
const RootStack = createStackNavigator({
screens: {
Chat: {
screen: ChatScreen,
linking: {
path: 'chat/:date',
parse: {
date: (date) => new Date(date).getTime(),
},
stringify: {
date: (date) => {
const d = new Date(date);
return d.getFullYear() + '-' + d.getMonth() + '-' + d.getDate();
},
},
},
},
},
});
```
```js
const config = {
screens: {
Chat: {
path: 'chat/:date',
parse: {
date: (date) => new Date(date).getTime(),
},
stringify: {
date: (date) => {
const d = new Date(date);
return d.getFullYear() + '-' + d.getMonth() + '-' + d.getDate();
},
},
},
},
};
```
Depending on your requirements, you can use this functionality to parse and stringify more complex data.
## Matching regular expressions
If you need more complex matching logic, you can use regular expressions to match the path. For example, if you want to use the pattern `@username` to match a user's profile, you can use a regular expression to match the path. This allows you to have the same path pattern for multiple screens, but fine-tune the matching logic to be more specific for a particular screen.
Regular expressions can be specified between parentheses `(` and `)` in the after a param name. For example:
```js
const RootStack = createStackNavigator({
screens: {
Feed: {
screen: FeedScreen,
linking: {
path: ':sort(latest|popular)',
},
},
Profile: {
screen: ProfileScreen,
linking: {
path: ':username(@[A-Za-z0-9_]+)',
},
},
},
});
```
```js
const config = {
screens: {
Feed: ':sort(latest|popular)',
Profile: ':username(@[A-Za-z0-9_]+)',
},
};
```
This will only match the path if it starts with `@` followed by alphanumeric characters or underscores. For example, the URL `/@jane` will match the `Profile` screen, but `/jane` won't.
Regular expressions are intended to only match path segments, not the entire path. So avoid using `/`, `^`, `$`, etc. in the regular expressions.
:::warning
Regular expressions are an advanced feature. They cannot be validated to warn you about potential issues, so it's up to you to ensure that the regular expression is correct.
:::
## Alias for paths
If you want to have multiple paths for the same screen, you can use the `alias` property to specify an array of paths. This can be useful to keep backward compatibility with old URLs while transitioning to a new URL structure.
For example, if you want to match both `/users/:id` and `/:id` to the `Profile` screen, you can do this:
```js
const RootStack = createStackNavigator({
screens: {
Profile: {
screen: ProfileScreen,
linking: {
path: ':id',
alias: ['users/:id'],
},
},
},
});
```
```js
const config = {
screens: {
Profile: {
path: ':id',
alias: ['users/:id'],
},
},
};
```
In this case, when the URL is `/users/jane` or `/jane`, it'll match the `Profile` screen. The `path` is the primary pattern that will be used to generate the URL, e.g. when navigating to the `Profile` screen in the app on the Web. The patterns in `alias` will be ignored when generating URLs. The `alias` patterns are not used for matching any child screens in nested navigators.
On the web, if a screen containing an alias contains a nested navigator, the URL matching the alias will only be used to match the screen, and will be updated to the URL of the focused child screen once the app renders.
Each item in the `alias` array can be a string matching the syntax of the `path` property, or an object with the following properties:
- `path` (required) - The path pattern to match.
- `exact` - Whether to match the path exactly. Defaults to `false`. See [Matching exact paths](#matching-exact-paths) for more details.
- `parse` - Function to parse path segments into param values. See [Passing params](#passing-params) for more details.
## Advanced cases
For some advanced cases, specifying the mapping may not be sufficient. To handle such cases, you can specify a custom function to parse the URL into a state object ([`getStateFromPath`](navigation-container.md#linkinggetstatefrompath)), and a custom function to serialize the state object into an URL ([`getPathFromState`](navigation-container.md#linkinggetpathfromstate)).
Example:
```js
const linking = {
prefixes: ['https://example.com', 'example://'],
getStateFromPath(path, options) {
// Return a state object here
// You can also reuse the default logic by importing `getStateFromPath` from `@react-navigation/native`
},
getPathFromState(state, config) {
// Return a path string here
// You can also reuse the default logic by importing `getPathFromState` from `@react-navigation/native`
},
// ...
};
```
## Playground
import LinkingTester from '@site/src/components/LinkingTester'
Playground is not available for static config.
You can play around with customizing the config and path below, and see how the path is parsed.
---
## React Navigation on Web
Source: https://reactnavigation.org/docs/web-support
import Tabs from '@theme/Tabs';
import TabItem from '@theme/TabItem';
React Navigation has built-in support for the Web platform. This allows you to use the same navigation logic in your React Native app as well as on the web. The navigators require using [React Native for Web](https://github.com/necolas/react-native-web) to work on the web.
## Pre-requisites
While Web support works out of the box, there are some things to configure to ensure a good experience on the web:
1. [**Configure linking**](configuring-links.md)
Configuring linking allows React Navigation to integrate with the browser's URL bar. This is crucial for web apps to have proper URLs for each screen.
2. [**Use Button or Link components**](link.md)
You may be familiar with using `navigation.navigate` to navigate between screens. But it's important to avoid using it when supporting the web. Instead, use the `Link` or [`Button`](elements.md#button) components to navigate between screens. This ensures that an anchor tag is rendered which provides the expected behavior on the web.
3. [**Server rendering**](server-rendering.md)
Currently, React Navigation works best with fully client-side rendered apps. However, minimal server-side rendering support is available. So you can optionally choose to server render your app.
4. **Adapt to web-specific behavior**
Depending on your app's requirements and design, you may also want to tweak some of the navigators' behavior on the web. For example:
- Change `backBehavior` to `fullHistory` for [tabs](bottom-tab-navigator.md#backbehavior) and [drawer](drawer-navigator.md#backbehavior) on the web to always push a new entry to the browser history.
- Use sidebars on larger screens instead of [bottom tabs](bottom-tab-navigator.md#tabbarposition) - while not specific to web, responsive design much more important on the web.
:::note
In React Navigation 4, it was necessary to install a separate package called `@react-navigation/web` to use web integration. This package is no longer needed in recent versions of React Navigation. If you have it installed, make sure to uninstall it to avoid conflicts.
:::
## Lazy loading screens
By default, screen components are bundled in the main bundle. This can lead to a large bundle size if you have many screens. It's important to keep the bundle size small on the web for faster loading times.
To reduce the bundle size, you can use [dynamic `import()`](https://developer.mozilla.org/en-US/docs/Web/JavaScript/Reference/Operators/import) with [`React.lazy`](https://react.dev/reference/react/lazy) to lazy load screens:
```js name="Lazy loading screens" snack
import { Suspense, lazy } from 'react';
const MyStack = createNativeStackNavigator({
screenLayout: ({ children }) => (
}>{children}
),
screens: {
Home: {
component: lazy(() => import('./HomeScreen')),
},
Profile: {
component: lazy(() => import('./ProfileScreen')),
},
},
});
```
```js name="Lazy loading screens" snack
import { Suspense, lazy } from 'react';
const HomeScreen = lazy(() => import('./HomeScreen'));
const ProfileScreen = lazy(() => import('./ProfileScreen'));
function MyStack() {
return (
(
}>{children}
)}
>
);
}
```
:::warning
Make sure to use `React.lazy` **outside** the component containing the navigator configuration. Otherwise, it will return a new component on each render, causing the [screen to be unmounted and remounted](troubleshooting.md#screens-are-unmountingremounting-during-navigation) every time the component rerenders.
:::
This will split the screen components into separate chunks (depending on your bundler) which are loaded on-demand when the screen is rendered. This can significantly reduce the initial bundle size.
In addition, you can use the [`screenLayout`](navigator.md#screen-layout) to wrap your screens in a [``](https://react.dev/reference/react/Suspense) boundary. The suspense fallback can be used to show a loading indicator and will be shown while the screen component is being loaded.
## Web-specific behavior
Some of the navigators have different behavior on the web compared to native platforms:
1. [**Native Stack Navigator**](stack-navigator.md)
Native Stack Navigator uses the platform's primitives to handle animations and gestures on native platforms. However, animations and gestures are not supported on the web.
2. [**Stack Navigator**](stack-navigator.md)
Stack Navigator uses [`react-native-gesture-handler`](https://docs.swmansion.com/react-native-gesture-handler/) to handle swipe gestures on native platforms. However, gestures are not supported on the web.
In addition, screen transitions are disabled by default on the web. You can enable them by setting `animationEnabled: true` in the navigator's options.
3. [**Drawer Navigator**](drawer-navigator.md)
Drawer Navigator uses [`react-native-gesture-handler`](https://docs.swmansion.com/react-native-gesture-handler/) to handle swipe gestures and [`react-native-reanimated`](https://docs.swmansion.com/react-native-reanimated/) for animations on native platforms. However, gestures are not supported on the web, and animations are handled using CSS transitions.
In addition, navigators render hyperlinks on the web when possible, such as in the drawer sidebar, tab bar, stack navigator's back button, etc.
Since `react-native-gesture-handler` and `react-native-reanimated` are not used on the web, avoid importing them in your own code to reduce the bundle size unless you need them for your components. You can use `.native.js` or `.native.ts` extensions for code specific to native platforms.
## Configuring hosting providers
React Navigation is designed for Single Page Applications (SPAs). This usually means that the `index.html` file needs to be served for all routes.
During development, the bundler such as Webpack or Metro automatically handles this. However, when deploying the site, you may need to configure redirects to ensure that the `index.html` file is served for all routes to avoid 404 errors.
Here are instructions for some of the popular hosting providers:
### Netlify
To handle redirects on Netlify, add the following in the `netlify.toml` file at the root of your project:
```toml
[[redirects]]
from = "/*"
to = "/index.html"
status = 200
```
### Vercel
To handle redirects on Vercel, add the following in the `vercel.json` file at the root of your project:
```json
{
"rewrites": [{ "source": "/(.*)", "destination": "/index.html" }]
}
```
### GitHub Pages
GitHub Pages doesn't support such redirection configuration for SPAs. There are a couple of ways to work around this:
- Rename your `index.html` to `404.html`. This will serve the `404.html` file for all routes. However, this will cause a 404 status code to be returned for all routes. So it's not ideal for SEO.
- Write a script that copies the `index.html` file to all routes in the build output. For example, if your app has routes `/`, `/about`, and `/contact`, you can copy the `index.html` file to `about.html` and `contact.html`.
---
## Server rendering
Source: https://reactnavigation.org/docs/server-rendering
import Tabs from '@theme/Tabs';
import TabItem from '@theme/TabItem';
This guide will cover how to server render your React Native app using React Native for Web and React Navigation. We'll cover the following cases:
1. Rendering the correct layout depending on the request URL
2. Setting appropriate page metadata based on the focused screen
:::warning
Server rendering support is currently limited. It's not possible to provide a seamless SSR experience due to a lack of APIs such as media queries. In addition, many third-party libraries often don't work well with server rendering.
:::
## Pre-requisites
Before you follow the guide, make sure that your app already renders fine on server. To do that, you will need to ensure the following:
- All of the dependencies that you use are [compiled before publishing](https://github.com/react-native-community/bob) to npm, so that you don't get syntax errors on Node.
- Node is configured to be able to `require` asset files such as images and fonts. You can try [webpack-isomorphic-tools](https://github.com/catamphetamine/webpack-isomorphic-tools) to do that.
- `react-native` is aliased to `react-native-web`. You can do it with [babel-plugin-module-resolver](https://github.com/tleunen/babel-plugin-module-resolver).
## Rendering the app
First, let's take a look at an example of how you'd do [server rendering with React Native Web](http://necolas.github.io/react-native-web/docs/?path=/docs/guides-server-side--page) without involving React Navigation:
```js
import { AppRegistry } from 'react-native-web';
import ReactDOMServer from 'react-dom/server';
import App from './src/App';
const { element, getStyleElement } = AppRegistry.getApplication('App');
const html = ReactDOMServer.renderToString(element);
const css = ReactDOMServer.renderToStaticMarkup(getStyleElement());
const document = `
${css}
${html}
`;
```
Here, `./src/App` is the file where you have `AppRegistry.registerComponent('App', () => App)`.
If you're using React Navigation in your app, this will render the screens rendered by your home page. However, if you have [configured links](configuring-links.md) in your app, you'd want to render the correct screens for the request URL on server so that it matches what'll be rendered on the client.
We can use the [`ServerContainer`](server-container.md) to do that by passing this info in the `location` prop. For example, with Koa, you can use the `path` and `search` properties from the context argument:
```js
app.use(async (ctx) => {
const location = new URL(ctx.url, 'https://example.org/');
const { element, getStyleElement } = AppRegistry.getApplication('App');
const html = ReactDOMServer.renderToString(
{element}
);
const css = ReactDOMServer.renderToStaticMarkup(getStyleElement());
const document = `
${css}
${html}
`;
ctx.body = document;
});
```
You may also want to set the correct document title and descriptions for search engines, open graph etc. To do that, you can pass a `ref` to the container which will give you the current screen's options.
```js
app.use(async (ctx) => {
const location = new URL(ctx.url, 'https://example.org/');
const { element, getStyleElement } = AppRegistry.getApplication('App');
const ref = React.createRef();
const html = ReactDOMServer.renderToString(
{element}
);
const css = ReactDOMServer.renderToStaticMarkup(getStyleElement());
const options = ref.current?.getCurrentOptions();
const document = `
${css}
${options.title}
${html}
`;
ctx.body = document;
});
```
Make sure that you have specified a `title` option for your screens:
```js
const Stack = createNativeStackNavigator({
screens: {
Home: {
screen: HomeScreen,
options: {
// highlight-next-line
title: 'My App',
},
},
Profile: {
screen: ProfileScreen,
options: ({ route }) => ({
// highlight-next-line
title: `${route.params.name}'s Profile`,
}),
},
},
});
```
```js
({
// highlight-next-line
title: `${route.params.name}'s Profile`,
})}
/>
```
## Handling 404 or other status codes
When [rendering a screen for an invalid URL](configuring-links.md#handling-unmatched-routes-or-404), we should also return a `404` status code from the server.
First, we need to create a context where we'll attach the status code. To do this, place the following code in a separate file that we will be importing on both the server and client:
```js
import * as React from 'react';
const StatusCodeContext = React.createContext();
export default StatusCodeContext;
```
Then, we need to use the context in our `NotFound` screen. Here, we add a `code` property with the value of `404` to signal that the screen was not found:
```js
function NotFound() {
const status = React.useContext(StatusCodeContext);
if (status) {
status.code = 404;
}
return (
Oops! This URL doesn't exist.
);
}
```
You could also attach additional information in this object if you need to.
Next, we need to create a status object to pass in the context on our server. By default, we'll set the `code` to `200`. Then pass the object in `StatusCodeContext.Provider` which should wrap the element with `ServerContainer`:
```js
// Create a status object
const status = { code: 200 };
const html = ReactDOMServer.renderToString(
// Pass the status object via context
{element}
);
// After rendering, get the status code and use it for server's response
ctx.status = status.code;
```
After we render the app with `ReactDOMServer.renderToString`, the `code` property of the `status` object will be updated to be `404` if the `NotFound` screen was rendered.
You can follow a similar approach for other status codes too, for example, `401` for unauthorized etc.
## Summary
- Use the `location` prop on `ServerContainer` to render correct screens based on the incoming request.
- Attach a `ref` to the `ServerContainer` get options for the current screen.
- Use context to attach more information such as status code.
---
## Screen tracking for analytics
Source: https://reactnavigation.org/docs/screen-tracking
import Tabs from '@theme/Tabs';
import TabItem from '@theme/TabItem';
To track the currently active screen, we need to:
1. Add a callback to get notified of state changes
2. Get the root navigator state and find the active route name
To get notified of state changes, we can use the `onStateChange` prop on `NavigationContainer`. To get the root navigator state, we can use the `getRootState` method on the container's ref. Please note that `onStateChange` is not called on initial render so you have to set your initial screen separately.
## Example
This example shows how the approach can be adapted to any mobile analytics SDK.
```js name="Screen tracking for analytics" snack
import * as React from 'react';
import { View } from 'react-native';
// codeblock-focus-start
import {
createStaticNavigation,
useNavigationContainerRef,
useNavigation,
} from '@react-navigation/native';
// codeblock-focus-end
import { Button } from '@react-navigation/elements';
import { createNativeStackNavigator } from '@react-navigation/native-stack';
function Home() {
const navigation = useNavigation();
return (
);
}
function Settings() {
const navigation = useNavigation();
return (
);
}
const RootStack = createNativeStackNavigator({
screens: {
Home: Home,
Settings: Settings,
},
});
const Navigation = createStaticNavigation(RootStack);
// codeblock-focus-start
export default function App() {
const navigationRef = useNavigationContainerRef();
const routeNameRef = React.useRef();
return (
{
routeNameRef.current = navigationRef.current.getCurrentRoute().name;
}}
onStateChange={async () => {
const previousRouteName = routeNameRef.current;
const currentRouteName = navigationRef.current.getCurrentRoute().name;
const trackScreenView = () => {
// Your implementation of analytics goes here!
};
if (previousRouteName !== currentRouteName) {
// Replace the line below to add the tracker from a mobile analytics SDK
await trackScreenView(currentRouteName);
}
// Save the current route name for later comparison
routeNameRef.current = currentRouteName;
}}
/>
);
}
// codeblock-focus-end
```
```js name="Screen tracking for analytics" snack
import * as React from 'react';
import { View } from 'react-native';
// codeblock-focus-start
import {
NavigationContainer,
useNavigation,
useNavigationContainerRef,
} from '@react-navigation/native';
// codeblock-focus-end
import { Button } from '@react-navigation/elements';
import { createStackNavigator } from '@react-navigation/stack';
function Home() {
const navigation = useNavigation();
return (
);
}
function Settings() {
const navigation = useNavigation();
return (
);
}
const Stack = createStackNavigator();
// codeblock-focus-start
export default function App() {
const navigationRef = useNavigationContainerRef();
const routeNameRef = React.useRef();
return (
{
routeNameRef.current = navigationRef.current.getCurrentRoute().name;
// Replace the line below to add the tracker from a mobile analytics SDK
await trackScreenView(routeNameRef.current);
}}
onStateChange={async () => {
const previousRouteName = routeNameRef.current;
const currentRouteName = navigationRef.current.getCurrentRoute().name;
const trackScreenView = () => {
// Your implementation of analytics goes here!
};
if (previousRouteName !== currentRouteName) {
// Replace the line below to add the tracker from a mobile analytics SDK
await trackScreenView(currentRouteName);
}
// Save the current route name for later comparison
routeNameRef.current = currentRouteName;
}}
>
{/* ... */}
// codeblock-focus-end
// codeblock-focus-start
);
}
// codeblock-focus-end
```
:::note
If you are building a library that wants to provide screen tracking integration with React Navigation, you can accept a [`ref`](navigation-container.md#ref) to the navigation container and use the [`ready`](navigation-container.md#ready) and [`state`](navigation-container.md#state) events instead of `onReady` and `onStateChange` props to keep your logic self-contained.
:::
## Libraries with built-in integration
Here are some popular telemetry and analytics libraries that have built-in integration with React Navigation for screen tracking:
### PostHog
Open source product analytics platform with self-hosted and cloud-hosted options. [Learn more](https://posthog.com/docs/libraries/react-native).
### Embrace
Observability platform for mobile and web, powered by OpenTelemetry. [Learn more](https://embrace.io/docs/react-native/features/navigation/?packages=react-navigation%2Fnative).
### Vexo
Analytics for web and React Native. [Learn more](https://docs.vexo.co/react-native-guide/integration).
### Datadog
Real User Monitoring and error tracking platform. [Learn more](https://docs.datadoghq.com/real_user_monitoring/application_monitoring/react_native/integrated_libraries/).
### Sentry
Application performance monitoring and error tracking platform. [Learn more](https://docs.sentry.io/platforms/react-native/tracing/instrumentation/react-navigation/).
### Segment
Customer data platform that supports React Native. [Learn more](https://www.twilio.com/docs/segment/connections/sources/catalog/libraries/mobile/react-native#automatic-screen-tracking).
### Luciq
Mobile observability and experience platform. [Learn more](https://docs.luciq.ai/docs/react-native-repro-steps#react-navigation).
---
## Themes
Source: https://reactnavigation.org/docs/themes
import Tabs from '@theme/Tabs';
import TabItem from '@theme/TabItem';
Themes allow you to change the colors and fonts of various components provided by React Navigation. You can use themes to:
- Customize the colors and fonts to match your brand
- Provide light and dark themes based on the time of the day or user preference
## Basic usage
To pass a custom theme, you can pass the `theme` prop to the navigation container.
```js name="Simple theme" snack
// codeblock-focus-start
import * as React from 'react';
import {
useNavigation,
createStaticNavigation,
DefaultTheme,
} from '@react-navigation/native';
// codeblock-focus-end
import { View, Text } from 'react-native';
import { createNativeStackNavigator } from '@react-navigation/native-stack';
import { createDrawerNavigator } from '@react-navigation/drawer';
import { Button } from '@react-navigation/elements';
// codeblock-focus-start
const MyTheme = {
...DefaultTheme,
colors: {
...DefaultTheme.colors,
background: 'rgb(140, 201, 125)',
primary: 'rgb(255, 45, 85)',
},
};
// codeblock-focus-end
function SettingsScreen({ route }) {
const navigation = useNavigation();
const { user } = route.params;
return (
Settings Screen
userParam: {JSON.stringify(user)}
);
}
function ProfileScreen() {
return (
Profile Screen
);
}
function HomeScreen() {
const navigation = useNavigation();
return (
Home Screen
);
}
const PanelStack = createNativeStackNavigator({
screens: {
Profile: ProfileScreen,
Settings: SettingsScreen,
},
});
const Drawer = createDrawerNavigator({
initialRouteName: 'Panel',
screens: {
Home: HomeScreen,
Panel: PanelStack,
},
});
// codeblock-focus-start
const Navigation = createStaticNavigation(Drawer);
export default function App() {
// highlight-next-line
return ;
}
// codeblock-focus-end
```
```js name="Simple theme" snack
// codeblock-focus-start
import * as React from 'react';
import {
NavigationContainer,
DefaultTheme,
useNavigation,
} from '@react-navigation/native';
// codeblock-focus-end
import { View, Text } from 'react-native';
import { createNativeStackNavigator } from '@react-navigation/native-stack';
import { createDrawerNavigator } from '@react-navigation/drawer';
import { Button } from '@react-navigation/elements';
// codeblock-focus-start
const MyTheme = {
...DefaultTheme,
colors: {
...DefaultTheme.colors,
background: 'rgb(140, 201, 125)',
primary: 'rgb(255, 45, 85)',
},
};
// codeblock-focus-end
function SettingsScreen({ route }) {
const navigation = useNavigation();
const { user } = route.params;
return (
Settings Screen
userParam: {JSON.stringify(user)}
);
}
function ProfileScreen() {
const navigation = useNavigation();
return (
Profile Screen
);
}
function HomeScreen() {
const navigation = useNavigation();
return (
Home Screen
);
}
const Drawer = createDrawerNavigator();
const Stack = createNativeStackNavigator();
function Root() {
return (
);
}
// codeblock-focus-start
export default function App() {
return (
// highlight-next-line
);
}
// codeblock-focus-start
```
You can change the theme prop dynamically and all the components will automatically update to reflect the new theme. If you haven't provided a `theme` prop, the default theme will be used.
## Properties
A theme is a JS object containing a list of colors to use. It contains the following properties:
- `dark` (`boolean`): Whether this is a dark theme or a light theme
- `colors` (`object`): Various colors used by react navigation components:
- `primary` (`string`): The primary color of the app used to tint various elements. Usually you'll want to use your brand color for this.
- `background` (`string`): The color of various backgrounds, such as the background color for the screens.
- `card` (`string`): The background color of card-like elements, such as headers, tab bars etc.
- `text` (`string`): The text color of various elements.
- `border` (`string`): The color of borders, e.g. header border, tab bar border etc.
- `notification` (`string`): The color of notifications and badge (e.g. badge in bottom tabs).
- `fonts` (`object`): Various fonts used by react navigation components:
- `regular` (`object`): Style object for the primary font used in the app.
- `medium` (`object`): Style object for the semi-bold variant of the primary font.
- `bold` (`object`): Style object for the bold variant of the primary font.
- `heavy` (`object`): Style object for the extra-bold variant of the primary font.
The style objects for fonts contain the following properties:
- `fontFamily` (`string`): The name of the font family (or font stack on Web) to use, e.g. `Roboto` or `Helvetica Neue`. The system fonts are used by default.
- `fontWeight` (`string`): The font weight to use. Valid values are `normal`, `bold`, `100`, `200`, `300`, `400`, `500`, `600`, `700`, `800`, `900`.
When creating a custom theme, you will need to provide all of these properties.
Example theme:
```js
const WEB_FONT_STACK =
'system-ui, "Segoe UI", Roboto, Helvetica, Arial, sans-serif, "Apple Color Emoji", "Segoe UI Emoji", "Segoe UI Symbol"';
const MyTheme = {
dark: false,
colors: {
primary: 'rgb(255, 45, 85)',
background: 'rgb(242, 242, 242)',
card: 'rgb(255, 255, 255)',
text: 'rgb(28, 28, 30)',
border: 'rgb(199, 199, 204)',
notification: 'rgb(255, 69, 58)',
},
fonts: Platform.select({
web: {
regular: {
fontFamily: WEB_FONT_STACK,
fontWeight: '400',
},
medium: {
fontFamily: WEB_FONT_STACK,
fontWeight: '500',
},
bold: {
fontFamily: WEB_FONT_STACK,
fontWeight: '600',
},
heavy: {
fontFamily: WEB_FONT_STACK,
fontWeight: '700',
},
},
ios: {
regular: {
fontFamily: 'System',
fontWeight: '400',
},
medium: {
fontFamily: 'System',
fontWeight: '500',
},
bold: {
fontFamily: 'System',
fontWeight: '600',
},
heavy: {
fontFamily: 'System',
fontWeight: '700',
},
},
default: {
regular: {
fontFamily: 'sans-serif',
fontWeight: 'normal',
},
medium: {
fontFamily: 'sans-serif-medium',
fontWeight: 'normal',
},
bold: {
fontFamily: 'sans-serif',
fontWeight: '600',
},
heavy: {
fontFamily: 'sans-serif',
fontWeight: '700',
},
},
}),
};
```
Providing a theme will take care of styling of all the official navigators. React Navigation also provides several tools to help you make your customizations of those navigators and the screens within the navigators can use the theme too.
## Built-in themes
As operating systems add built-in support for light and dark modes, supporting dark mode is less about keeping hip to trends and more about conforming to the average user expectations for how apps should work. In order to provide support for light and dark mode in a way that is reasonably consistent with the OS defaults, these themes are built in to React Navigation.
You can import the default and dark themes like so:
```js
import { DefaultTheme, DarkTheme } from '@react-navigation/native';
```
## Keeping the native theme in sync
If you're changing the theme in the app, native UI elements such as Alert, ActionSheet etc. won't reflect the new theme. You can do the following to keep the native theme in sync:
```js
React.useEffect(() => {
const colorScheme = theme.dark ? 'dark' : 'light';
if (Platform.OS === 'web') {
document.documentElement.style.colorScheme = colorScheme;
} else {
Appearance.setColorScheme(colorScheme);
}
}, [theme.dark]);
```
Alternatively, you can use the [`useColorScheme`](#using-the-operating-system-preferences) hook to get the current native color scheme and update the theme accordingly.
## Using the operating system preferences
On iOS 13+ and Android 10+, you can get user's preferred color scheme (`'dark'` or `'light'`) with the ([`useColorScheme` hook](https://reactnative.dev/docs/usecolorscheme)).
```js name="Operating system color theme" snack
import * as React from 'react';
// codeblock-focus-start
import {
useNavigation,
createStaticNavigation,
DefaultTheme,
DarkTheme,
useTheme,
} from '@react-navigation/native';
import { View, Text, TouchableOpacity, useColorScheme } from 'react-native';
// codeblock-focus-end
import { createNativeStackNavigator } from '@react-navigation/native-stack';
import { createDrawerNavigator } from '@react-navigation/drawer';
import { Button } from '@react-navigation/elements';
function SettingsScreen({ route }) {
const navigation = useNavigation();
const { user } = route.params;
const { colors } = useTheme();
return (
Settings Screen
userParam: {JSON.stringify(user)}
);
}
function ProfileScreen() {
const { colors } = useTheme();
return (
Profile Screen
);
}
function MyButton() {
const { colors } = useTheme();
return (
Button!
);
}
function HomeScreen() {
const navigation = useNavigation();
const { colors } = useTheme();
return (
Home Screen
);
}
const PanelStack = createNativeStackNavigator({
screens: {
Profile: ProfileScreen,
Settings: SettingsScreen,
},
});
const Drawer = createDrawerNavigator({
initialRouteName: 'Panel',
screens: {
Home: HomeScreen,
Panel: PanelStack,
},
});
// codeblock-focus-start
const Navigation = createStaticNavigation(Drawer);
export default function App() {
// highlight-next-line
const scheme = useColorScheme();
// highlight-next-line
return ;
}
// codeblock-focus-end
```
```js name="Operating system color theme" snack
import * as React from 'react';
// codeblock-focus-start
import { View, Text, TouchableOpacity, useColorScheme } from 'react-native';
import {
NavigationContainer,
DefaultTheme,
DarkTheme,
useTheme,
} from '@react-navigation/native';
// codeblock-focus-end
import { createNativeStackNavigator } from '@react-navigation/native-stack';
import { createDrawerNavigator } from '@react-navigation/drawer';
import { Button } from '@react-navigation/elements';
function SettingsScreen({ route, navigation }) {
const { user } = route.params;
const { colors } = useTheme();
return (
Settings Screen
userParam: {JSON.stringify(user)}
);
}
function ProfileScreen() {
const { colors } = useTheme();
return (
Profile Screen
);
}
function MyButton() {
const { colors } = useTheme();
return (
Button!
);
}
function HomeScreen() {
const navigation = useNavigation();
const { colors } = useTheme();
return (
Home Screen
);
}
const Drawer = createDrawerNavigator();
const Stack = createNativeStackNavigator();
function Root() {
return (
);
}
// codeblock-focus-start
export default function App() {
// highlight-next-line
const scheme = useColorScheme();
return (
// highlight-next-line
);
}
// codeblock-focus-end
```
## Using the current theme in your own components
To gain access to the theme in any component that is rendered inside the navigation container:, you can use the `useTheme` hook. It returns the theme object:
```js name="System themes" snack
import * as React from 'react';
// codeblock-focus-start
import {
useNavigation,
createStaticNavigation,
DefaultTheme,
DarkTheme,
useTheme,
} from '@react-navigation/native';
import { View, Text, TouchableOpacity, useColorScheme } from 'react-native';
// codeblock-focus-end
import { createNativeStackNavigator } from '@react-navigation/native-stack';
import { createDrawerNavigator } from '@react-navigation/drawer';
import { Button } from '@react-navigation/elements';
function SettingsScreen({ route }) {
const navigation = useNavigation();
const { user } = route.params;
const { colors } = useTheme();
return (
Settings Screen
userParam: {JSON.stringify(user)}
);
}
function ProfileScreen() {
const { colors } = useTheme();
return (
Profile Screen
);
}
// codeblock-focus-start
function MyButton() {
// highlight-next-line
const { colors } = useTheme();
return (
Button!
);
}
// codeblock-focus-end
function HomeScreen() {
const navigation = useNavigation();
const { colors } = useTheme();
return (
Home Screen
);
}
const PanelStack = createNativeStackNavigator({
screens: {
Profile: ProfileScreen,
Settings: SettingsScreen,
},
});
const Drawer = createDrawerNavigator({
initialRouteName: 'Panel',
screens: {
Home: HomeScreen,
Panel: PanelStack,
},
});
const Navigation = createStaticNavigation(Drawer);
export default function App() {
const scheme = useColorScheme();
return ;
}
```
```js name="System themes" snack
import * as React from 'react';
// codeblock-focus-start
import { View, Text, TouchableOpacity, useColorScheme } from 'react-native';
import {
NavigationContainer,
DefaultTheme,
DarkTheme,
useTheme,
useNavigation,
} from '@react-navigation/native';
// codeblock-focus-end
import { createNativeStackNavigator } from '@react-navigation/native-stack';
import { createDrawerNavigator } from '@react-navigation/drawer';
function SettingsScreen({ route, navigation }) {
const { colors } = useTheme();
const { user } = route.params;
return (
Settings Screen
userParam: {JSON.stringify(user)}
);
}
function ProfileScreen() {
const { colors } = useTheme();
return (
Profile Screen
);
}
// codeblock-focus-start
function MyButton() {
// highlight-next-line
const { colors } = useTheme();
return (
Button!
);
}
// codeblock-focus-end
function HomeScreen() {
const navigation = useNavigation();
const { colors } = useTheme();
return (
Home Screen
);
}
const Drawer = createDrawerNavigator();
const Stack = createNativeStackNavigator();
function Root() {
return (
);
}
export default function App() {
const scheme = useColorScheme();
return (
);
}
```
---
## State persistence
Source: https://reactnavigation.org/docs/state-persistence
import Tabs from '@theme/Tabs';
import TabItem from '@theme/TabItem';
You might want to save the user's location in the app, so that they are immediately returned to the same location after the app is restarted.
This is especially valuable during development because it allows the developer to stay on the same screen when they refresh the app.
## Usage
To be able to persist the [navigation state](navigation-state.md), we can use the `onStateChange` and `initialState` props of the container.
- `onStateChange` - This prop notifies us of any state changes. We can persist the state in this callback.
- `initialState` - This prop allows us to pass an initial state to use for [navigation state](navigation-state.md). We can pass the restored state in this prop.
```js name="Persisting the navigation state" snack dependencies=@react-native-async-storage/async-storage
import * as React from 'react';
// codeblock-focus-start
import { Platform, View, Linking } from 'react-native';
import AsyncStorage from '@react-native-async-storage/async-storage';
import {
useNavigation,
createStaticNavigation,
} from '@react-navigation/native';
// codeblock-focus-end
import { Button } from '@react-navigation/elements';
import { createBottomTabNavigator } from '@react-navigation/bottom-tabs';
import { createNativeStackNavigator } from '@react-navigation/native-stack';
function A() {
return ;
}
function B() {
const navigation = useNavigation();
return (
);
}
function C() {
const navigation = useNavigation();
return (
);
}
function D() {
return ;
}
const HomeStackScreen = createNativeStackNavigator({
screens: {
A: A,
},
});
const SettingsStackScreen = createNativeStackNavigator({
screens: {
B: B,
C: C,
D: D,
},
});
const Tab = createBottomTabNavigator({
screens: {
Home: {
screen: HomeStackScreen,
options: {
headerShown: false,
tabBarLabel: 'Home!',
},
},
Settings: {
screen: SettingsStackScreen,
options: {
headerShown: false,
tabBarLabel: 'Settings!',
},
},
},
});
const Navigation = createStaticNavigation(Tab);
// codeblock-focus-start
const PERSISTENCE_KEY = 'NAVIGATION_STATE_V1';
export default function App() {
const [isReady, setIsReady] = React.useState(Platform.OS === 'web'); // Don't persist state on web since it's based on URL
const [initialState, setInitialState] = React.useState();
React.useEffect(() => {
const restoreState = async () => {
try {
const initialUrl = await Linking.getInitialURL();
if (Platform.OS !== 'web' && initialUrl == null) {
const savedState = await AsyncStorage.getItem(PERSISTENCE_KEY);
const state = savedState ? JSON.parse(savedState) : undefined;
if (state !== undefined) {
setInitialState(state);
}
}
} finally {
setIsReady(true);
}
};
if (!isReady) {
restoreState();
}
}, [isReady]);
if (!isReady) {
return null;
}
return (
AsyncStorage.setItem(PERSISTENCE_KEY, JSON.stringify(state))
}
/>
);
}
// codeblock-focus-end
```
```js name="Persisting the navigation state" snack dependencies=@react-native-async-storage/async-storage
import * as React from 'react';
// codeblock-focus-start
import { Platform, View, Linking } from 'react-native';
import AsyncStorage from '@react-native-async-storage/async-storage';
import { NavigationContainer, useNavigation } from '@react-navigation/native';
// codeblock-focus-end
import { Button } from '@react-navigation/elements';
import { createBottomTabNavigator } from '@react-navigation/bottom-tabs';
import { createNativeStackNavigator } from '@react-navigation/native-stack';
const Tab = createBottomTabNavigator();
const HomeStack = createNativeStackNavigator();
const SettingsStack = createNativeStackNavigator();
function A() {
return ;
}
function B() {
const navigation = useNavigation();
return (
);
}
function C() {
const navigation = useNavigation();
return (
);
}
function D() {
return ;
}
function HomeStackScreen() {
return (
);
}
function SettingsStackScreen() {
return (
);
}
function RootTabs() {
return (
);
}
// codeblock-focus-start
const PERSISTENCE_KEY = 'NAVIGATION_STATE_V1';
export default function App() {
const [isReady, setIsReady] = React.useState(Platform.OS === 'web'); // Don't persist state on web since it's based on URL
const [initialState, setInitialState] = React.useState();
React.useEffect(() => {
const restoreState = async () => {
try {
const initialUrl = await Linking.getInitialURL();
if (initialUrl == null) {
// Only restore state if there's no deep link
const savedStateString = await AsyncStorage.getItem(PERSISTENCE_KEY);
const state = savedStateString
? JSON.parse(savedStateString)
: undefined;
if (state !== undefined) {
setInitialState(state);
}
}
} finally {
setIsReady(true);
}
};
if (!isReady) {
restoreState();
}
}, [isReady]);
if (!isReady) {
return null;
}
return (
AsyncStorage.setItem(PERSISTENCE_KEY, JSON.stringify(state))
}
>
);
}
// codeblock-focus-end
```
:::warning
It is recommended to use an [error boundary](https://react.dev/reference/react/Component#catching-rendering-errors-with-an-error-boundary) in your app and clear the persisted state if an error occurs. This will ensure that the app doesn't get stuck in an error state if a screen crashes.
:::
### Development Mode
This feature is particularly useful in development mode. You can enable it selectively using the following approach:
```js
const [isReady, setIsReady] = React.useState(__DEV__ ? false : true);
```
While it can be used for production as well, use it with caution as it can make the app unusable if the app is crashing on a particular screen - as the user will still be on the same screen after restarting. So if you are using it in production, make sure to clear the persisted state if an error occurs.
### Loading View
Because the state is restored asynchronously, the app must render an empty/loading view for a moment before we have the initial state. To handle this, we can return a loading view when `isReady` is `false`:
```js
if (!isReady) {
return ;
}
```
## Warning: Serializable State
Each param, route, and navigation state must be fully serializable for this feature to work. Typically, you would serialize the state as a JSON string. This means that your routes and params must contain no functions, class instances, or recursive data structures. React Navigation already [warns you during development](troubleshooting.md#i-get-the-warning-non-serializable-values-were-found-in-the-navigation-state) if it encounters non-serializable data, so watch out for the warning if you plan to persist navigation state.
You can modify the initial state object before passing it to container, but note that if your `initialState` isn't a [valid navigation state](navigation-state.md#stale-state-objects), React Navigation may not be able to handle the situation gracefully in some scenarios.
---
## Combining static and dynamic APIs
Source: https://reactnavigation.org/docs/combine-static-with-dynamic
While the static API has many advantages, it doesn't fit use cases where the navigation configuration needs to be dynamic. So React Navigation supports interop between the static and dynamic APIs.
Keep in mind that the features provided by the static API such as automatic linking configuration and automatic TypeScript types need the whole configuration to be static. If part of the configuration is dynamic, you'll need to handle those parts manually.
There are 2 ways you may want to combine the static and dynamic APIs:
## Static root navigator, dynamic nested navigator
This is useful if you want to keep your configuration static, but need to use a dynamic configuration for a specific navigator.
Let's consider the following example:
- You have a root stack navigator that contains a tab navigator in a screen.
- The tab navigator is defined using the dynamic API.
Our static configuration would look like this:
```js
import { createNativeStackNavigator } from '@react-navigation/native-stack';
const RootStack = createNativeStackNavigator({
screens: {
Home: {
screen: HomeScreen,
},
Feed: {
screen: FeedScreen,
linking: {
path: 'feed',
},
},
},
});
```
Here, `FeedScreen` is a component that renders a tab navigator and is defined using the dynamic API:
```js
import { createBottomTabNavigator } from '@react-navigation/bottom-tabs';
const Tab = createBottomTabNavigator();
function FeedScreen() {
return (
);
}
```
This code will work, but we're missing 2 things:
- Linking configuration for the screens in the top tab navigator.
- TypeScript types for the screens in the top tab navigator.
Since the nested navigator is defined using the dynamic API, we need to handle these manually. For the linking configuration, we can define the screens in the `linking` property of the `Feed` screen:
```js
import { createNativeStackNavigator } from '@react-navigation/native-stack';
const RootStack = createNativeStackNavigator({
screens: {
Home: {
screen: HomeScreen,
},
Feed: {
screen: FeedScreen,
linking: {
path: 'feed',
// highlight-start
screens: {
Latest: 'latest',
Popular: 'popular',
},
// highlight-end
},
},
},
});
```
Here the `screens` property is the same as how you'd define it with `linking` config with the dynamic API. It can contain configuration for any nested navigators as well. See [configuring links](configuring-links.md) for more details on the API.
For the TypeScript types, we can define the type of the `FeedScreen` component:
```tsx
import {
StaticScreenProps,
NavigatorScreenParams,
} from '@react-navigation/native';
type FeedParamList = {
Latest: undefined;
Popular: undefined;
};
// highlight-next-line
type Props = StaticScreenProps>;
// highlight-next-line
function FeedScreen(_: Props) {
// ...
}
```
In the above snippet:
1. We first define the param list type for screens in the navigator that defines params for each screen
2. Then we use the `NavigatorScreenParams` type to get the type of route's `params` which will include types for the nested screens
3. Finally, we use the type of `params` with `StaticScreenProps` to define the type of the screen component
This is based on how we'd define the type for a screen with a nested navigator with the dynamic API. See [Type checking screens and params in nested navigator](typescript.md#type-checking-screens-and-params-in-nested-navigator).
## Dynamic root navigator, static nested navigator
This is useful if you already have a dynamic configuration, but want to migrate to the static API. This way you can migrate one navigator at a time.
Let's consider the following example:
- You have a root stack navigator that contains a tab navigator in a screen.
- The root stack navigator is defined using the dynamic API.
Our dynamic configuration would look like this:
```js
import { createNativeStackNavigator } from '@react-navigation/native-stack';
const RootStack = createNativeStackNavigator();
function RootStackScreen() {
return (
);
}
```
Here, `FeedScreen` is a component that renders a tab navigator and is defined using the static API:
```js
import { createBottomTabNavigator } from '@react-navigation/bottom-tabs';
const FeedTabs = createBottomTabNavigator({
screens: {
Latest: {
screen: LatestScreen,
},
Popular: {
screen: PopularScreen,
},
},
});
```
To use the `FeedTabs` navigator for the `Feed` screen, we need to use the `createComponentForStaticNavigation` function:
```js
import { createComponentForStaticNavigation } from '@react-navigation/native';
// highlight-next-line
const FeedScreen = createComponentForStaticNavigation(FeedTabs, 'Feed');
```
In addition, we can generate the TypeScript types for the `FeedTabs` navigator and use it in the types of `RootStack` without needing to write them manually:
```tsx
import {
StaticParamList,
NavigatorScreenParams,
} from '@react-navigation/native';
// highlight-next-line
type FeedTabsParamList = StaticParamList;
type RootStackParamList = {
Home: undefined;
// highlight-next-line
Feed: NavigatorScreenParams;
};
```
Similarly, we can generate the linking configuration for the `FeedTabs` navigator and use it in the linking configuration passed to `NavigationContainer`:
```js
import { createPathConfigForStaticNavigation } from '@react-navigation/native';
// highlight-next-line
const feedScreens = createPathConfigForStaticNavigation(FeedTabs);
const linking = {
prefixes: ['https://example.com', 'example://'],
config: {
screens: {
Home: '',
Feed: {
path: 'feed',
// highlight-next-line
screens: feedScreens,
},
},
},
};
```
This will generate the linking configuration for the `Feed` screen based on the configuration of the `FeedTabs` navigator.
---
## Writing tests
Source: https://reactnavigation.org/docs/testing
import Tabs from '@theme/Tabs';
import TabItem from '@theme/TabItem';
React Navigation components can be tested in a similar way to other React components. This guide will cover how to write tests for components using React Navigation using [Jest](https://jestjs.io).
## Guiding principles
When writing tests, it's encouraged to write tests that closely resemble how users interact with your app. Keeping this in mind, here are some guiding principles to follow:
- **Test the result, not the action**: Instead of checking if a specific navigation action was called, check if the expected components are rendered after navigation.
- **Avoid mocking React Navigation**: Mocking React Navigation components can lead to tests that don't match the actual logic. Instead, use a real navigator in your tests.
Following these principles will help you write tests that are more reliable and easier to maintain by avoiding testing implementation details.
## Setting up Jest
### Compiling React Navigation
React Navigation ships [ES modules](https://developer.mozilla.org/en-US/docs/Web/JavaScript/Guide/Modules). However, Jest does not support ES modules natively.
It's necessary to transform the code to CommonJS to use them in tests. The `react-native` preset for Jest does not transform the code in `node_modules` by default. To enable this, you need to add the [`transformIgnorePatterns`](https://jestjs.io/docs/configuration#transformignorepatterns-arraystring) option in your Jest configuration where you can specify a regexp pattern. To compile React Navigation packages, you can add `@react-navigation` to the regexp.
This is usually done in a `jest.config.js` file or the `jest` key in `package.json`:
```diff lang=json
{
"preset": "react-native",
+ "transformIgnorePatterns": [
+ "node_modules/(?!(@react-native|react-native|@react-navigation)/)"
+ ]
}
```
### Mocking native dependencies
To be able to test React Navigation components, certain dependencies will need to be mocked depending on which components are being used.
If you're using `@react-navigation/stack`, you will need to mock:
- `react-native-gesture-handler`
If you're using `@react-navigation/drawer`, you will need to mock:
- `react-native-reanimated`
- `react-native-gesture-handler`
To add the mocks, create a file `jest/setup.js` (or any other file name of your choice) and paste the following code in it:
```js
// Include this line for mocking react-native-gesture-handler
import 'react-native-gesture-handler/jestSetup';
// Include this section for mocking react-native-reanimated
import { setUpTests } from 'react-native-reanimated';
setUpTests();
// Silence the warning: Animated: `useNativeDriver` is not supported because the native animated module is missing
import { jest } from '@jest/globals';
jest.mock('react-native/Libraries/Animated/NativeAnimatedHelper');
```
Then we need to use this setup file in our jest config. You can add it under [`setupFilesAfterEnv`](https://jestjs.io/docs/configuration#setupfilesafterenv-array) option in a `jest.config.js` file or the `jest` key in `package.json`:
```diff lang=json
{
"preset": "react-native",
"transformIgnorePatterns": [
"node_modules/(?!(@react-native|react-native|@react-navigation)/)"
],
+ "setupFilesAfterEnv": ["/jest/setup.js"]
}
```
Jest will run the files specified in `setupFilesAfterEnv` before running your tests, so it's a good place to put your global mocks.
Mocking `react-native-screens`
This shouldn't be necessary in most cases. However, if you find yourself in a need to mock `react-native-screens` component for some reason, you should do it by adding following code in `jest/setup.js` file:
```js
// Include this section for mocking react-native-screens
jest.mock('react-native-screens', () => {
// Require actual module instead of a mock
let screens = jest.requireActual('react-native-screens');
// All exports in react-native-screens are getters
// We cannot use spread for cloning as it will call the getters
// So we need to clone it with Object.create
screens = Object.create(
Object.getPrototypeOf(screens),
Object.getOwnPropertyDescriptors(screens)
);
// Add mock of the component you need
// Here is the example of mocking the Screen component as a View
Object.defineProperty(screens, 'Screen', {
value: require('react-native').View,
});
return screens;
});
```
If you're not using Jest, then you'll need to mock these modules according to the test framework you are using.
## Fake timers
When writing tests containing navigation with animations, you need to wait until the animations finish. In such cases, we recommend using [`Fake Timers`](https://jestjs.io/docs/timer-mocks) to simulate the passage of time in your tests. This can be done by adding the following line at the beginning of your test file:
```js
jest.useFakeTimers();
```
Fake timers replace real implementation of the native timer functions (e.g. `setTimeout()`, `setInterval()` etc,) with a custom implementation that uses a fake clock. This lets you instantly skip animations and reduce the time needed to run your tests by calling methods such as `jest.runAllTimers()`.
Often, component state is updated after an animation completes. To avoid getting an error in such cases, wrap `jest.runAllTimers()` in `act`:
```js
import { act } from 'react-test-renderer';
// ...
act(() => jest.runAllTimers());
```
See the examples below for more details on how to use fake timers in tests involving navigation.
## Navigation and visibility
In React Navigation, the previous screen is not unmounted when navigating to a new screen. This means that the previous screen is still present in the component tree, but it's not visible.
When writing tests, you should assert that the expected component is visible or hidden instead of checking if it's rendered or not. React Native Testing Library provides a `toBeVisible` matcher that can be used to check if an element is visible to the user.
```js
expect(screen.getByText('Settings screen')).toBeVisible();
```
This is in contrast to the `toBeOnTheScreen` matcher, which checks if the element is rendered in the component tree. This matcher is not recommended when writing tests involving navigation.
By default, the queries from React Native Testing Library (e.g. `getByRole`, `getByText`, `getByLabelText` etc.) [only return visible elements](https://callstack.github.io/react-native-testing-library/docs/api/queries#includehiddenelements-option). So you don't need to do anything special. However, if you're using a different library for your tests, you'll need to account for this behavior.
## Example tests
We recommend using [React Native Testing Library](https://callstack.github.io/react-native-testing-library/) to write your tests.
In this guide, we will go through some example scenarios and show you how to write tests for them using Jest and React Native Testing Library:
### Navigation between tabs
In this example, we have a bottom tab navigator with two tabs: Home and Settings. We will write a test that asserts that we can navigate between these tabs by pressing the tab bar buttons.
```js title="MyTabs.js"
import { createBottomTabNavigator } from '@react-navigation/bottom-tabs';
import { Text, View } from 'react-native';
const HomeScreen = () => {
return (
Home screen
);
};
const SettingsScreen = () => {
return (
Settings screen
);
};
export const MyTabs = createBottomTabNavigator({
screens: {
Home: HomeScreen,
Settings: SettingsScreen,
},
});
```
```js title="MyTabs.js"
import { createBottomTabNavigator } from '@react-navigation/bottom-tabs';
import { Text, View } from 'react-native';
const HomeScreen = () => {
return (
Home screen
);
};
const SettingsScreen = () => {
return (
Settings screen
);
};
const Tab = createBottomTabNavigator();
export const MyTabs = () => {
return (
);
};
```
```js title="MyTabs.test.js"
import { expect, jest, test } from '@jest/globals';
import { createStaticNavigation } from '@react-navigation/native';
import { act, render, screen, userEvent } from '@testing-library/react-native';
import { MyTabs } from './MyTabs';
jest.useFakeTimers();
test('navigates to settings by tab bar button press', async () => {
const user = userEvent.setup();
const Navigation = createStaticNavigation(MyTabs);
render();
const button = screen.getByRole('button', { name: 'Settings, tab, 2 of 2' });
await user.press(button);
act(() => jest.runAllTimers());
expect(screen.getByText('Settings screen')).toBeVisible();
});
```
```js title="MyTabs.test.js"
import { expect, jest, test } from '@jest/globals';
import { NavigationContainer } from '@react-navigation/native';
import { act, render, screen, userEvent } from '@testing-library/react-native';
import { MyTabs } from './MyTabs';
jest.useFakeTimers();
test('navigates to settings by tab bar button press', async () => {
const user = userEvent.setup();
render(
);
const button = screen.getByLabelText('Settings, tab, 2 of 2');
await user.press(button);
act(() => jest.runAllTimers());
expect(screen.getByText('Settings screen')).toBeVisible();
});
```
In the above test, we:
- Render the `MyTabs` navigator within a [NavigationContainer](navigation-container.md) in our test.
- Get the tab bar button using the `getByLabelText` query that matches its accessibility label.
- Press the button using `userEvent.press(button)` to simulate a user interaction.
- Run all timers using `jest.runAllTimers()` to skip animations (e.g. animations in the `Pressable` for the button).
- Assert that the `Settings screen` is visible after the navigation.
### Reacting to a navigation event
In this example, we have a stack navigator with two screens: Home and Surprise. We will write a test that asserts that the text "Surprise!" is displayed after navigating to the Surprise screen.
```js title="MyStack.js"
import { useNavigation } from '@react-navigation/native';
import { createStackNavigator } from '@react-navigation/stack';
import { Button, Text, View } from 'react-native';
import { useEffect, useState } from 'react';
const HomeScreen = () => {
const navigation = useNavigation();
return (
Home screen
);
};
const SurpriseScreen = () => {
const navigation = useNavigation();
const [textVisible, setTextVisible] = useState(false);
useEffect(() => {
navigation.addListener('transitionEnd', () => setTextVisible(true));
}, [navigation]);
return (
{textVisible ? Surprise! : ''}
);
};
export const MyStack = createStackNavigator({
screens: {
Home: HomeScreen,
Surprise: SurpriseScreen,
},
});
```
```js title="MyStack.js"
import { useNavigation } from '@react-navigation/native';
import { createStackNavigator } from '@react-navigation/stack';
import { useEffect, useState } from 'react';
import { Button, Text, View } from 'react-native';
const HomeScreen = () => {
const navigation = useNavigation();
return (
Home screen
);
};
const SurpriseScreen = () => {
const navigation = useNavigation();
const [textVisible, setTextVisible] = useState(false);
useEffect(() => {
navigation.addListener('transitionEnd', () => setTextVisible(true));
}, [navigation]);
return (
{textVisible ? Surprise! : ''}
);
};
const Stack = createStackNavigator();
export const MyStack = () => {
return (
);
};
```
```js title="MyStack.test.js"
import { expect, jest, test } from '@jest/globals';
import { createStaticNavigation } from '@react-navigation/native';
import { act, render, screen, userEvent } from '@testing-library/react-native';
import { MyStack } from './MyStack';
jest.useFakeTimers();
test('shows surprise text after navigating to surprise screen', async () => {
const user = userEvent.setup();
const Navigation = createStaticNavigation(MyStack);
render();
await user.press(screen.getByLabelText('Click here!'));
act(() => jest.runAllTimers());
expect(screen.getByText('Surprise!')).toBeVisible();
});
```
```js title="MyStack.test.js"
import { expect, jest, test } from '@jest/globals';
import { NavigationContainer } from '@react-navigation/native';
import { act, render, screen, userEvent } from '@testing-library/react-native';
import { MyStack } from './MyStack';
jest.useFakeTimers();
test('shows surprise text after navigating to surprise screen', async () => {
const user = userEvent.setup();
render(
);
await user.press(screen.getByLabelText('Click here!'));
act(() => jest.runAllTimers());
expect(screen.getByText('Surprise!')).toBeVisible();
});
```
In the above test, we:
- Render the `MyStack` navigator within a [NavigationContainer](navigation-container.md) in our test.
- Get the button using the `getByLabelText` query that matches its title.
- Press the button using `userEvent.press(button)` to simulate a user interaction.
- Run all timers using `jest.runAllTimers()` to skip animations (e.g. navigation animation between screens).
- Assert that the `Surprise!` text is visible after the transition to the Surprise screen is complete.
### Fetching data with `useFocusEffect`
In this example, we have a bottom tab navigator with two tabs: Home and Pokemon. We will write a test that asserts the data fetching logic on focus in the Pokemon screen.
```js title="MyTabs.js"
import { createBottomTabNavigator } from '@react-navigation/bottom-tabs';
import { useFocusEffect } from '@react-navigation/native';
import { useCallback, useState } from 'react';
import { Text, View } from 'react-native';
function HomeScreen() {
return (
Home screen
);
}
const url = 'https://pokeapi.co/api/v2/pokemon/ditto';
function PokemonScreen() {
const [profileData, setProfileData] = useState({ status: 'loading' });
useFocusEffect(
useCallback(() => {
if (profileData.status === 'success') {
return;
}
setProfileData({ status: 'loading' });
const controller = new AbortController();
const fetchUser = async () => {
try {
const response = await fetch(url, { signal: controller.signal });
const data = await response.json();
setProfileData({ status: 'success', data: data });
} catch (error) {
setProfileData({ status: 'error' });
}
};
fetchUser();
return () => {
controller.abort();
};
}, [profileData.status])
);
if (profileData.status === 'loading') {
return (
Loading...
);
}
if (profileData.status === 'error') {
return (
An error occurred!
);
}
return (
{profileData.data.name}
);
}
export const MyTabs = createBottomTabNavigator({
screens: {
Home: HomeScreen,
Pokemon: PokemonScreen,
},
});
```
```js title="MyTabs.js"
import { createBottomTabNavigator } from '@react-navigation/bottom-tabs';
import { useFocusEffect } from '@react-navigation/native';
import { useCallback, useState } from 'react';
import { Text, View } from 'react-native';
function HomeScreen() {
return (
Home screen
);
}
const url = 'https://pokeapi.co/api/v2/pokemon/ditto';
function PokemonInfoScreen() {
const [profileData, setProfileData] = useState({ status: 'loading' });
useFocusEffect(
useCallback(() => {
if (profileData.status === 'success') {
return;
}
setProfileData({ status: 'loading' });
const controller = new AbortController();
const fetchUser = async () => {
try {
const response = await fetch(url, { signal: controller.signal });
const data = await response.json();
setProfileData({ status: 'success', data: data });
} catch (error) {
setProfileData({ status: 'error' });
}
};
fetchUser();
return () => {
controller.abort();
};
}, [profileData.status])
);
if (profileData.status === 'loading') {
return (
Loading...
);
}
if (profileData.status === 'error') {
return (
An error occurred!
);
}
return (
{profileData.data.name}
);
}
const Tab = createBottomTabNavigator();
export function MyTabs() {
return (
);
}
```
To make the test deterministic and isolate it from the real backend, you can mock the network requests with a library such as [Mock Service Worker](https://mswjs.io/):
```js title="msw-handlers.js"
import { delay, http, HttpResponse } from 'msw';
export const handlers = [
http.get('https://pokeapi.co/api/v2/pokemon/ditto', async () => {
await delay(1000);
return HttpResponse.json({
id: 132,
name: 'ditto',
});
}),
];
```
Here we setup a handler that mocks responses from the API (for this example we're using [PokéAPI](https://pokeapi.co/)). Additionally, we `delay` the response by 1000ms to simulate a network request delay.
Then, we write a Node.js integration module to use the Mock Service Worker in our tests:
```js title="msw-node.js"
import { setupServer } from 'msw/node';
import { handlers } from './msw-handlers';
const server = setupServer(...handlers);
```
Refer to the documentation of the library to learn more about setting it up in your project - [Getting started](https://mswjs.io/docs/getting-started), [React Native integration](https://mswjs.io/docs/integrations/react-native).
```js title="MyTabs.test.js"
import './msw-node';
import { expect, jest, test } from '@jest/globals';
import { createStaticNavigation } from '@react-navigation/native';
import { act, render, screen, userEvent } from '@testing-library/react-native';
import { MyTabs } from './MyTabs';
jest.useFakeTimers();
test('loads data on Pokemon info screen after focus', async () => {
const user = userEvent.setup();
const Navigation = createStaticNavigation(MyTabs);
render();
const homeTabButton = screen.getByLabelText('Home, tab, 1 of 2');
const profileTabButton = screen.getByLabelText('Profile, tab, 2 of 2');
await user.press(profileTabButton);
expect(screen.getByText('Loading...')).toBeVisible();
await act(() => jest.runAllTimers());
expect(screen.getByText('ditto')).toBeVisible();
await user.press(homeTabButton);
await act(() => jest.runAllTimers());
await user.press(profileTabButton);
expect(screen.queryByText('Loading...')).not.toBeVisible();
expect(screen.getByText('ditto')).toBeVisible();
});
```
```js title="MyTabs.test.js"
import './msw-node';
import { expect, jest, test } from '@jest/globals';
import { NavigationContainer } from '@react-navigation/native';
import { act, render, screen, userEvent } from '@testing-library/react-native';
import { MyTabs } from './MyTabs';
jest.useFakeTimers();
test('loads data on Pokemon info screen after focus', async () => {
const user = userEvent.setup();
render(
);
const homeTabButton = screen.getByLabelText('Home, tab, 1 of 2');
const profileTabButton = screen.getByLabelText('Profile, tab, 2 of 2');
await user.press(profileTabButton);
expect(screen.getByText('Loading...')).toBeVisible();
await act(() => jest.runAllTimers());
expect(screen.getByText('ditto')).toBeVisible();
await user.press(homeTabButton);
await act(() => jest.runAllTimers());
await user.press(profileTabButton);
expect(screen.queryByText('Loading...')).not.toBeVisible();
expect(screen.getByText('ditto')).toBeVisible();
});
```
In the above test, we:
- Assert that the `Loading...` text is visible while the data is being fetched.
- Run all timers using `jest.runAllTimers()` to skip delays in the network request.
- Assert that the `ditto` text is visible after the data is fetched.
- Press the home tab button to navigate to the home screen.
- Run all timers using `jest.runAllTimers()` to skip animations (e.g. animations in the `Pressable` for the button).
- Press the profile tab button to navigate back to the Pokemon screen.
- Ensure that cached data is shown by asserting that the `Loading...` text is not visible and the `ditto` text is visible.
:::note
In a production app, we recommend using a library like [React Query](https://tanstack.com/query/) to handle data fetching and caching. The above example is for demonstration purposes only.
:::
### Re-usable components
To make it easier to test components that don't depend on the navigation structure, we can create a light-weight test navigator:
```js title="TestStackNavigator.js"
import { useNavigationBuilder, StackRouter } from '@react-navigation/native';
function TestStackNavigator(props) {
const { state, descriptors, NavigationContent } = useNavigationBuilder(
StackRouter,
props
);
return (
{state.routes.map((route, index) => {
return (
{descriptors[route.key].render()}
);
})}
);
}
export function createTestStackNavigator(config) {
return createNavigatorFactory(TestStackNavigator)(config);
}
```
This lets us test React Navigation specific logic such as `useFocusEffect` without needing to set up a full navigator.
We can use this test navigator in our tests like this:
```js title="MyComponent.test.js"
import { act, render, screen } from '@testing-library/react-native';
import { createStaticNavigation } from '@react-navigation/native';
import { createTestStackNavigator } from './TestStackNavigator';
import { MyComponent } from './MyComponent';
test('does not show modal when not focused', () => {
const TestStack = createTestStackNavigator({
screens: {
A: MyComponent,
B: () => null,
},
});
const Navigation = createStaticNavigation(TestStack);
render(
);
expect(screen.queryByText('Modal')).not.toBeVisible();
});
test('shows modal when focused', () => {
const TestStack = createTestStackNavigator({
screens: {
A: MyComponent,
B: () => null,
},
});
const Navigation = createStaticNavigation(TestStack);
render(
);
expect(screen.getByText('Modal')).toBeVisible();
});
```
```js title="MyComponent.test.js"
import { act, render, screen } from '@testing-library/react-native';
import { NavigationContainer } from '@react-navigation/native';
import { createTestStackNavigator } from './TestStackNavigator';
import { MyComponent } from './MyComponent';
test('does not show modal when not focused', () => {
const Stack = createTestStackNavigator();
const TestStack = () => (
null} />
);
render(
);
expect(screen.queryByText('Modal')).not.toBeVisible();
});
test('shows modal when focused', () => {
const Stack = createTestStackNavigator();
const TestStack = () => (
null} />
);
render(
);
expect(screen.getByText('Modal')).toBeVisible();
});
```
Here we create a test stack navigator using the `createTestStackNavigator` function. We then render the `MyComponent` component within the test navigator and assert that the modal is shown or hidden based on the focus state.
The `initialState` prop is used to set the initial state of the navigator, i.e. which screens are rendered in the stack and which one is focused. See [navigation state](navigation-state.md) for more information on the structure of the state object.
You can also pass a [`ref`](navigation-container.md#ref) to programmatically navigate in your tests.
The test navigator is a simplified version of the stack navigator, but it's still a real navigator and behaves like one. This means that you can use it to test any other navigation logic.
See [Custom navigators](custom-navigators.md) for more information on how to write custom navigators if you want adjust the behavior of the test navigator or add more functionality.
## Best practices
Generally, we recommend avoiding mocking React Navigation. Mocking can help you isolate the component you're testing, but when testing components with navigation logic, mocking means that your tests don't test for the navigation logic.
- Mocking APIs such as `useFocusEffect` means you're not testing the focus logic in your component.
- Mocking `navigation` prop or `useNavigation` means that the `navigation` object may not have the same shape as the real one.
- Asserting `navigation.navigate` calls means you only test that the function was called, not that the call was correct based on the navigation structure.
- etc.
Avoiding mocks means additional work when writing tests, but it also means:
- Refactors that don't change the logic won't break the tests, e.g. changing `navigation` prop to `useNavigation`, using a different navigation action that does the same thing, etc.
- Library upgrades or refactor that actually change the behavior will correctly break the tests, surfacing actual regressions.
Tests should break when there's a regression, not due to a refactor. Otherwise it leads to additional work to fix the tests, making it harder to know when a regression is introduced.
---
## Type checking with TypeScript
Source: https://reactnavigation.org/docs/typescript
import Tabs from '@theme/Tabs';
import TabItem from '@theme/TabItem';
React Navigation can be configured to type-check screens and their params, as well as various other APIs using TypeScript. This provides better intelliSense and type safety when working with React Navigation.
First, make sure you have the following configuration in your `tsconfig.json` under `compilerOptions`:
- `strict: true` or `strictNullChecks: true` - Necessary for intelliSense and type inference to work correctly.
- `moduleResolution: "bundler"` - Necessary to resolve the types correctly and match the behavior of [Metro](https://metrobundler.dev/) and other bundlers.
There are 2 steps to configure TypeScript with the static API:
1. Each screen component needs to specify the type of the [`route.params`](params.md) prop that it accepts. The `StaticScreenProps` type makes it simpler:
```ts
import type { StaticScreenProps } from '@react-navigation/native';
// highlight-start
type Props = StaticScreenProps<{
username: string;
}>;
// highlight-end
function ProfileScreen({ route }: Props) {
// ...
}
```
2. Generate the `ParamList` type for the root navigator and specify it as the default type for the `RootParamList` type:
```ts
import type { StaticParamList } from '@react-navigation/native';
const HomeTabs = createBottomTabNavigator({
screens: {
Feed: FeedScreen,
Profile: ProfileScreen,
},
});
const RootStack = createNativeStackNavigator({
screens: {
Home: HomeTabs,
},
});
// highlight-next-line
type RootStackParamList = StaticParamList;
// highlight-start
declare global {
namespace ReactNavigation {
interface RootParamList extends RootStackParamList {}
}
}
// highlight-end
```
This is needed to type-check the [`useNavigation`](use-navigation.md) hook.
## Navigator specific types
Generally, we recommend using the default types for the [`useNavigation`](use-navigation.md) prop to access the navigation object in a navigator-agnostic manner. However, if you need to use navigator-specific APIs, e.g. `setOptions` to update navigator options, `push`, `pop`, `popTo` etc. with stacks, `openDrawer`, `closeDrawer` etc. with drawer and so on, you need to manually annotate [`useNavigation`](use-navigation.md):
```ts
import type { BottomTabNavigationProp } from '@react-navigation/bottom-tabs';
type BottomTabParamList = StaticParamList;
type ProfileScreenNavigationProp = BottomTabNavigationProp<
BottomTabParamList,
'Profile'
>;
// ...
const navigation = useNavigation();
```
Similarly, you can import `NativeStackNavigationProp` from [`@react-navigation/native-stack`](native-stack-navigator.md), `StackNavigationProp` from [`@react-navigation/stack`](stack-navigator.md), `DrawerNavigationProp` from [`@react-navigation/drawer`](drawer-navigator.md) etc.
:::danger
Annotating [`useNavigation`](use-navigation.md) this way is not type-safe since we can't guarantee that the type you provided matches the type of the navigator. So try to keep manual annotations to a minimum and use the default types instead.
:::
## Nesting navigator using dynamic API
Consider the following example:
```js
const Tab = createBottomTabNavigator();
function HomeTabs() {
return (
);
}
const RootStack = createStackNavigator({
Home: HomeTabs,
});
```
Here, the `HomeTabs` component is defined using the dynamic API. This means that when we create the param list for the root navigator with `StaticParamList`, it won't know about the screens defined in the nested navigator. To fix this, we'd need to specify the param list for the nested navigator explicitly.
This can be done by using the type of the [`route`](route-object.md) prop that the screen component receives:
```ts
type HomeTabsParamList = {
Feed: undefined;
Profile: undefined;
};
// highlight-start
type HomeTabsProps = StaticScreenProps<
NavigatorScreenParams
>;
// highlight-end
// highlight-next-line
function HomeTabs(_: HomeTabsProps) {
return (
);
}
```
Now, when using `StaticParamList`, it will include the screens defined in the nested navigator.
When using the dynamic API, it is necessary to specify the types for each screen as well as the nesting structure as it cannot be inferred from the code.
## Typechecking the navigator
To typecheck our route name and params, the first thing we need to do is to create an object type with mappings for route names to the params of the route. For example, say we have a route called `Profile` in our root navigator which should have a param `userId`:
```tsx
type RootStackParamList = {
Profile: { userId: string };
};
```
Similarly, we need to do the same for each route:
```tsx
type RootStackParamList = {
Home: undefined;
Profile: { userId: string };
Feed: { sort: 'latest' | 'top' } | undefined;
};
```
Specifying `undefined` means that the route doesn't have params. A union type with `undefined` (e.g. `SomeType | undefined`) means that params are optional.
After we have defined the mapping, we need to tell our navigator to use it. To do that, we can pass it as a generic to the [`createXNavigator`](static-configuration.md) functions:
```tsx
import { createStackNavigator } from '@react-navigation/stack';
const RootStack = createStackNavigator();
```
And then we can use it:
```tsx
```
This will provide type checking and intelliSense for props of the [`Navigator`](navigator.md) and [`Screen`](screen.md) components.
:::note
The type containing the mapping must be a type alias (e.g. `type RootStackParamList = { ... }`). It cannot be an interface (e.g. `interface RootStackParamList { ... }`). It also shouldn't extend `ParamListBase` (e.g. `interface RootStackParamList extends ParamListBase { ... }`). Doing so will result in incorrect type checking which allows you to pass incorrect route names.
:::
If you have an [`id`](./navigator.md#id) prop for your navigator, you will also need to pass it as a generic:
```tsx
const RootStack = createStackNavigator();
```
## Type checking screens
To typecheck our screens, we need to annotate the `navigation` and the `route` props received by a screen. The navigator packages in React Navigation export generic types to define types for both the `navigation` and `route` props from the corresponding navigator.
For example, you can use `NativeStackScreenProps` for the Native Stack Navigator.
```tsx
import type { NativeStackScreenProps } from '@react-navigation/native-stack';
type RootStackParamList = {
Home: undefined;
Profile: { userId: string };
Feed: { sort: 'latest' | 'top' } | undefined;
};
type Props = NativeStackScreenProps;
```
The type takes 3 generics:
- The param list object we defined earlier
- The name of the route the screen belongs to
- The ID of the navigator (optional)
If you have an [`id`](./navigator.md#id) prop for your navigator, you can do:
```ts
type Props = NativeStackScreenProps;
```
This allows us to type check route names and params which you're navigating using [`navigate`](navigation-object.md#navigate), [`push`](stack-actions.md#push) etc. The name of the current route is necessary to type check the params in `route.params` and when you call [`setParams`](navigation-actions#setparams) or [`replaceParams`](navigation-actions#replaceparams).
Similarly, you can import `StackScreenProps` from [`@react-navigation/stack`](stack-navigator.md), `DrawerScreenProps` from [`@react-navigation/drawer`](drawer-navigator.md), `BottomTabScreenProps` from [`@react-navigation/bottom-tabs`](bottom-tab-navigator.md) and so on.
Then you can use the `Props` type you defined above to annotate your component.
For function components:
```tsx
function ProfileScreen({ route, navigation }: Props) {
// ...
}
```
For class components:
```ts
class ProfileScreen extends React.Component {
render() {
// ...
}
}
```
You can get the types for `navigation` and `route` from the `Props` type as follows:
```ts
type ProfileScreenNavigationProp = Props['navigation'];
type ProfileScreenRouteProp = Props['route'];
```
Alternatively, you can also annotate the `navigation` and `route` objects separately.
To get the type for the `navigation` prop, we need to import the corresponding type from the navigator. For example, `NativeStackNavigationProp` for `@react-navigation/native-stack`:
```tsx
import type { NativeStackNavigationProp } from '@react-navigation/native-stack';
type ProfileScreenNavigationProp = NativeStackNavigationProp<
RootStackParamList,
'Profile'
>;
```
Similarly, you can import `StackNavigationProp` from [`@react-navigation/stack`](stack-navigator.md), `DrawerNavigationProp` from [`@react-navigation/drawer`](drawer-navigator.md), `BottomTabNavigationProp` from [`@react-navigation/bottom-tabs`](bottom-tab-navigator.md) etc.
To get the type for the `route` object, we need to use the `RouteProp` type from `@react-navigation/native`:
```tsx
import type { RouteProp } from '@react-navigation/native';
type ProfileScreenRouteProp = RouteProp;
```
We recommend creating a separate file: `types.tsx` - where you keep the types and import from there in your component files instead of repeating them in each file.
## Nesting navigators
### Type checking screens and params in nested navigator
You can [navigate to a screen in a nested navigator](nesting-navigators.md#navigating-to-a-screen-in-a-nested-navigator) by passing `screen` and `params` properties for the nested screen:
```ts
navigation.navigate('Home', {
screen: 'Feed',
params: { sort: 'latest' },
});
```
To be able to type check this, we need to extract the params from the screen containing the nested navigator. This can be done using the `NavigatorScreenParams` utility:
```ts
import { NavigatorScreenParams } from '@react-navigation/native';
type TabParamList = {
Home: NavigatorScreenParams;
Profile: { userId: string };
};
```
### Combining navigation props
When you nest navigators, the navigation prop of the screen is a combination of multiple navigation props. For example, if we have a tab inside a stack, the `navigation` prop will have both [`jumpTo`](tab-actions.md#jumpto) (from the tab navigator) and [`push`](stack-actions.md#push) (from the stack navigator). To make it easier to combine types from multiple navigators, you can use the `CompositeScreenProps` type.
For example, if we have a `Profile` in a navigator, nested inside `Account` screen of a stack navigator, we can combine the types as follows:
```ts
import type { CompositeScreenProps } from '@react-navigation/native';
import type { BottomTabScreenProps } from '@react-navigation/bottom-tabs';
import type { StackScreenProps } from '@react-navigation/stack';
type ProfileScreenProps = CompositeScreenProps<
BottomTabScreenProps,
StackScreenProps
>;
```
The `CompositeScreenProps` type takes 2 parameters:
- The first parameter is the type for the navigator that owns this screen, in our case the tab navigator which contains the `Profile` screen
- The second parameter is the type of props for a parent navigator, in our case the stack navigator which contains the `Account` screen
For multiple parent navigators, this second parameter can nest another `CompositeScreenProps`:
```ts
type ProfileScreenProps = CompositeScreenProps<
BottomTabScreenProps,
CompositeScreenProps<
StackScreenProps,
DrawerScreenProps
>
>;
```
If annotating the `navigation` prop separately, you can use `CompositeNavigationProp` instead. The usage is similar to `CompositeScreenProps`:
```ts
import type { CompositeNavigationProp } from '@react-navigation/native';
import type { BottomTabNavigationProp } from '@react-navigation/bottom-tabs';
import type { StackNavigationProp } from '@react-navigation/stack';
type ProfileScreenNavigationProp = CompositeNavigationProp<
BottomTabNavigationProp,
StackNavigationProp
>;
```
## Annotating `useNavigation`
:::danger
Annotating `useNavigation` isn't type-safe because the type parameter cannot be statically verified.
Prefer [specifying a default type](#specifying-default-types-for-usenavigation-link-ref-etc) instead.
:::
To annotate the `navigation` object that we get from [`useNavigation`](use-navigation.md), we can use a type parameter:
```ts
const navigation = useNavigation();
```
## Annotating `useRoute`
:::danger
Annotating `useRoute` isn't type-safe because the type parameter cannot be statically verified.
Prefer using the [`route` object](route-object.md) from the screen component's props instead when possible. Use `useRoute` for generic code that doesn't need specific route type.
:::
To annotate the `route` object that we get from [`useRoute`](use-route.md), we can use a type parameter:
```ts
const route = useRoute();
```
## Annotating `options` and `screenOptions`
When you pass the `options` to a `Screen` or `screenOptions` prop to a `Navigator` component, they are already type-checked and you don't need to do anything special. However, sometimes you might want to extract the options to a separate object, and you might want to annotate it.
To annotate the options, we need to import the corresponding type from the navigator. For example, `StackNavigationOptions` for `@react-navigation/stack`:
```ts
import type { StackNavigationOptions } from '@react-navigation/stack';
const options: StackNavigationOptions = {
headerShown: false,
};
```
Similarly, you can import `DrawerNavigationOptions` from `@react-navigation/drawer`, `BottomTabNavigationOptions` from `@react-navigation/bottom-tabs` etc.
When using the function form of `options` and `screenOptions`, you can annotate the arguments with a type exported from the navigator, e.g. `StackOptionsArgs` for `@react-navigation/stack`, `DrawerOptionsArgs` for `@react-navigation/drawer`, `BottomTabOptionsArgs` for `@react-navigation/bottom-tabs` etc.:
```ts
import type {
StackNavigationOptions,
StackOptionsArgs,
} from '@react-navigation/stack';
const options = ({ route }: StackOptionsArgs): StackNavigationOptions => {
return {
headerTitle: route.name,
};
};
```
## Annotating `ref` on `NavigationContainer`
If you use the `createNavigationContainerRef()` method to create the ref, you can annotate it to type-check navigation actions:
```ts
import { createNavigationContainerRef } from '@react-navigation/native';
// ...
const navigationRef = createNavigationContainerRef();
```
Similarly, for `useNavigationContainerRef()`:
```ts
import { useNavigationContainerRef } from '@react-navigation/native';
// ...
const navigationRef = useNavigationContainerRef();
```
If you're using a regular `ref` object, you can pass a generic to the `NavigationContainerRef` type..
Example when using `React.useRef` hook:
```ts
import type { NavigationContainerRef } from '@react-navigation/native';
// ...
const navigationRef =
React.useRef>(null);
```
Example when using `React.createRef`:
```ts
import type { NavigationContainerRef } from '@react-navigation/native';
// ...
const navigationRef =
React.createRef>();
```
## Specifying default types for `useNavigation`, `Link`, `ref` etc
Instead of manually annotating these APIs, you can specify a global type for your root navigator which will be used as the default type.
To do this, you can add this snippet somewhere in your codebase:
```js
declare global {
namespace ReactNavigation {
interface RootParamList extends RootStackParamList {}
}
}
```
The `RootParamList` interface lets React Navigation know about the params accepted by your root navigator. Here we extend the type `RootStackParamList` because that's the type of params for our stack navigator at the root. The name of this type isn't important.
Specifying this type is important if you heavily use [`useNavigation`](use-navigation.md), [`Link`](link.md) etc. in your app since it'll ensure type-safety. It will also make sure that you have correct nesting on the [`linking`](navigation-container.md#linking) prop.
## Organizing types
When writing types for React Navigation, there are a couple of things we recommend to keep things organized.
1. It's good to create a separate file (e.g. `navigation/types.tsx`) that contains the types related to React Navigation.
2. Instead of using `CompositeNavigationProp` directly in your components, it's better to create a helper type that you can reuse.
3. Specifying a global type for your root navigator would avoid manual annotations in many places.
Considering these recommendations, the file containing the types may look something like this:
```ts
import type {
CompositeScreenProps,
NavigatorScreenParams,
} from '@react-navigation/native';
import type { StackScreenProps } from '@react-navigation/stack';
import type { BottomTabScreenProps } from '@react-navigation/bottom-tabs';
export type RootStackParamList = {
Home: NavigatorScreenParams;
PostDetails: { id: string };
NotFound: undefined;
};
export type RootStackScreenProps =
StackScreenProps;
export type HomeTabParamList = {
Popular: undefined;
Latest: undefined;
};
export type HomeTabScreenProps =
CompositeScreenProps<
BottomTabScreenProps,
RootStackScreenProps
>;
declare global {
namespace ReactNavigation {
interface RootParamList extends RootStackParamList {}
}
}
```
Now, when annotating your components, you can write:
```ts
import type { HomeTabScreenProps } from './navigation/types';
function PopularScreen({ navigation, route }: HomeTabScreenProps<'Popular'>) {
// ...
}
```
If you're using hooks such as [`useRoute`](use-route.md), you can write:
```ts
import type { HomeTabScreenProps } from './navigation/types';
function PopularScreen() {
const route = useRoute['route']>();
// ...
}
```
---
## Troubleshooting
Source: https://reactnavigation.org/docs/troubleshooting
import Tabs from '@theme/Tabs';
import TabItem from '@theme/TabItem';
This section attempts to outline issues that users frequently encounter when first getting accustomed to using React Navigation. These issues may or may not be related to React Navigation itself.
Before troubleshooting an issue, make sure that you have upgraded to **the latest available versions** of the packages. You can install the latest versions by installing the packages again (e.g. `npm install package-name`).
## I'm getting an error "Unable to resolve module" after updating to the latest version
This might happen for 3 reasons:
### Stale cache of Metro bundler
If the module points to a local file (i.e. the name of the module starts with `./`), then it's probably due to stale cache. To fix this, try the following solutions.
If you're using Expo, run:
```bash
expo start -c
```
If you're not using Expo, run:
```bash
npx react-native start --reset-cache
```
If that doesn't work, you can also try the following:
```bash
rm -rf $TMPDIR/metro-bundler-cache-*
```
### Missing peer dependency
If the module points to an npm package (i.e. the name of the module doesn't with `./`), then it's probably due to a missing dependency. To fix this, install the dependency in your project:
```bash npm2yarn
npm install name-of-the-module
```
Sometimes it might even be due to a corrupt installation. If clearing cache didn't work, try deleting your `node_modules` folder and run `npm install` again.
### Missing extensions in metro configuration
Sometimes the error may look like this:
```bash
Error: While trying to resolve module "@react-navigation/native" from file "/path/to/src/App.js", the package "/path/to/node_modules/@react-navigation/native/package.json" was successfully found. However, this package itself specifies a "main" module field that could not be resolved ("/path/to/node_modules/@react-navigation/native/src/index.tsx"
```
This can happen if you have a custom configuration for metro and haven't specified `ts` and `tsx` as valid extensions. These extensions are present in the default configuration. To check if this is the issue, look for a `metro.config.js` file in your project and check if you have specified the [`sourceExts`](https://facebook.github.io/metro/docs/en/configuration#sourceexts) option. It should at least have the following configuration:
```js
sourceExts: ['js', 'json', 'ts', 'tsx'];
```
If it's missing these extensions, add them and then clear metro cache as shown in the section above.
## I'm getting "SyntaxError in @react-navigation/xxx/xxx.tsx" or "SyntaxError: /xxx/@react-navigation/xxx/xxx.tsx: Unexpected token"
This might happen if you have an old version of the `@react-native/babel-preset` package. Try upgrading it to the latest version.
```bash npm2yarn
npm install --save-dev @react-native/babel-preset
```
If you have `@babel/core` installed, also upgrade it to latest version.
```bash npm2yarn
npm install --save-dev @babel/core
```
If upgrading the packages don't help, you can also try deleting your `node_modules` and then the lock the file and reinstall your dependencies.
If you use `npm`:
```bash
rm -rf node_modules
rm package-lock.json
npm install
```
If you use `yarn`:
```bash
rm -rf node_modules
rm yarn.lock
yarn
```
:::warning
Deleting the lockfile is generally not recommended as it may upgrade your dependencies to versions that haven't been tested with your project. So only use this as a last resort.
:::
After upgrading or reinstalling the packages, you should also clear Metro bundler's cache following the instructions earlier in the page.
## I'm getting "Module '[...]' has no exported member 'xxx' when using TypeScript
This might happen if you have an old version of TypeScript in your project. You can try upgrading it:
```bash npm2yarn
npm install --save-dev typescript
```
## I'm getting an error "null is not an object (evaluating 'RNGestureHandlerModule.default.Direction')"
This and some similar errors might occur if you have a bare React Native project and the library [`react-native-gesture-handler`](https://github.com/software-mansion/react-native-gesture-handler) library isn't linked.
Linking is automatic from React Native 0.60, so if you have linked the library manually, first unlink it:
```bash
react-native unlink react-native-gesture-handler
```
If you're testing on iOS and use Mac, make sure you have run `pod install` in the `ios/` folder:
```bash
cd ios
pod install
cd ..
```
Now rebuild the app and test on your device or simulator.
## I'm getting an error "requireNativeComponent: "RNCSafeAreaProvider" was not found in the UIManager"
This and some similar errors might occur if you have a bare React Native project and the library [`react-native-safe-area-context`](https://github.com/th3rdwave/react-native-safe-area-context) library isn't linked.
Linking is automatic from React Native 0.60, so if you have linked the library manually, first unlink it:
```bash
react-native unlink react-native-safe-area-context
```
If you're testing on iOS and use Mac, make sure you have run `pod install` in the `ios/` folder:
```bash
cd ios
pod install
cd ..
```
Now rebuild the app and test on your device or simulator.
## I'm getting an error "Tried to register two views with the same name RNCSafeAreaProvider"
This might occur if you have multiple versions of [`react-native-safe-area-context`](https://github.com/th3rdwave/react-native-safe-area-context) installed.
If you're using Expo managed workflow, it's likely that you have installed an incompatible version. To install the correct version, run:
```bash
npx expo install react-native-safe-area-context
```
If it didn't fix the error or you're not using Expo managed workflow, you'll need to check which package depends on a different version of `react-native-safe-area-context`.
If you use `yarn`, run:
```bash
yarn why react-native-safe-area-context
```
If you use `npm`, run:
```bash
npm ls react-native-safe-area-context
```
This will tell you if a package you use has a dependency on `react-native-safe-area-context`. If it's a third-party package, you should open an issue on the relevant repo's issue tracker explaining the problem. Generally for libraries, dependencies containing native code should be defined in `peerDependencies` instead of `dependencies` to avoid such issues.
If it's already in `peerDependencies` and not in `dependencies`, and you use `npm`, it might be because of incompatible version range defined for the package. The author of the library will need to relax the version range in such cases to allow a wider range of versions to be installed.
If you use `yarn`, you can also temporarily override the version being installed using `resolutions`. Add the following in your `package.json`:
```json
"resolutions": {
"react-native-safe-area-context": ""
}
```
And then run:
```bash
yarn
```
If you're on iOS and not using Expo managed workflow, also run:
```bash
cd ios
pod install
cd ..
```
Now rebuild the app and test on your device or simulator.
## Nothing is visible on the screen after adding a `View`
If you wrap the container in a `View`, make sure the `View` stretches to fill the container using `flex: 1`:
```js
import * as React from 'react';
import { View } from 'react-native';
import { createStaticNavigation } from '@react-navigation/native';
/* ... */
const Navigation = createStaticNavigation(RootStack);
export default function App() {
return (
// highlight-next-line
);
}
```
```js
import * as React from 'react';
import { View } from 'react-native';
import { NavigationContainer } from '@react-navigation/native';
export default function App() {
return (
// highlight-next-line
{/* ... */}
);
}
```
## I get the warning "Non-serializable values were found in the navigation state"
This can happen if you are passing non-serializable values such as class instances, functions etc. in params. React Navigation warns you in this case because this can break other functionality such [state persistence](state-persistence.md), [deep linking](deep-linking.md), [web support](web-support.md) etc.
Example of some use cases for passing functions in params are the following:
- To pass a callback to use in a header button. This can be achieved using `navigation.setOptions` instead. See the [guide for header buttons](header-buttons.md#header-interaction-with-its-screen-component) for examples.
- To pass a callback to the next screen which it can call to pass some data back. You can usually achieve it using `popTo` instead. See [passing params to a previous screen](params.md#passing-params-to-a-previous-screen) for examples.
- To pass complex data to another screen. Instead of passing the data `params`, you can store that complex data somewhere else (like a global store), and pass an id instead. Then the screen can get the data from the global store using the id. See [what should be in params](params.md#what-should-be-in-params).
- Pass data, callbacks etc. from a parent to child screens. You can either use React Context, or pass a children callback to pass these down instead of using params. See [passing additional props](hello-react-navigation.md#passing-additional-props).
We don't generally recommend passing functions in params. But if you don't use state persistence, deep links, or use React Navigation on Web, then you can choose to ignore it. To ignore the warning, you can use `LogBox.ignoreLogs`.
Example:
```js
import { LogBox } from 'react-native';
LogBox.ignoreLogs([
'Non-serializable values were found in the navigation state',
]);
```
## I'm getting "Invalid hook call. Hooks can only be called inside of the body of a function component"
This can happen when you pass a React component to an option that accepts a function returning a react element. For example, the [`headerTitle` option in native stack navigator](native-stack-navigator.md#headertitle) expects a function returning a react element:
```js
const Stack = createNativeStackNavigator({
screens: {
Home: {
screen: Home,
options: {
// highlight-next-line
headerTitle: (props) => ,
},
},
},
});
```
```js
,
}}
/>
```
If you directly pass a function here, you'll get this error when using hooks:
```js
const Stack = createNativeStackNavigator({
screens: {
Home: {
screen: Home,
options: {
// This is not correct
// highlight-next-line
headerTitle: MyTitle,
},
},
},
});
```
```js
```
The same applies to other options like `headerLeft`, `headerRight`, `tabBarIcon` etc. as well as props such as `tabBar`, `drawerContent` etc.
## Screens are unmounting/remounting during navigation
Sometimes you might have noticed that your screens unmount/remount, or your local component state or the navigation state resets when you navigate. This might happen if you are creating React components during render.
The simplest example is something like following:
```js
function App() {
return (
{
return ;
}}
/>
);
}
```
The `component` prop expects a React Component, but in the example, it's getting a function returning an React Element. While superficially a component and a function returning a React Element look the exact same, they don't behave the same way when used.
Here, every time the component re-renders, a new function will be created and passed to the `component` prop. React will see a new component and unmount the previous component before rendering the new one. This will cause any local state in the old component to be lost. React Navigation will detect and warn for this specific case but there can be other ways you might be creating components during render which it can't detect.
Another easy to identify example of this is when you create a component inside another component:
```js
function App() {
const Home = () => {
return ;
};
const RootStack = createNativeStackNavigator({
screens: {
Home: Home,
},
});
const Navigation = createStaticNavigation(RootStack);
return ;
}
```
```js
function App() {
const Home = () => {
return ;
};
return (
);
}
```
Or when you use a higher order component (such as `connect` from Redux, or `withX` functions that accept a component) inside another component:
```js
function App() {
return (
);
}
```
If you're unsure, it's always best to make sure that the components you are using as screens are defined outside of a React component. They could be defined in another file and imported, or defined at the top level scope in the same file:
```js
const Home = () => {
// ...
return ;
};
const RootStack = createNativeStackNavigator({
screens: {
Home: Home,
},
});
const Navigation = createStaticNavigation(RootStack);
function App() {
return ;
}
```
```js
const Home = () => {
// ...
return ;
};
function App() {
return (
);
}
```
This is not React Navigation specific, but related to React in general. You should always avoid creating components during render, whether you are using React Navigation or not.
## App is not working properly when connected to Chrome Debugger
When the app is connected to Chrome Debugger (or other tools that use Chrome Debugger such as [React Native Debugger](https://github.com/jhen0409/react-native-debugger)) you might encounter various issues related to timing.
This can result in issues such as button presses taking a long time to register or not working at all, [gestures and animations being slow and buggy](https://github.com/facebook/react-native/issues/2367) etc. There can be other functional issues such as promises not resolving, [timeouts and intervals not working correctly](https://github.com/facebook/react-native/issues/4470) etc. as well.
The issues are not related to React Navigation, but due to the nature of how the Chrome Debugger works. When connected to Chrome Debugger, your whole app runs on Chrome and communicates with the native app via sockets over the network, which can introduce latency and timing related issues.
So, unless you are trying to debug something, it's better to test the app without being connected to the Chrome Debugger. If you are using iOS, you can alternatively use [Safari to debug your app](https://reactnative.dev/docs/debugging#safari-developer-tools) which debugs the app on the device directly and does not have these issues, though it has other downsides.
---
## Upgrading from 6.x
Source: https://reactnavigation.org/docs/upgrading-from-6.x
React Navigation 7 focuses on streamlining the API to avoid patterns that can cause bugs. This means deprecating some of the legacy behavior kept for backward compatibility reasons.
This guides lists all the breaking changes and new features in React Navigation 7 that you need to be aware of when upgrading from React Navigation 6.
## Minimum Requirements
- `react-native` >= 0.72.0
- `expo` >= 52 (if you use [Expo Go](https://expo.dev/go))
- `typescript` >= 5.0.0 (if you use TypeScript)
## Breaking changes
### Changes to the `navigate` action
#### The `navigate` method no longer navigates to screen in a nested child navigator
Due to backward compatibility reasons, React Navigation 5 and 6 support navigating to a screen in a nested child navigator with `navigation.navigate(ScreenName)` syntax. But this is problematic:
- It only works if the navigator is already mounted - making navigation coupled to other logic.
- It doesn't work with the TypeScript types.
Due to these issues, we have a special API to navigate to a nested screen (`navigation.navigate(ParentScreenName, { screen: ScreenName })`).
From these release, this is no longer the default behavior. If you're relying on this behavior in your app, you can pass the [`navigationInChildEnabled`](navigation-container.md#navigationinchildenabled) prop to `NavigationContainer` to keep the behavior until you are able to migrate:
```jsx
{/* ... */}
```
The `navigationInChildEnabled` prop will be removed in the next major.
See [`navigate`](navigation-object.md#navigate) for updated usage.
#### The `navigate` method no longer goes back, use `popTo` instead
Previously, `navigate` method navigated back if the screen already exists in the stack. We have seen many people get confused by this behavior.
To avoid this confusion, we have removed the going back behavior from `navigate` and added a [new method `popTo`](stack-actions.md#popto) to explicitly go back to a specific screen in the stack:
```diff lang=js
- navigation.navigate('PreviousScreen', { foo: 42 });
+ navigation.popTo('PreviousScreen', { foo: 42 });
```
The methods now behave as follows:
- `navigate(screenName)` will stay on the current screen if the screen is already focused, otherwise push a new screen to the stack.
- `popTo(screenName)` will go back to the screen if it exists in the stack, otherwise pop the current screen and add this screen to the stack.
See [`popTo`](stack-actions.md#popto) for more details.
To achieve a behavior similar to before with `navigate`, you can use specify `pop: true` in the options:
```diff lang=js
- navigation.navigate('PreviousScreen', { foo: 42 });
+ navigation.navigate('PreviousScreen', { foo: 42 }, { pop: true });
```
To help with the migration, we have added a new method called `navigateDeprecated` which will behave like the old `navigate` method. You can replace your current `navigate` calls with [`navigateDeprecated`](navigation-object.md#navigatedeprecated) to gradually migrate to the new behavior:
```diff lang=js
- navigation.navigate('SomeScreen');
+ navigation.navigateDeprecated('SomeScreen');
```
The `navigateDeprecated` method will be removed in the next major.
#### The `navigate` method no longer accepts a `key` option
Previously, you could specify a route `key` to navigate to, e.g.:
```js
navigation.navigate({ key: 'someuniquekey' })`
```
It's problematic since:
- `key` is an internal implementation detail and created by the library internally - which makes it weird to use.
- None of the other actions support such usage.
- Specifying a `key` is not type-safe, making it easy to cause bugs.
In React Navigation 5, we added the [`getId`](screen.md#id) prop which can be used for similar use cases - and gives users full control since they provide the ID and it's not autogenerated by the library.
So the `key` option is now being removed from the `navigate` action.
See [`navigate`](navigation-object.md#navigate) for updated usage.
### Changes to `NavigationContainer`
#### The `onReady` callback on `NavigationContainer` now fires only when there are navigators rendered
Previously, the `onReady` prop and `navigationRef.isReady()` worked slightly differently:
- The `onReady` callback fired when `NavigationContainer` finishes mounting and deep links is resolved.
- The `navigationRef.isReady()` method additionally checks if there are any navigators rendered - which may not be true if the user is rendering their navigators conditionally inside a `NavigationContainer`.
This is important to know since if no navigator is rendered, we can't dispatch any navigation actions as there's no navigator to handle them. But the inconsistency between `onReady` and `navigationRef.isReady()` made it easy to cause issues and confusion.
This changes `onReady` to work similar to `navigationRef.isReady()`. The `onReady` callback will now fire only when there are navigators rendered - reflecting the value of `navigationRef.isReady()`.
This change is not breaking for most users, so you may not need to do anything.
See [`onReady`](navigation-container.md#onready) for usage.
#### The `independent` prop on `NavigationContainer` is removed in favor of `NavigationIndependentTree` component
The `independent` prop on `NavigationContainer` was added to support rendering navigators in a separate tree from the rest of the app. This is useful for use cases such as miniapps.
However, there are issues with this approach:
- When building a miniapp, the responsibility of adding this prop was on the miniapp developer, which isn't ideal since forgetting it can cause problems.
- A lot of beginners mistakenly added this prop and were confused why navigation wasn't working.
So we've removed this prop instead of a `NavigationIndependentTree` component which you can use to wrap the navigation container:
```diff lang=jsx
-
- {/* ... */}
-
+
+
+ {/* ... */}
+
+
```
This way, the responsibility no longer lies on the miniapp developer, but on the parent app. It's also harder for beginners to accidentally add this.
See [Independent navigation containers](navigation-container.md#independent-navigation-containers) for usage.
#### The `theme` prop now accepts a `fonts` property
Previously, the `theme` prop on `NavigationContainer` accepted a `colors` property to customize the colors used by various UI elements from React Navigation. We have now added a `fonts` property to customize the fonts as well. If you are passing a custom theme in the `theme` prop, you'll need to update it to include the `fonts` property.
```diff lang=js
import { DefaultTheme } from '@react-navigation/native';
const theme = {
colors: {
// ...
},
+ fonts: DefaultTheme.fonts,
};
```
If you want to customize the fonts, see [the themes guide](themes.md) for more details.
#### The navigation state is frozen in development mode
The navigation state is now frozen in development mode to prevent accidental mutations. This includes the state object and all the nested objects such as `route` object etc. If you're mutating the navigation state directly, you may get an error like `Cannot assign to read only property 'key' of object`.
Note that React Navigation relies on the immutability of the navigation state to detect changes and update the UI. Mutating the navigation state directly can cause issues and was never supported. So if you're mutating the navigation state directly, you'll need to use a different approach.
### Changes to linking
#### Encoding of params in path position is now more relaxed
Previously, params were always URL encoded with `encodeURIComponent` regardless of their position (e.g. query position such as `?user=jane` or path position such as `/users/jane`) when generating a link for a screen (e.g. URL on the Web). This made it hard to use special characters in the params.
Now, only the params in the query position are URL encoded. For the params in the path position, we only encode the characters that are not allowed in the path position.
With this change, it's easier to use special characters such as `@` in the path. For example, to have a URL such as `profile/@username`, you can use the following in the linking config:
```js
const config = {
prefixes: ['https://mysite.com'],
config: {
screens: {
Profile: {
path: 'profile/:username',
parse: {
username: (username) => username.replace(/^@/, ''),
},
stringify: {
username: (username) => `@${username}`,
},
},
},
},
};
```
See [Configuring links](configuring-links.md) for usage of the linking config.
#### The `Link` component and `useLinkProps` hook now use screen names instead of paths
Previously, the `Link` component and `useLinkProps` hook were designed to work with path strings via the `to` prop. But it had few issues:
- The path strings are not type-safe, making it easy to cause typos and bugs after refactor
- The API made navigating via screen name more inconvenient, even if that's the preferred approach
Now, instead of the `to` prop that took a path string, they now accept `screen` and `params` props, as well as an optional `href` prop to use instead of the generated path:
```diff lang=jsx
- Go to Details
+ Go to Details
```
or
```diff lang=js
- const props = useLinkProps({ to: '/details?foo=42' });
+ const props = useLinkProps({ screen: 'Details', params: { foo: 42 } });
```
With this change, you'd now have full type-safety when using the `Link` component given that you have [configured the global type](typescript.md#specifying-default-types-for-usenavigation-link-ref-etc).
See [`Link`](link.md) and [`useLinkProps`](use-link-props.md) for usage.
#### The `useLinkBuilder` hooks now returns an object instead of a function
Previously, the `useLinkBuilder` hooks returned a function to build a `href` for a screen - which is primarily useful for building custom navigators. Now, it returns an object with `buildHref` and `buildAction` methods:
```js
const { buildHref, buildAction } = useLinkBuilder();
const href = buildHref('Details', { foo: 42 }); // '/details?foo=42'
const action = buildAction('/details?foo=42'); // { type: 'NAVIGATE', payload: { name: 'Details', params: { foo: 42 } } }
```
The `buildHref` method acts the same as the previously returned function. The new `buildAction` method can be used to build a navigation action from a `href` string.
Note that this hook is intended to be primarily used by custom navigators and not by end users. For end users, the `Link` component and `useLinkProps` are the recommended way to navigate.
See [`useLinkBuilder`](use-link-builder.md) for usage.
### Changes to navigators
#### Screens pushed on top of modals are now shown as modals in the Stack and Native Stack navigators
Previously, screens pushed on top of modals were shown as regular screens in the Stack and Native Stack navigators. This often caused glitchy animation on Stack Navigator and appeared behind the modal on Native Stack Navigator. This can be especially confusing if the user came to the screen from a deep link.
Now, screens pushed on top of modals are automatically shown as modals to avoid these issues. This behavior can be disabled by explicitly setting the `presentation` option to `card`:
```jsx
```
See [Stack Navigator](stack-navigator.md#presentation) and [Native Stack Navigator](native-stack-navigator.md#presentation) docs for usage.
#### `headerBackTitleVisible` is removed in favor of `headerBackButtonDisplayMode` in Stack and Native Stack navigators
Previously, `headerBackTitleVisible` could be used to control whether the back button title is shown in the header. It's now removed in favor of `headerBackButtonDisplayMode` which provides more flexibility.
The previous behavior can be achieved by setting `headerBackButtonDisplayMode` to `default` and `minimal` for showing and hiding the back button title respectively:
```diff lang=js
```
Similarly, the `headerTruncatedBackTitle` option in Stack Navigator is renamed to `headerBackTruncatedTitle` for consistency.
#### `animationEnabled` option is removed in favor of `animation` option in Stack Navigator
Previously, `animationEnabled: false` was used to disable the animation for the screen transition in Stack Navigator.
There's now a new `animation` prop to configure animations similar to the Native Stack. So you can now use `animation: 'none'` to disable the animation instead:
```diff lang=js
```
See [Stack Navigator animation](stack-navigator.md#animations) for usage.
#### `customAnimationOnGesture` is renamed to `animationMatchesGesture` in Native Stack Navigator
The `customAnimationOnGesture` option in Native Stack Navigator is renamed to `animationMatchesGesture` to better reflect its purpose. If you are using `customAnimationOnGesture` in your project, you can rename it to `animationMatchesGesture`:
```diff lang=js
-
+
```
See [Native Stack Navigator](native-stack-navigator.md#animationmatchesgesture) for usage.
#### `statusBarColor` is renamed to `statusBarBackgroundColor` in Native Stack Navigator
The `statusBarColor` option in Native Stack Navigator is renamed to `statusBarBackgroundColor` to better reflect its purpose. If you are using `statusBarColor` in your project, you can rename it to `statusBarBackgroundColor`:
```diff lang=js
-
+
```
See [Native Stack Navigator](native-stack-navigator.md#statusbarbackgroundcolor) for usage.
#### Native Stack now requires `react-native-screens` 4
`@react-navigation/native-stack` now requires `react-native-screens` 4 and will break when using an earlier version. If you are using Native Stack Navigator in your project, make sure to upgrade `react-native-screens` to version 4.
See [Native Stack Navigator](native-stack-navigator.md) for usage.
#### Material Top Tab Navigator no longer requires installing `react-native-tab-view`
Previously, `@react-navigation/material-top-tabs` required installing `react-native-tab-view` as a dependency in the project. We have now moved this package to the React Navigation monorepo and able to coordinate the releases together, so it's no longer necessary to install it separately.
If you use `@react-navigation/material-top-tabs` and don't use `react-native-tab-view` anywhere else in your project, you can remove it from your dependencies after upgrading.
If you need to enforce a specific version of `react-native-tab-view` for some reason, we recommend using [Yarn resolutions](https://classic.yarnpkg.com/lang/en/docs/selective-version-resolutions/) or [npm overrides](https://docs.npmjs.com/cli/v9/configuring-npm/package-json#overrides) to do so.
See [Material Top Tab Navigator](material-top-tab-navigator.md) for usage.
#### The `unmountOnBlur` option is removed in favor of `popToTopOnBlur` in Bottom Tab Navigator and Drawer Navigator
In many cases, the desired behavior is to return to the first screen of the stack nested in a tab or drawer navigator after it's unfocused. Previously, the `unmountOnBlur` option was used to achieve this behavior. However, it had some issues:
- It destroyed the local state of the screen in the stack.
- It was slow to remount the nested navigator on tab navigation.
The `popToTopOnBlur` option provides an alternative approach - it pops the screens on a nested stack to go back to the first screen in the stack and doesn't have the above issues.
See [Bottom Tab Navigator](bottom-tab-navigator.md#poptotoponblur) and [Drawer Navigator](drawer-navigator.md#poptotoponblur) docs for usage.
It's still possible to achieve the old behavior of `unmountOnBlur` by using the [`useIsFocused`](use-is-focused.md) hook in the screen:
```js
const isFocused = useIsFocused();
if (!isFocused) {
return null;
}
```
This could also be combined with the new [layout props](#new-layout-props) to specify it at the screen configuration level to make the migration easier.
To achieve this, define a component that uses the `useIsFocused` hook to conditionally render its children:
```js
function UnmountOnBlur({ children }) {
const isFocused = useIsFocused();
if (!isFocused) {
return null;
}
return children;
}
```
Then use the component in `layout` prop of the screen:
```diff lang=js
{children}}
options={{
- unmountOnBlur: true,
}}
/>
```
Or `screenLayout` prop of the navigator:
```diff lang=js
{children}}
screenOptions={{
- unmountOnBlur: true,
}}
>
```
#### The `tabBarTestID` option is renamed to `tabBarButtonTestID` in Bottom Tab Navigator and Material Top Tab Navigator
The `tabBarTestID` option in `@react-navigation/bottom-tabs` and `@react-navigation/material-top-tabs` is renamed to `tabBarButtonTestID` to better reflect its purpose. If you are using `tabBarTestID` in your project, you can rename it to `tabBarButtonTestID`:
```diff lang=js
-
+
```
See [Bottom Tab Navigator](bottom-tab-navigator.md#tabbarbuttontestid) and [Material Top Tab Navigator](material-top-tab-navigator.md#tabbarbuttontestid) docs for usage.
#### The `sceneContainerStyle` prop and option are removed from Bottom Tab Navigator, Material Top Tab Navigator and Drawer Navigator in favor of `sceneStyle`
Previously, the Bottom Tab Navigator and Material Top Tab Navigator accepted a `sceneContainerStyle` prop to style the container of the scene. This was inflexible as it didn't allow different styles for different screens. Now, the `sceneStyle` option is added to these navigators to style individual screens.
Similarly, the `sceneContainerStyle` option in Drawer Navigator is renamed to `sceneStyle` for consistency.
If you are using `sceneContainerStyle` prop, you can pass `sceneStyle` in `screenOptions` instead to keep the same behavior:
```diff lang=js
-
+
```
#### Drawer Navigator now requires Reanimated 2 or 3 on native platforms
Previously, `@react-navigation/drawer` supported both Reanimated 1 and Reanimated 2 APIs with the `useLegacyImplementation` option. This is now no longer supported and the `useLegacyImplementation` option is removed.
If you are using Reanimated 1 in your project, you'll need to upgrade to Reanimated 2 or 3 to use `@react-navigation/drawer`.
If you're using Drawer Navigator on the Web, it'll now use CSS transitions instead of Reanimated for a smaller bundle size.
See [Drawer Navigator](drawer-navigator.md) for usage.
### Changes to elements
#### `labelVisible` is removed in favor of `displayMode` in `headerLeft` and `HeaderBackButton` elements
Previously, `labelVisible` could be used to control whether the back button title is shown in the header. It's now removed in favor of `displayMode` which provides more flexibility.
The new possible values are:
- `default`: Displays one of the following depending on the available space: previous screen's title, generic title (e.g. 'Back') or no title (only icon).
- `generic`: Displays one of the following depending on the available space: generic title (e.g. 'Back') or no title (only icon). iOS >= 14 only, falls back to "default" on older iOS versions.
- `minimal`: Always displays only the icon without a title.
The previous behavior can be achieved by setting `displayMode` to `default` or `generic` for showing and `minimal` for hiding the back button title respectively:
```diff lang=js
```
### Deprecations and removals
#### Material Bottom Tab Navigator now lives in `react-native-paper` package
The `@react-navigation/material-bottom-tabs` package provided React Navigation integration for `react-native-paper`'s `BottomNavigation` component. To make it easier to keep it updated with the changes in `react-native-paper`, we have now moved it to the `react-native-paper` package.
If you are using `@react-navigation/material-bottom-tabs` in your project, you can remove it from your dependencies and change the imports to `react-native-paper/react-navigation` instead:
```diff lang=js
- import { createMaterialBottomTabNavigator } from '@react-navigation/material-bottom-tabs';
+ import { createMaterialBottomTabNavigator } from 'react-native-paper/react-navigation';
```
See [Material Bottom Tab Navigator](https://callstack.github.io/react-native-paper/docs/guides/bottom-navigation/) for usage.
Alternatively, you can use the [`BottomNavigation.Bar`](https://callstack.github.io/react-native-paper/docs/components/BottomNavigation/BottomNavigationBar) component as a custom tab bar with `@react-navigation/bottom-tabs`.
For any issues related to the Material Bottom Tab Navigator or `BottomNavigation.Bar`, please open them in the [react-native-paper repository](https://github.com/callstack/react-native-paper) instead of the React Navigation repository.
#### The flipper devtools plugin is now removed
Previously, we added a Flipper plugin for React Navigation to make debugging navigation easier. However, it has added significant maintenance overhead for us. The Flipper team hasn't been focused on React Native recently, so the overall experience of using Flipper with React Native has been poor.
> Currently, the Flipper team has been focused on native developer experience, so we are going back to the drawing board. We have created a new pillar within our team focused on Developer Experience. We are currently investigating improved Chrome Debugger protocol support from the Hermes team as well as migrating the debugging experience from Flipper to Chrome DevTools so we can deliver a debugging experience that meets our standard.
>
> [react-native-community/discussions-and-proposals#546 (comment)](https://github.com/react-native-community/discussions-and-proposals/discussions/546#discussioncomment-4178951)
Since the React Native team migrating away from Flipper, it doesn't make much sense for us to spend additional resources to keep supporting it. So we've removed the Flipper plugin from `@react-navigation/devtools`.
Alternatively, you can use the following developer tools:
- [Logger](devtools.md#uselogger)
- [Integration for Redux DevTools Extension](devtools.md#usereduxdevtoolsextension)
- [Devtools plugin for Expo](https://docs.expo.dev/debugging/devtools-plugins/#react-navigation) if you are using [Expo](https://expo.dev).
#### Various deprecated APIs are removed
We have removed all of the previously deprecated APIs. These APIs were deprecated in React Navigation 6 and showed a warning when used. So make sure that you have addressed all the warnings before upgrading.
Full list of removed APIs
- `@react-navigation/stack`
- Removed `mode` prop - use `presentation` option instead
- Removed `headerMode` prop - use `headerMode` and `headerShown` options instead
- Removed `keyboardHandlingEnabled` prop - use `keyboardHandlingEnabled` option instead
- `@react-navigation/drawer`
- Removed `openByDefault` prop - use `defaultStatus` prop instead
- Removed `lazy` prop - use `lazy` option instead
- Removed `drawerContentOptions` prop which contained following options:
- `drawerPosition` - use `drawerPosition` option instead
- `drawerType` - use `drawerType` option instead
- `edgeWidth` - use `swipeEdgeWidth` option instead
- `hideStatusBar` - use `drawerHideStatusBarOnOpen` option instead
- `keyboardDismissMode` - use `keyboardDismissMode` option instead
- `minSwipeDistance` - use `swipeMinDistance` option instead
- `overlayColor` - use `overlayColor` option instead
- `statusBarAnimation` - use `drawerStatusBarAnimation` option instead
- `gestureHandlerProps` - use `configureGestureHandler` option instead
- `@react-navigation/bottom-tabs`
- Removed `lazy` prop - use `lazy` option instead
- Removed `tabBarOptions` prop which contained following options:
- `keyboardHidesTabBar` - use `tabBarHideOnKeyboard` option instead
- `activeTintColor` - use `tabBarActiveTintColor` option instead
- `inactiveTintColor` - use `tabBarInactiveTintColor` option instead
- `activeBackgroundColor` - use `tabBarActiveBackgroundColor` option instead
- `inactiveBackgroundColor` - use `tabBarInactiveBackgroundColor` option instead
- `allowFontScaling` - use `tabBarAllowFontScaling` option instead
- `showLabel` - use `tabBarShowLabel` option instead
- `labelStyle` - use `tabBarLabelStyle` option instead
- `iconStyle` - use `tabBarIconStyle` option instead
- `tabStyle` - use `tabBarItemStyle` option instead
- `labelPosition` and `adapative` - use `tabBarLabelPosition` option instead
- `tabBarVisible` - use `display: 'none'` `tabBarStyle` option instead
- `@react-navigation/material-top-tabs`
- Removed `swipeEnabled` prop - use `swipeEnabled` option instead
- Removed `lazy` prop - use `lazy` option instead
- Removed `lazyPlaceholder` prop - use `lazyPlaceholder` option instead
- Removed `lazyPreloadDistance` prop - use `lazyPreloadDistance` option instead
- Removed `tabBarOptions` prop which contained following options: - `renderBadge` - use `tabBarBadge` option instead - `renderIndicator` - use `tabBarIndicator` option instead - `activeTintColor` - use `tabBarActiveTintColor` option instead - `inactiveTintColor` - use `tabBarInactiveTintColor` option instead - `pressColor` - use `tabBarPressColor` option instead - `pressOpacity` - use `tabBarPressOpacity` option instead - `showLabel` - use `tabBarShowLabel` option instead - `showIcon` - use `tabBarShowIcon` option instead - `allowFontScaling` - use `tabBarAllowFontScaling` option instead - `bounces` - use `tabBarBounces` option instead - `scrollEnabled` - use `tabBarScrollEnabled` option instead - `iconStyle` - use `tabBarIconStyle` option instead - `labelStyle` - use `tabBarLabelStyle` option instead - `tabStyle` - use `tabBarItemStyle` option instead - `indicatorStyle` - use `tabBarIndicatorStyle` option instead - `indicatorContainerStyle` - use `tabBarIndicatorContainerStyle` option instead - `contentContainerStyle` - use `tabBarContentContainerStyle` option instead - `style` - use `tabBarStyle` option instead
### Miscellaneous
#### Various UI elements now follow Material Design 3 guidelines
Previously, the UI elements in React Navigation such as the header on platforms other than iOS, drawer, material top tabs etc. were following the Material Design 2 guidelines. We have now updated them to follow the Material Design 3 guidelines.
#### React Native Tab View now has a new API to specify various options
The API for the `TabView` and `TabBar` component in `react-native-tab-view` has been revamped.
Some of props accepted by the `TabBar` have now been replaced with `commonOptions` and `options` props on `TabView`:
- `getLabelText` -> `labelText`
- `getAccessible` -> `accessible`
- `getAccessibilityLabel` -> `accessibilityLabel`
- `getTestID` -> `testID`
- `renderIcon` -> `icon`
- `renderLabel` -> `label`
- `renderBadge` -> `badge`
- `labelStyle`
- `sceneContainerStyle` -> `sceneStyle`
To keep the same behavior when updating your existing code, move these props to `commonOptions` prop on `TabView`:
```diff lang=js
(
-
+
)}
+ commonOptions={{
+ label: renderLabel,
+ labelStyle,
+ }}
/>
```
The options can also be customized individually for each tab by passing an object to the `options` prop with the `route.key` as the key and the options as the value:
```js
(
),
}}
options={{
albums: {
labelText: 'Albums',
},
profile: {
labelText: 'Profile',
},
}}
/>
```
When using a custom tab bar, it will receive the `options` in the arguments.
The new API will make it easier for us to improve re-rendering performance of the tab bar items in the library.
See [React Native Tab View](tab-view.md#options) for usage.
#### Custom navigators now require more type information
Custom navigators now require more type information to work correctly so that we can provide better type-checking and autocompletion in TypeScript when using the navigator.
```diff lang=js
- export const createMyNavigator = createNavigatorFactory<
- MyNavigationState,
- MyNavigationOptions,
- MyNavigationEventMap,
- typeof MyNavigator
- >(MyNavigator);
+ export function createMyNavigator<
+ const ParamList extends ParamListBase,
+ const NavigatorID extends string | undefined = undefined,
+ const TypeBag extends NavigatorTypeBagBase = {
+ ParamList: ParamList;
+ NavigatorID: NavigatorID;
+ State: TabNavigationState;
+ ScreenOptions: TabNavigationOptions;
+ EventMap: TabNavigationEventMap;
+ NavigationList: {
+ [RouteName in keyof ParamList]: TabNavigationProp<
+ ParamList,
+ RouteName,
+ NavigatorID
+ >;
+ };
+ Navigator: typeof TabNavigator;
+ },
+ const Config extends StaticConfig = StaticConfig,
+ >(config?: Config): TypedNavigator {
+ return createNavigatorFactory(MyNavigator)(config);
+ }
```
See [Custom navigators](custom-navigators.md) for usage.
#### Packages now use ESM and package exports
All the packages in React Navigation now use ESM exports. While it shouldn't affect most users, there are some changes to be aware of:
- If you are importing internal files from the packages, they might now be restricted by your bundler and it won't be possible to import them directly. You should use the public API instead.
- If you're patching the packages using `patch-package`, `yarn patch` etc., you'll need to patch the built files under `lib/` folders instead of the source files under `src/` as the source files are no longer exported.
- If you're using TypeScript with the `module` or `moduleResolution` option, it maybe necessary to set `moduleResolution` to `bundler` to match [Metro's resolution behavior](https://reactnative.dev/blog/2023/06/21/package-exports-support#enabling-package-exports-beta).
- If you're using Webpack for bundling code using React Navigation, it maybe necessary to set [`resolve.fullySpecified`](https://webpack.js.org/configuration/module/#resolvefullyspecified) to `false` for bundling to work.
## New features
### Static configuration API
React Navigation 5 introduced a dynamic API to support more flexible use cases. With React Navigation 7, we are re-introducing a static configuration API:
```js
import { createNativeStackNavigator } from '@react-navigation/native-stack';
const MyStack = createNativeStackNavigator({
screens: {
Home: {
screen: HomeScreen,
options: {
title: 'My App',
},
},
Details: {
screen: DetailsScreen,
linking: 'details/:id',
},
},
});
```
The static configuration API provides the following benefits:
- **Simpler type-checking with TypeScript**: It's not necessary to specify screens and their params separately. See [Type checking with TypeScript](typescript.md?config=static) for more details.
- **Easier deep linking setup**: Paths can be generated automatically. Linking configuration can be defined next to the screen for explicit configuration. See [Configuring links](configuring-links.md?config=static) for more details.
It's also possible to mix the static and dynamic configuration APIs. For example, you can use the static configuration API for the top-level navigators and the dynamic configuration API for the nested navigators where you need more flexibility.
:::note
The static configuration API doesn't replace the dynamic configuration API. Both APIs are equally supported and you can choose the one that fits your use case better.
:::
You can see examples for both the static and dynamic configuration APIs in the documentation by selecting the appropriate tab in the examples.
Go to ["Hello React Navigation"](hello-react-navigation.md?config=static) to start writing some code with the static API.
### Improved TypeScript support
Previously, the `navigation` object received in `options` and `listeners` callbacks were typed as `any` and required manual type annotation. Now, the `navigation` object has a more accurate type based on the navigator it's used in, and the type annotation is no longer required.
We also export a new `XOptionsArgs` (where `X` is the navigator name, e.g. `StackOptionsArgs`, `BottomTabOptionsArgs` etc.) type which can be used to type the arguments of the `options` callback. This can be useful if you want to define the options callback separately.
```ts
const options = ({
route,
}: StackOptionsArgs) => {
return {
title: route.params.title,
};
};
```
### Improved RTL support
Previously, various UI elements used the `I18nManager` API to determine the writing direction. However, this API doesn't work well on the Web as the writing direction can be different for a specific subtree and hence can't be determined globally.
The `NavigationContainer` now accepts a `direction` prop to specify the direction of the layout instead of relying on the `I18nManager` API. It also exposes this value via `useLocale` hook for use in your own components.
See the [navigation container docs](navigation-container.md#direction) for usage.
### The `options` callback gets `theme`
The `options` callback now receives the `theme` object to allow customizing the UI elements specified in the options:
```jsx
({
headerRight: () => (
{}}
color={theme.colors.primary}
/>
),
})}
/>
```
See [Screen options](screen-options.md) for usage.
### Top-level `path` in linking config
The linking configuration now supports a top-level `path` configuration to define the base path for all the screens in the navigator:
```js
const linking = {
prefixes: ['https://mysite.com'],
config: {
// highlight-next-line
path: 'app',
screens: {
Home: 'home',
Details: 'details/:id',
},
},
};
```
This can be useful if your app lives under a subpath on the web. For example, if your app lives under `https://mysite.com/app`, you can define the `path` as `app` and the `Details` screen will be accessible at `https://mysite.com/app/details/42`.
See [Configuring links](configuring-links.md#apps-under-subpaths) for usage.
### Improved Web integration
More built-in UI elements that trigger navigation now render `a` tags on the Web for better accessibility and SEO. This includes:
- Back button in the header
- The tab buttons in material top tab navigator
UI elements such as the bottom tab bar and drawer items already rendered `a` tags on the Web.
### New `usePreventRemove` hook
Previously, the only way to prevent a screen from being removed from the stack was to use the `beforeRemove` event. This didn't work well with the Native Stack Navigator.
The new `usePreventRemove` hook is an alternative to `beforeRemove` that works with the Native Stack Navigator.
See [`usePreventRemove`](use-prevent-remove.md) for usage.
### New `layout` props
#### For navigators
Navigators now support a `layout` prop. It can be useful for augmenting the navigators with additional UI with a wrapper. The difference from adding a regular wrapper is that the code in `layout` callback has access to the navigator's state, options etc.:
```jsx
(
{children}
)}
// highlight-end
>
{/* ... */}
```
See [Navigator layout](navigator.md#layout) for usage.
#### For screens and groups
The `layout` prop makes it easier to provide things such as a global error boundary and suspense fallback for a group of screens without having to manually add HOCs for every screen separately.
It can be used for a single screen with [`layout`](screen.md#layout):
```jsx
(
Loading…
}
>
{children}
)}
// highlight-end
/>
```
Or with a [group](group.md#screen-layout) or [navigator](navigator.md#screen-layout) with `screenLayout`:
```jsx
(
Loading…
}
>
{children}
)}
>
// highlight-end
{/* screens */}
```
### Preloading screens
All built-in navigators now support preloading screens prior to navigating to them. This can be useful to improve the perceived performance of the app by preloading the screens that the user is likely to navigate to next. Preloading a screen will render it off-screen and execute its side-effects such as data fetching.
To preload a screen, you can use the `preload` method on the navigation object:
```js
navigation.preload('Details', { id: 42 });
```
See [`preload`](navigation-object.md#preload) for usage.
### Improvements to navigators
#### Bottom Tab Navigator can now show tabs on the side and top
The `@react-navigation/bottom-tabs` package now supports showing tabs on the side. This will make it easier to build responsive UIs for where you want to show tabs on the bottom on smaller screens and switch to a sidebar on larger screens.
Similarly, showing tabs on the top is also supported which can be useful for Android TV or Apple TV apps.
You can use the `tabBarPosition` option to customize the position of the tabs:
```jsx
{/* ... */}
```
See [Bottom Tab Navigator options](bottom-tab-navigator.md#tabbarposition) for usage.
#### Bottom Tab Navigator now supports animations
The `@react-navigation/bottom-tabs` package now supports animations. This was one of the most requested features on our Canny board: [TabNavigator Custom Transition](https://react-navigation.canny.io/feature-requests/p/tabnavigator-custom-transition).
You can use the `animation` option to customize the animations for the tab transitions:
```jsx
{/* ... */}
```
See [Bottom Tab Navigator animation](bottom-tab-navigator.md#animations) for usage.
#### Stack Navigator now supports an `animation` option
The `@react-navigation/stack` package now supports an `animation` option to customize the animations for the screen transitions:
```jsx
{/* ... */}
```
The `animation` option is an alternative to the `TransitionPresets` API, and is intended to make migrating between JS stack and native stack navigators easier.
See [Stack Navigator animation](stack-navigator.md#animations) for usage.
#### Native Stack Navigator now exports a `useAnimatedHeaderHeight` hook
The `@react-navigation/native-stack` package now exports a `useAnimatedHeaderHeight` hook. It can be used to animate content based on the header height changes - such as when the large title shrinks to a small title on iOS:
```jsx
const headerHeight = useAnimatedHeaderHeight();
return (
{/* ... */}
);
```
#### All navigators with headers now support `headerSearchBarOptions`
The `Header` component from `@react-navigation/elements` now supports a `headerSearchBarOptions` prop. This means all navigators that use the `Header` component now support a search bar in the header as well on all platforms. Previously, this was only available in the Native Stack Navigator on iOS and Android.
```js
React.useLayoutEffect(() => {
navigation.setOptions({
headerSearchBarOptions: {
placeholder: 'Search',
onChangeText: (text) => {
// Do something
},
},
});
}, [navigation]);
```
See [`headerSearchBarOptions`](elements.md#headersearchbaroptions) for usage.
### New components in elements library
The `@react-navigation/elements` package now includes new components that can be used in your app:
#### `Button`
The `Button` component has built-in support for navigating to screens, and renders an anchor tag on the Web when used for navigation:
```jsx